
basement 4l60e buildup (photos)
 03-16-2007, 07:50 PM
#41
Please do not take this the wrong way. I think you need to cut down on the grease. On the input drum where the seal for the output shaft rides you have it packed in there like you are packing wheel bearings. All you need in that location is a thin smear of grease on that seal so that it will be lubed for assembly. With the way you have that grease it is more than likely going to block the lube to the rear of the unit when you fire it up. It does not take long before you will cause damage to the planetaries and the other components of the rear of the transmission. My advise is to remove the grease from there. You can tighten up the forward clutch clearance to .010 to .020. The 3-4 clutch looks ok. I have seen in print from trans go that the suggested clearance for the 3-4 is between .010 to .030. I like .015-.020. These clutches will wear in and compress a bit in break in. Keep up the good work. Vince
 03-16-2007, 08:02 PM
#43
I would have to agree with the above statement. I do not presoak my clutches either. Although we do have a dyno to do that for us. We fire it up and let it run for a few minutes. Basically we let the lube oil take care of this. As Todd said, it is best to measure first and then soak. Vince
03-16-2007, 10:53 PM
#44
TECH Regular
iTrader: (16)

Join Date: Jun 2004
Location: michigan
Posts: 483
Likes: 0
Received 0 Likes
on
0 Posts

also when measuring with feeler gauges you have to measure 180 degrees apart at the same time, otherwise you will get a false reading. i like to use a dial indicator and air check everything when i do it, but its all personal preference
03-17-2007, 02:33 PM
#45

I check the clutch clearances dry, but soak them and let hang dry (where they are not dripping wet anymore, but presoaked) just before installation. I use very little gel just transmission fluid on parts when putting it together.
 03-17-2007, 03:15 PM
#46
Launching!
Thread Starter
iTrader: (2)
Join Date: May 2005
Location: Rochester Mn
Posts: 285
Likes: 0
Received 0 Likes
on
0 Posts
Thanks to Dana and others for their support.
I was moving right along today, before I hit another roadblock. This is good though, it'll give an idea what to look for. I have a bunch more pictures, but I'll wait to post them.
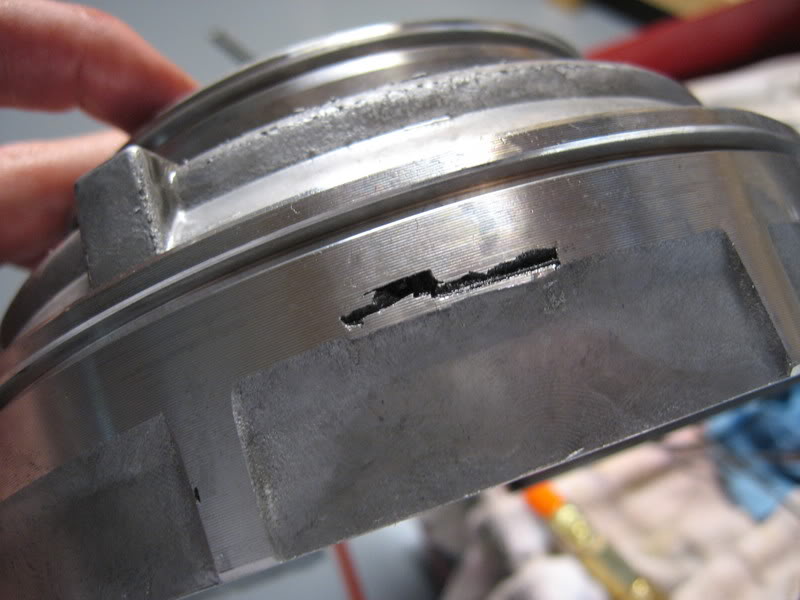
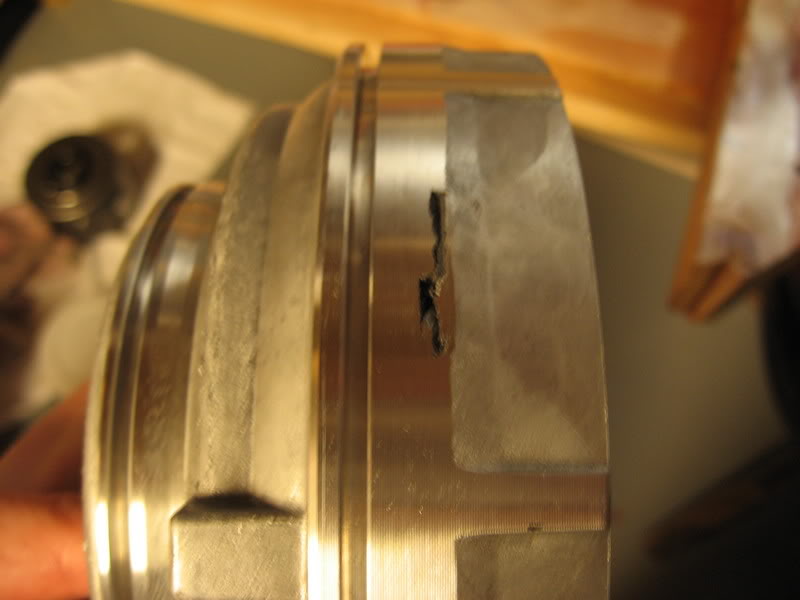
Here are the only ones that count This is the low reverse piston. I was pressure checking my work and didn't like the hissing sound I got on this one. Sure enough the piston is cracked. I should have pulled it to begin with, but I thought it would be ok 'It's just the low/reverse piston after all' -wrong.
air test this hole and look for piston to move (no air should escape)
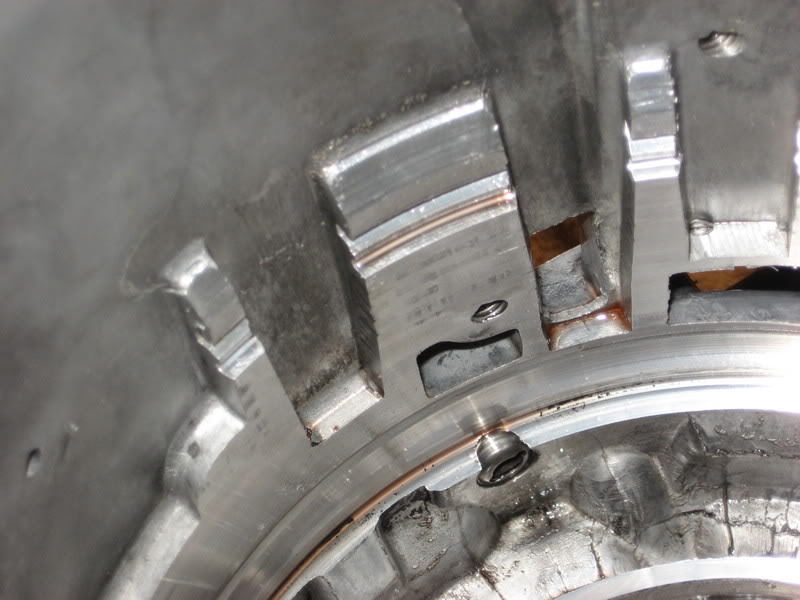
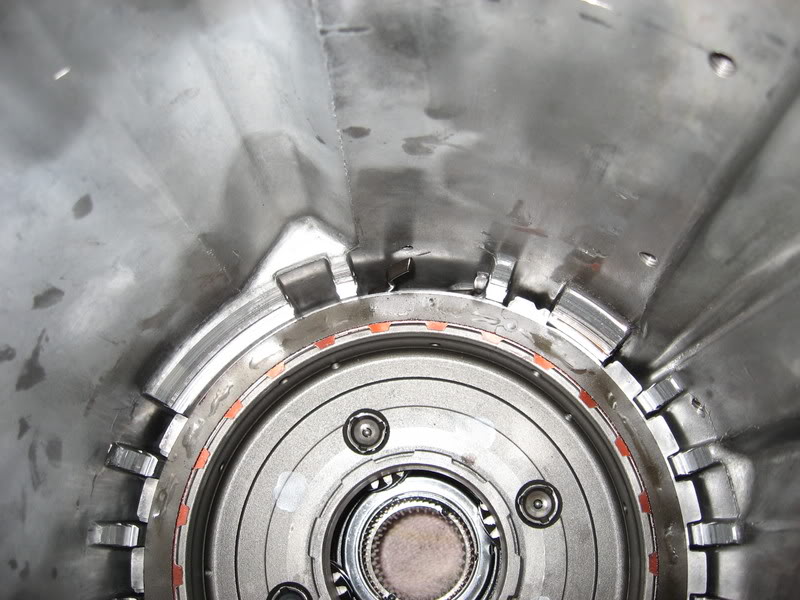
Some odd wear in the back of the case
I was moving right along today, before I hit another roadblock. This is good though, it'll give an idea what to look for. I have a bunch more pictures, but I'll wait to post them.
Here are the only ones that count This is the low reverse piston. I was pressure checking my work and didn't like the hissing sound I got on this one. Sure enough the piston is cracked. I should have pulled it to begin with, but I thought it would be ok 'It's just the low/reverse piston after all' -wrong.
air test this hole and look for piston to move (no air should escape)
Some odd wear in the back of the case
Last edited by VORTECFCAR; 03-17-2007 at 03:34 PM.
 03-18-2007, 10:53 AM
#49
I agree with Vince here, the piston is ok. Did you aircheck with the clutch pack, pressure plate, snap ring installed? Did you see if there were any highspots in the area where the seals ride? If there is take 400-600 sandpaper and going around not front to back remove any highspots. Check the seals to see if you have torn them? Replace any that are.
03-18-2007, 11:31 AM
#50
Launching!
Thread Starter
iTrader: (2)
Join Date: May 2005
Location: Rochester Mn
Posts: 285
Likes: 0
Received 0 Likes
on
0 Posts
As usual you guys are right. Further inspection reveals a solid piston. I put all the hard parts in the case today. Everything pressure tested ok with fresh seals and a better air nozzle. Lucky me!
I'll have a bunch of pics up later today. Being an amatuer sucks...but it's cool when it comes together.
I'll have a bunch of pics up later today. Being an amatuer sucks...but it's cool when it comes together.
03-18-2007, 03:50 PM
#51
Launching!
Thread Starter
iTrader: (2)
Join Date: May 2005
Location: Rochester Mn
Posts: 285
Likes: 0
Received 0 Likes
on
0 Posts
Here are some more pics and couple movies (if they work).
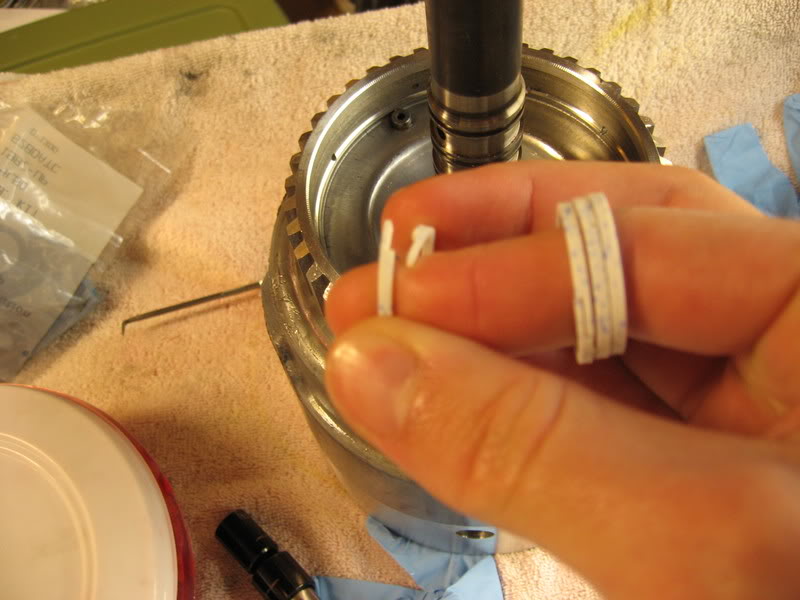
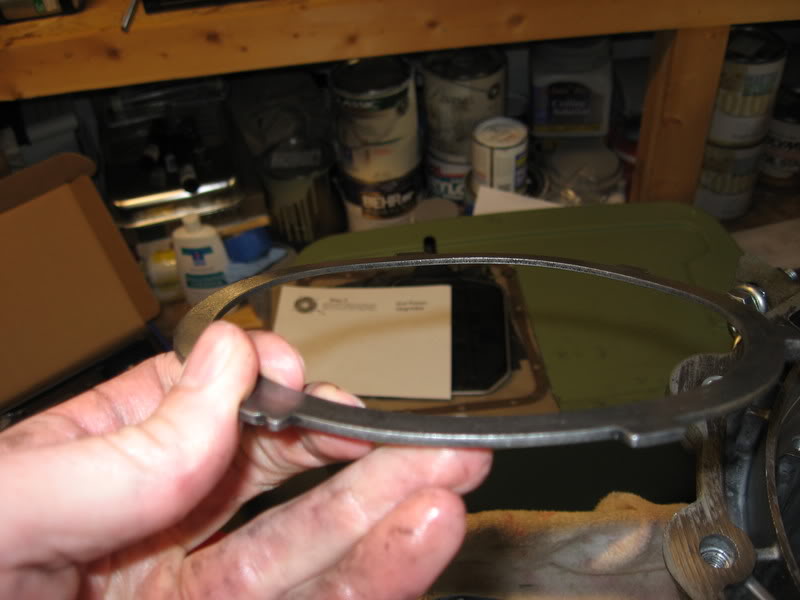
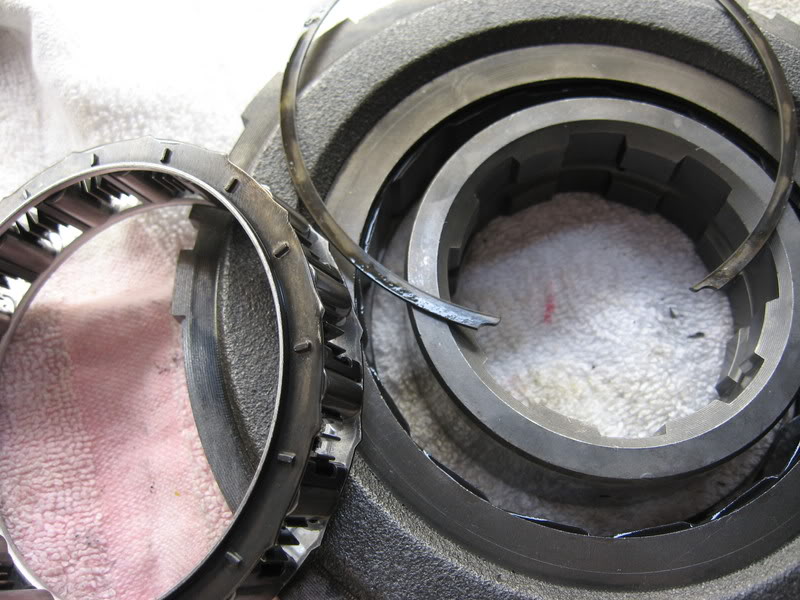
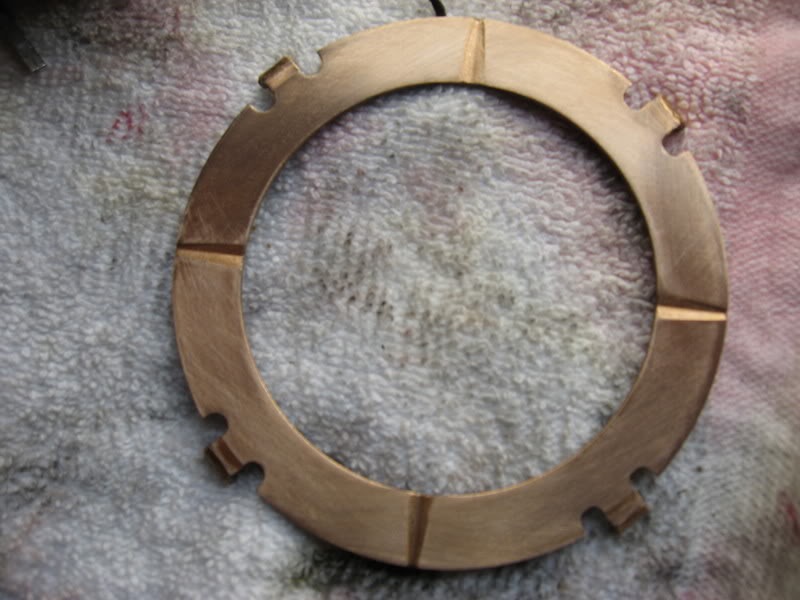
The first ones are of the input drum being finished up. Here's a shot of the 4 teflon rings that go on the shaft.
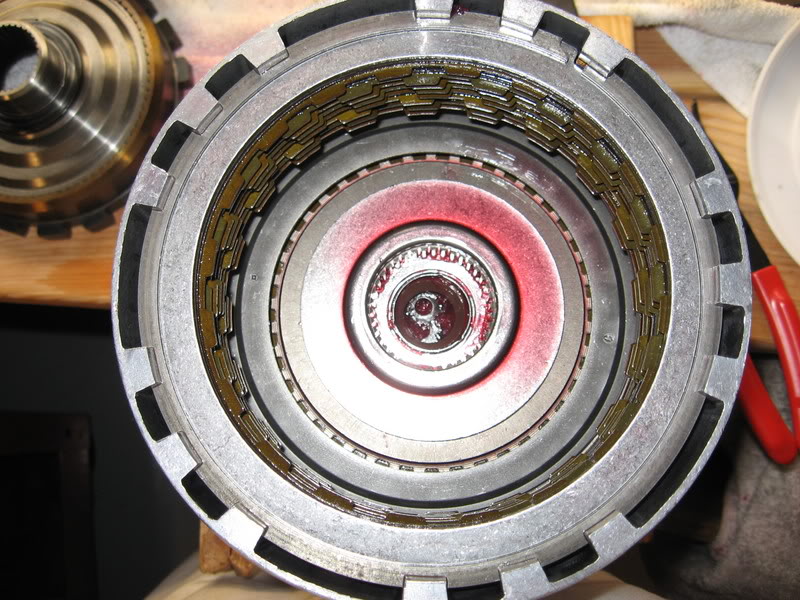
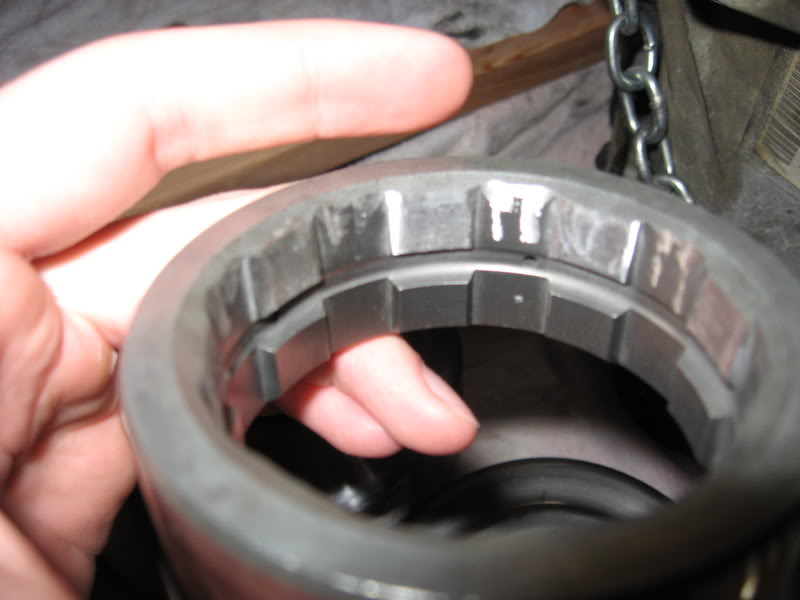
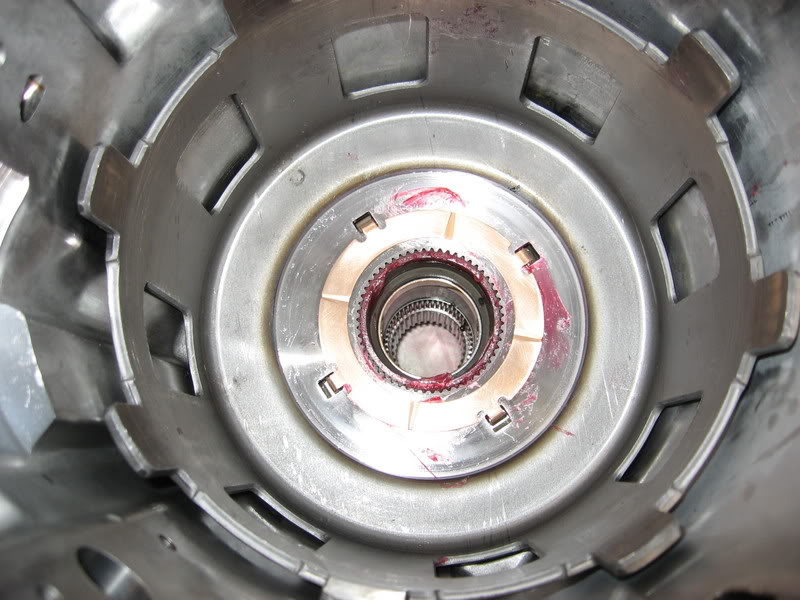
Here's a quick shot of the input drum after I pulled out the extra transgel out.
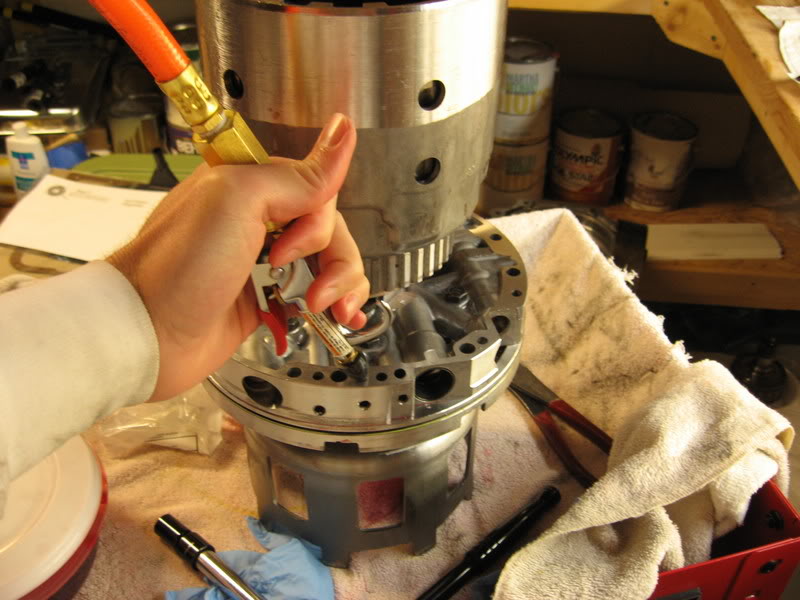
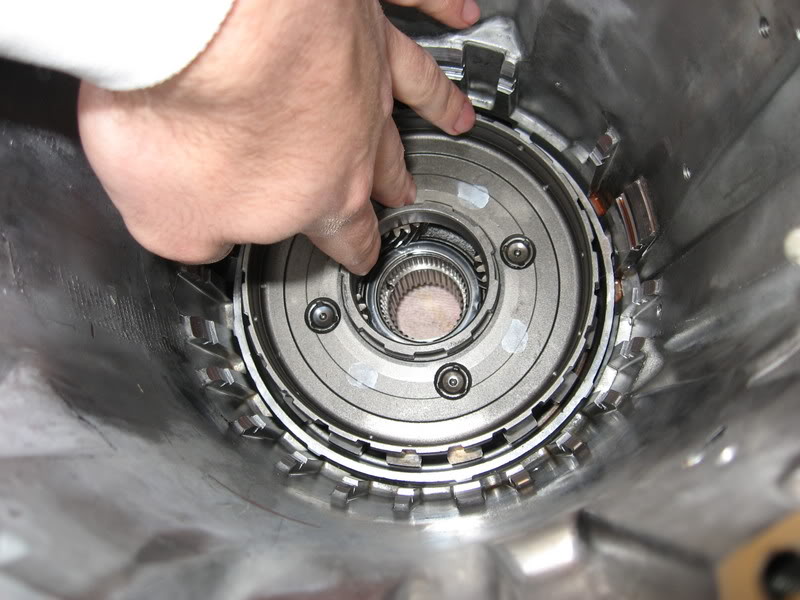
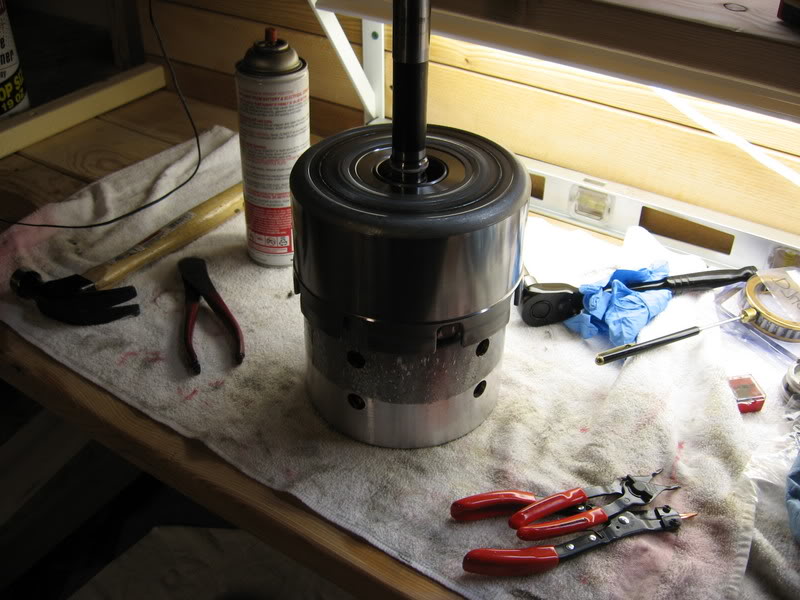
Then some air testing on the input drum. I had to use about 50 psi - they call for 40, but with the extra spring pressure on the piston it wouldn't apply that low.
Now, back to the case. There are some torrington bearings and whatnot that you'll need to pay attention to, but otherwise it goes pretty easy. Drop the rear planetary holder in first
Then the planetary
The first steel is wavey. It's marked with a V notch that goes at the bottom of the case. Then another steel, clutch, steel...ect. Button it up with the low roller sprag. Don't forget the little clip deal that fits at the bottom of the case.
This is the low roller sprag deconstructed. I replaced mine and ground the teeth off one side of the inner part of the sprag to fit the "Beast" . You'll have to push pretty hard on the part to get it back into the sprag. Use some transfluid and be firm, but not obnoxious.
Low roller in place
The first ones are of the input drum being finished up. Here's a shot of the 4 teflon rings that go on the shaft.
Here's a quick shot of the input drum after I pulled out the extra transgel out.
Then some air testing on the input drum. I had to use about 50 psi - they call for 40, but with the extra spring pressure on the piston it wouldn't apply that low.
Now, back to the case. There are some torrington bearings and whatnot that you'll need to pay attention to, but otherwise it goes pretty easy. Drop the rear planetary holder in first
Then the planetary
The first steel is wavey. It's marked with a V notch that goes at the bottom of the case. Then another steel, clutch, steel...ect. Button it up with the low roller sprag. Don't forget the little clip deal that fits at the bottom of the case.
This is the low roller sprag deconstructed. I replaced mine and ground the teeth off one side of the inner part of the sprag to fit the "Beast" . You'll have to push pretty hard on the part to get it back into the sprag. Use some transfluid and be firm, but not obnoxious.
Low roller in place
03-18-2007, 04:04 PM
#52
Launching!
Thread Starter
iTrader: (2)
Join Date: May 2005
Location: Rochester Mn
Posts: 285
Likes: 0
Received 0 Likes
on
0 Posts
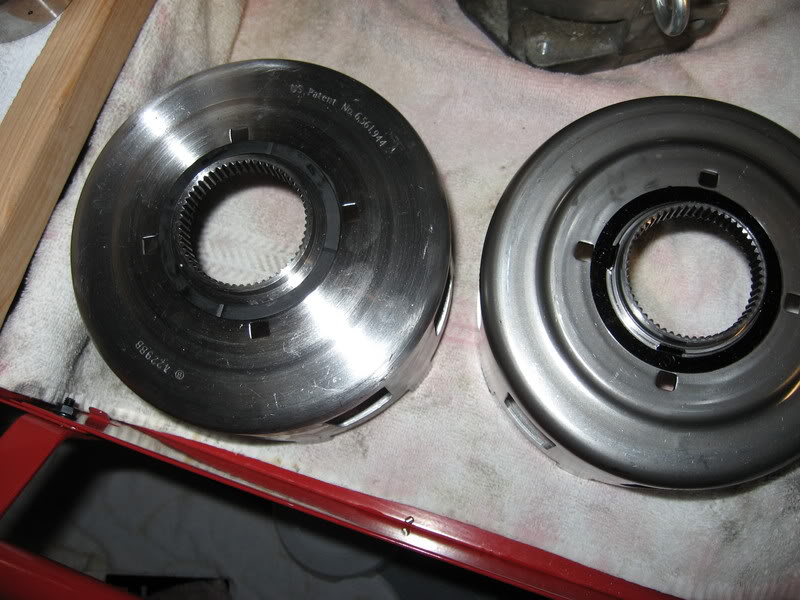
Next is the Beast sun shell and sun gear. Here's a shot of the two shells next to each other. The Beast has a beefier hub area.
There's a thrust washer that I flat sanded before putting in the beast.
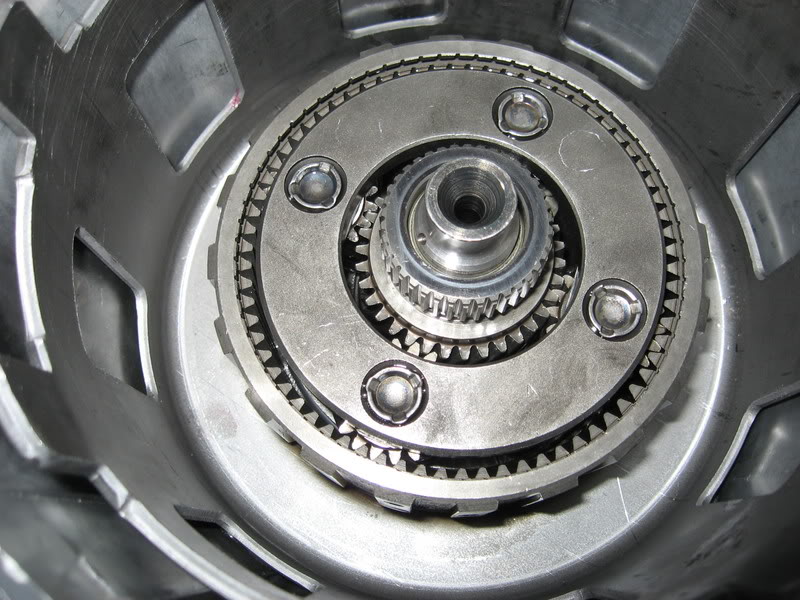
Here's a pic of the beast and sun gear in place.
a quick vid of the beast in action (are you tired of me calling it the beast yet?)

The next planetary set sits inside the sunshell.
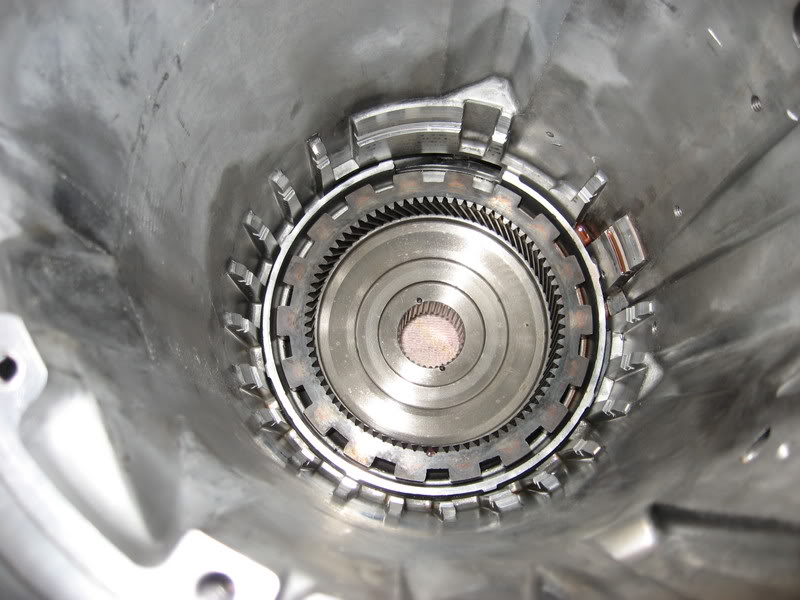
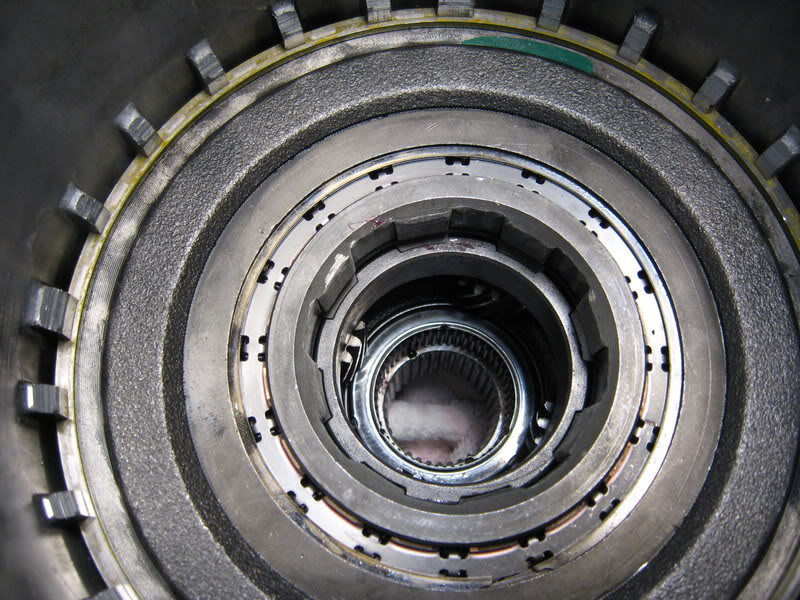
Next goes the input drum and low/revers drum. You'll have to rotate the low/reverse drum back and forth to put it on top of the input drum. It's fully seated when you push hard on top of the drum and you can still turn it.
Set the ban up in the case, spriral like.
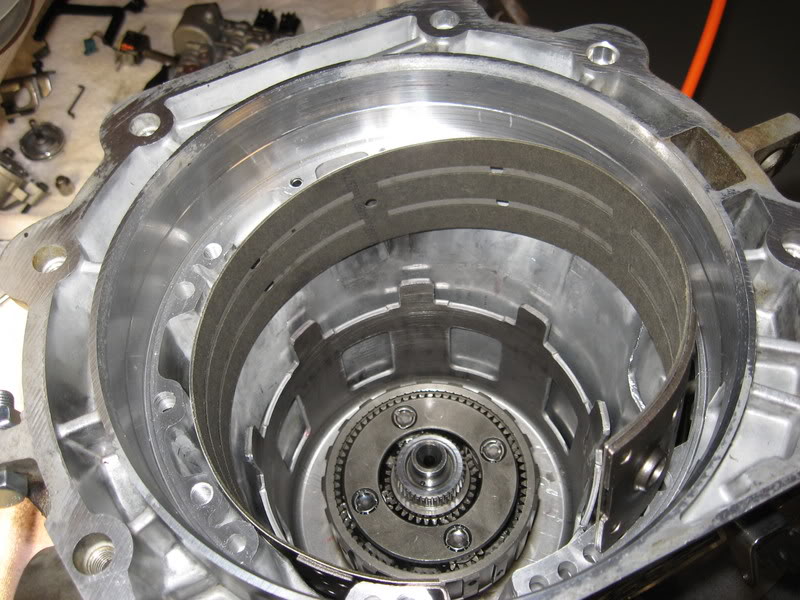
Then drop the drums in and twist a lot until all of the 3-4 clutches engage. You know it's all the way down when the drum sits lower than the case.
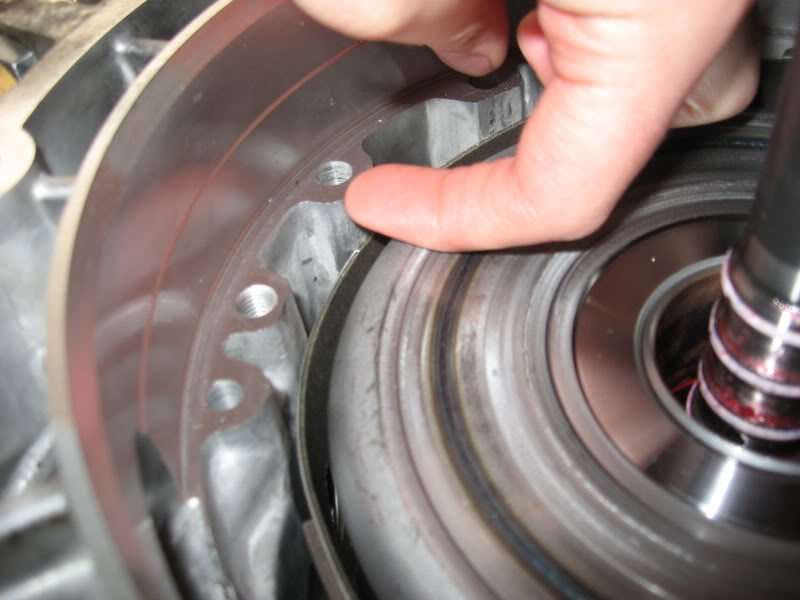
reposition the band and put this little fella back in.
Next I'll be setting the pump in and getting the valve body modified and attached.
'Til then..
Nick
There's a thrust washer that I flat sanded before putting in the beast.
Here's a pic of the beast and sun gear in place.
a quick vid of the beast in action (are you tired of me calling it the beast yet?)
The next planetary set sits inside the sunshell.
Next goes the input drum and low/revers drum. You'll have to rotate the low/reverse drum back and forth to put it on top of the input drum. It's fully seated when you push hard on top of the drum and you can still turn it.
Set the ban up in the case, spriral like.
Then drop the drums in and twist a lot until all of the 3-4 clutches engage. You know it's all the way down when the drum sits lower than the case.
reposition the band and put this little fella back in.
Next I'll be setting the pump in and getting the valve body modified and attached.
'Til then..
Nick
03-19-2007, 11:03 PM
#53

here's my pics that I took while doing the TransGo HD2c kit
http://s122.photobucket.com/albums/o...TransGo%20HD2/
I recently decided to look into rebuilding my trans, I haven't seen anything like this yet, keep the pics coming.
http://s122.photobucket.com/albums/o...TransGo%20HD2/
I recently decided to look into rebuilding my trans, I haven't seen anything like this yet, keep the pics coming.
03-20-2007, 05:41 AM
#54
Launching!
Thread Starter
iTrader: (2)
Join Date: May 2005
Location: Rochester Mn
Posts: 285
Likes: 0
Received 0 Likes
on
0 Posts
Do you have a parts list or did you buy a whole rebuild kit?
Nice pics of the shift kit install, I hope mine goes smoothly.
Nick
Last edited by Ragtop 99; 11-23-2007 at 01:37 PM.
03-20-2007, 11:59 AM
#55
Launching!
iTrader: (8)
Join Date: Jun 2006
Location: Memphis, TN
Posts: 289
Likes: 0
Received 0 Likes
on
0 Posts
Kudos for the inspective and tireless effort! Get the Z-pack from Raybestos for the 3-4 clutches and get five pinion planetaries for the front and rear! Spare nothing; Go all out if you are gonna do it! Don't put the transgo kit in. You do not need it. A simple correction kit and a super servo will make you happy and save you a few bucks. Good job man!
03-29-2007, 03:43 PM
#56
Launching!
Thread Starter
iTrader: (2)
Join Date: May 2005
Location: Rochester Mn
Posts: 285
Likes: 0
Received 0 Likes
on
0 Posts
Been busy as hell lately guys, but it's done.
I have the trans in the car and I just got done taking it around the block. It seems to shift ok and there are no leaks.
I have some pics and vids to post, but they'll have to wait until early next week.
I'd just like to thank everyone for the encouragement and pointers. VERY HELPFUL
Stay tuned for the wrap up!
Nick
04-06-2007, 03:09 PM
#59
Launching!
Thread Starter
iTrader: (2)
Join Date: May 2005
Location: Rochester Mn
Posts: 285
Likes: 0
Received 0 Likes
on
0 Posts
Originally Posted by Vince @ FLT
Wohoo! 3 months and it's done. I'll bet your glad it's done, in the car and works. I'm glad to be apart of your thread and enjoy. Vince 
PB blaster doesn't always work fellas - salty roads took their toll.
Also I thought I ran into serious troubles when I could only turn the output shaft so far after installing the driveshaft. It was the U-joint, they don't like some angles.
The trans is heavy, lowering it onto your hand will break whatever bone it is that keeps profanity in the body.
Here are the follow up pics
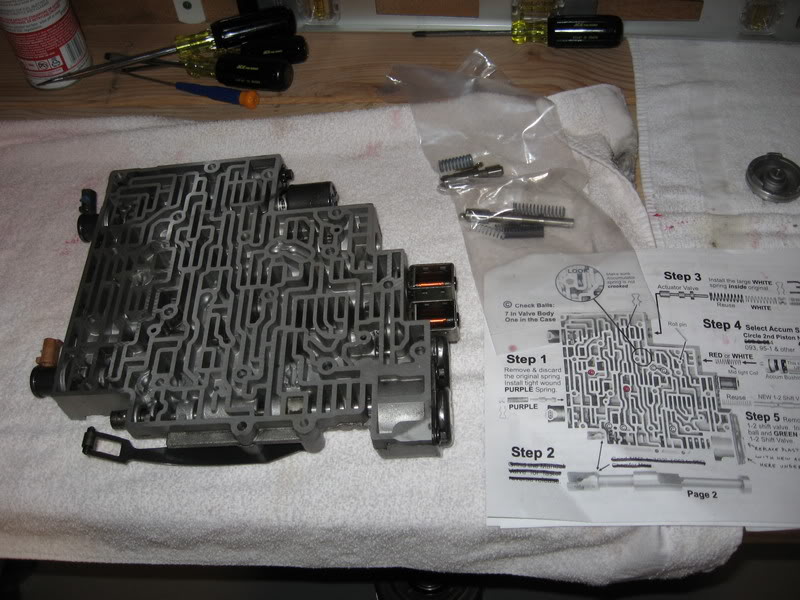
Mostly going through the valve body and seperator plate to make the transgo modifications and stuff that Dana wrote down. I'll get some in videos when it warms up, but for now, these will have to do.
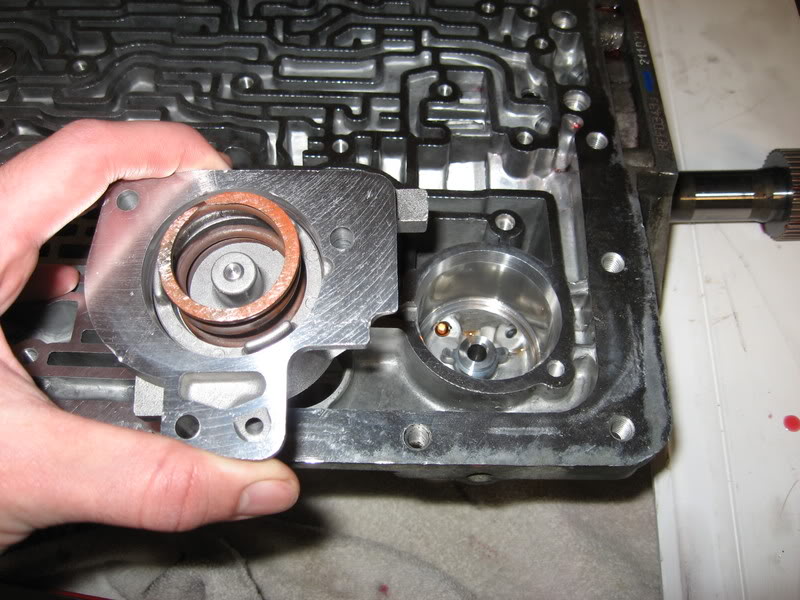
servo installation. Be sure to check band still free by prying lightly on it with a flat blade screwgy
heres one of the accumulator assembly, I put in an aluminum piston and some different springs.
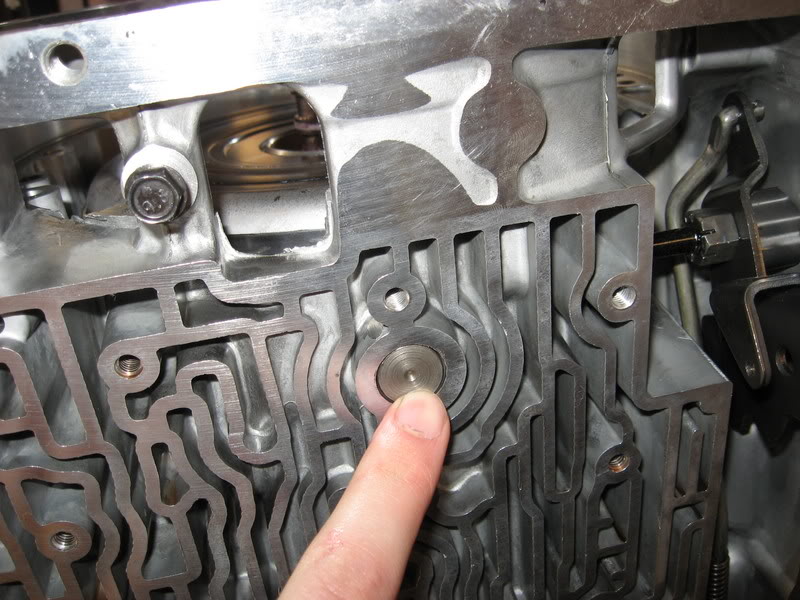
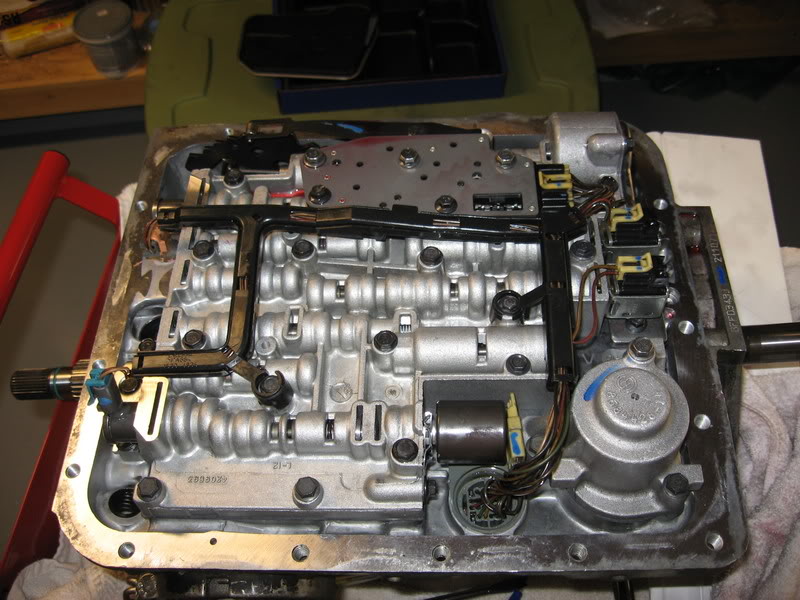
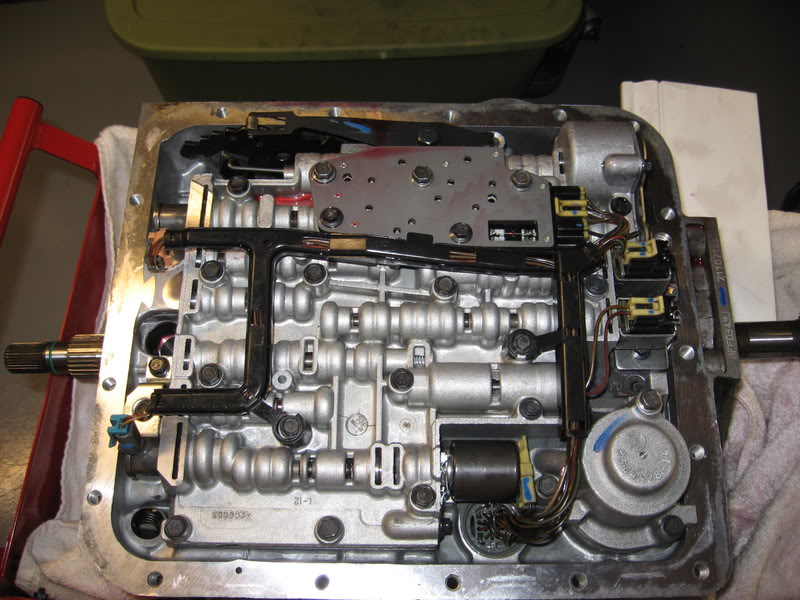
Here's the valvebody before teardown.
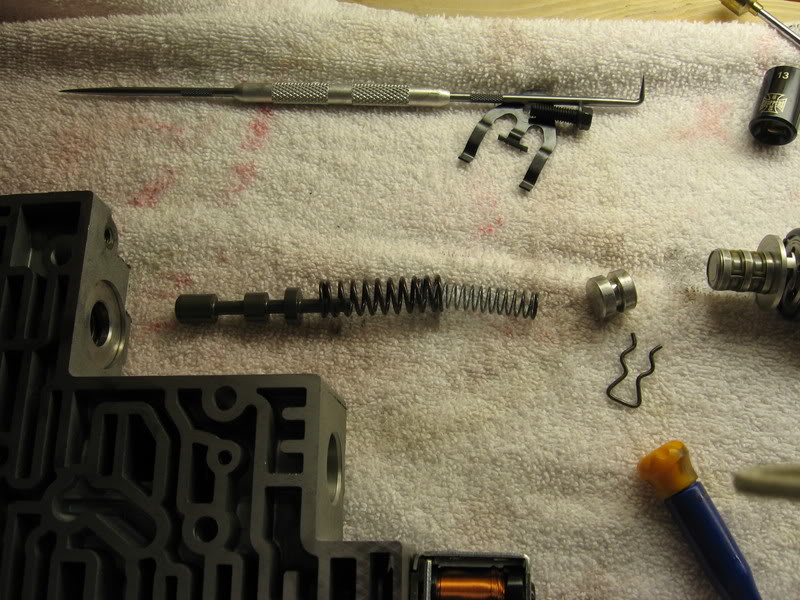
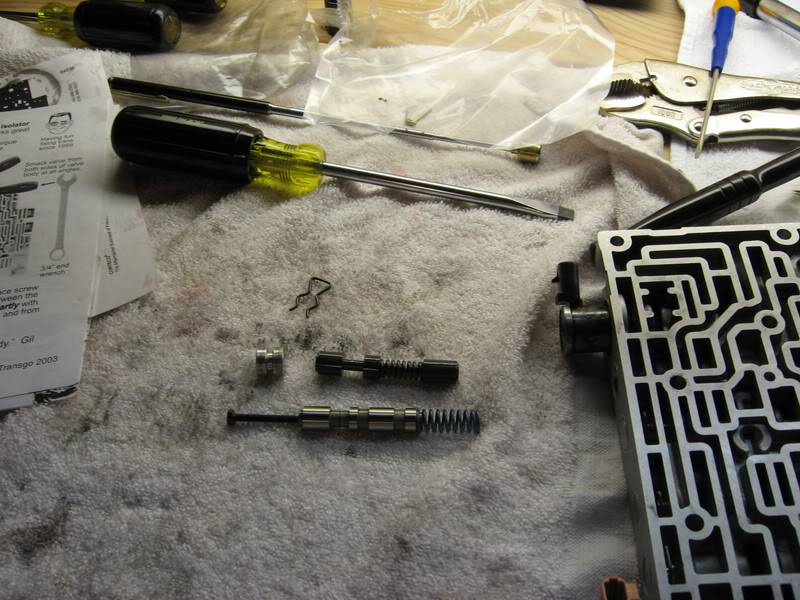
Force motor changes

New shift solenoid valve lineup
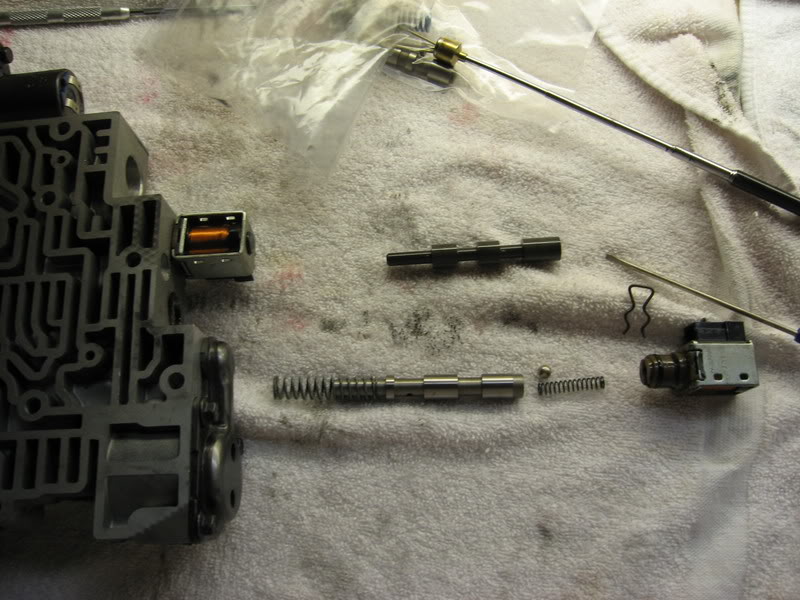
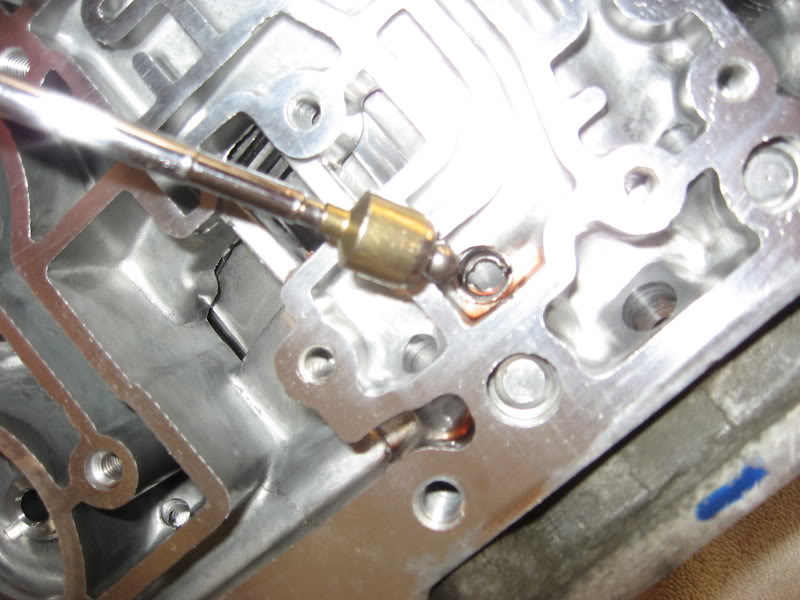
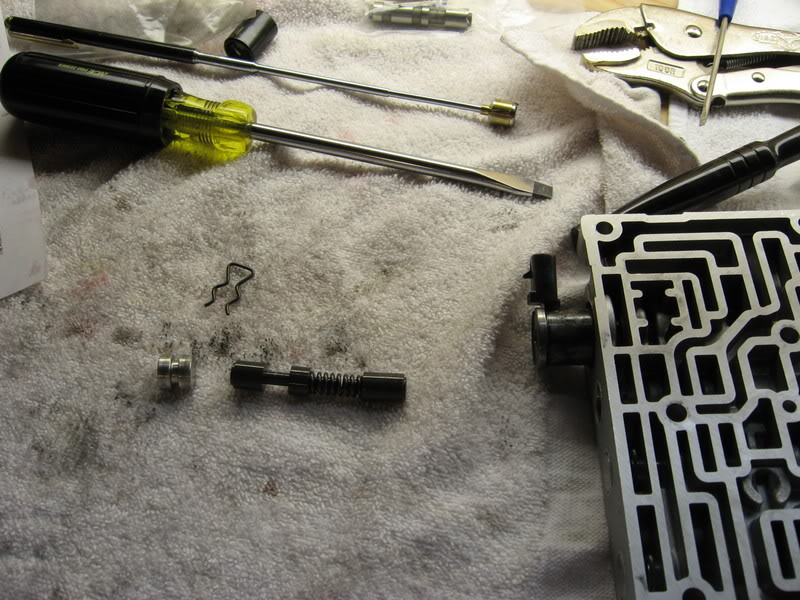
Here are some other random shots of valve changes and piston mods that are done with the transgo kit and Dana's mods.

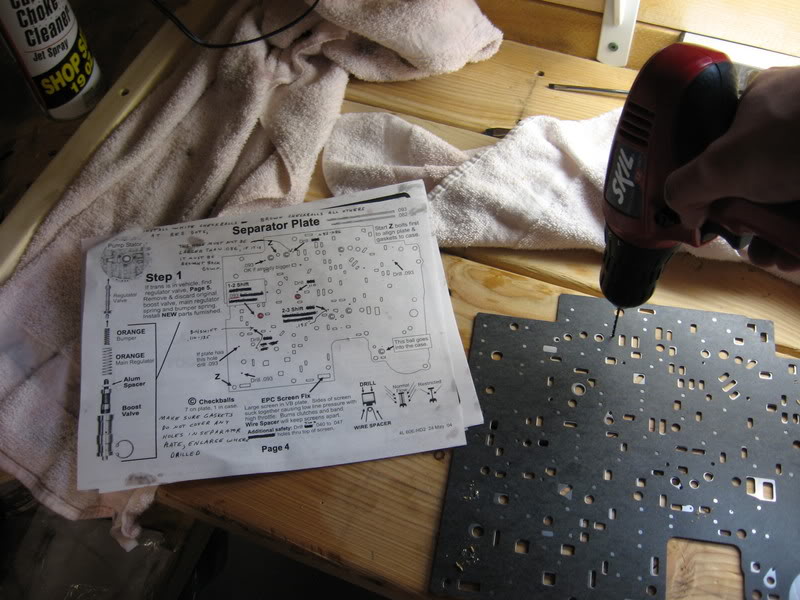
Here's one of the seperator plate being drilled with the supplied drill bits.
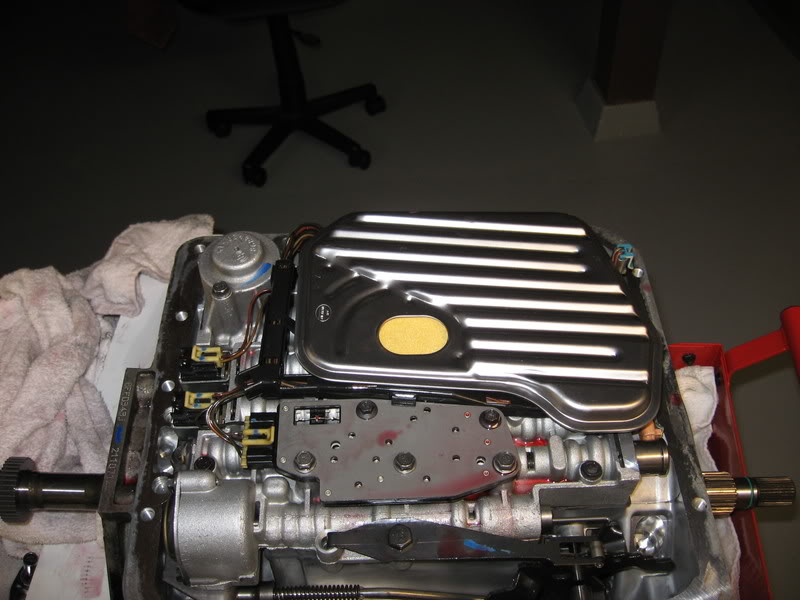
A couple of the bottom before the pan goes on. There are a lot of intricacies to putting the valvebody back on: Lining up the gasket, getting the checkballs in the right spots, Using the right bolts in the right spot, seperator plate filters and such. Just take the time to look things over after each step and it'll go smoothly. Every bolt has a specific torque spec - something like 96 inch-pounds.
Don't forget the filter
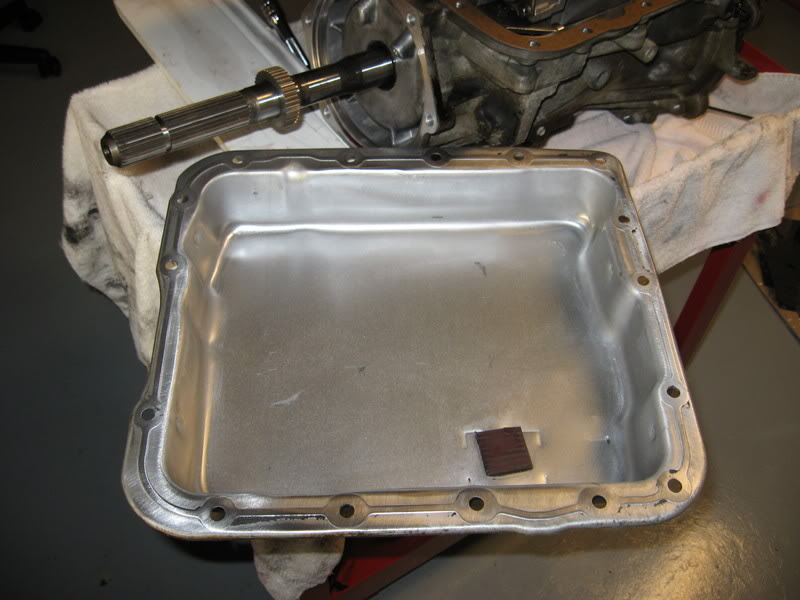
Here's my clean pan.
Here's a movie of how my output shaft turned before I put the tail housing on.
I'll be back to post up more stuff as I drive the car. Or try to answer any questions (if I can).
ps- a 4000 stall is a rowdy converter!
04-17-2007, 06:06 PM
#60
TECH Senior Member
Originally Posted by VORTECFCAR
...I have the trans in the car and I just got done taking it around the block. It seems to shift ok and there are no leaks. ...
