
Twin Turbo Ls powered Zephyr - Stuff out of my mustang
 11-19-2009, 11:36 AM
#1
TECH Resident
Thread Starter
iTrader: (3)
Join Date: Oct 2006
Location: edmonton alberta canada
Posts: 858
Likes: 0
Received 0 Likes
on
0 Posts

Hey I thought some of you guys might enjoy some pics of my newest project.
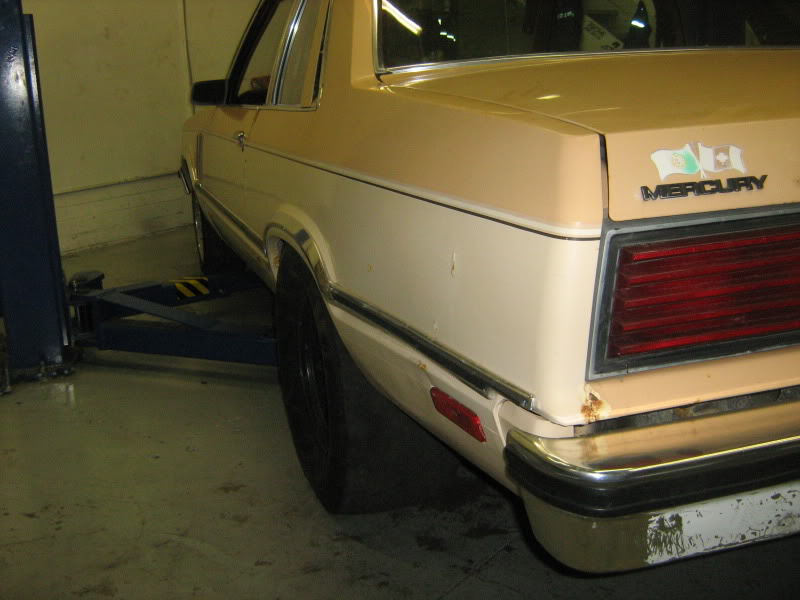
1979 zephyr 2 door box top.
There is some before and some during and some after. All of this work was done in one day and the dash in another.
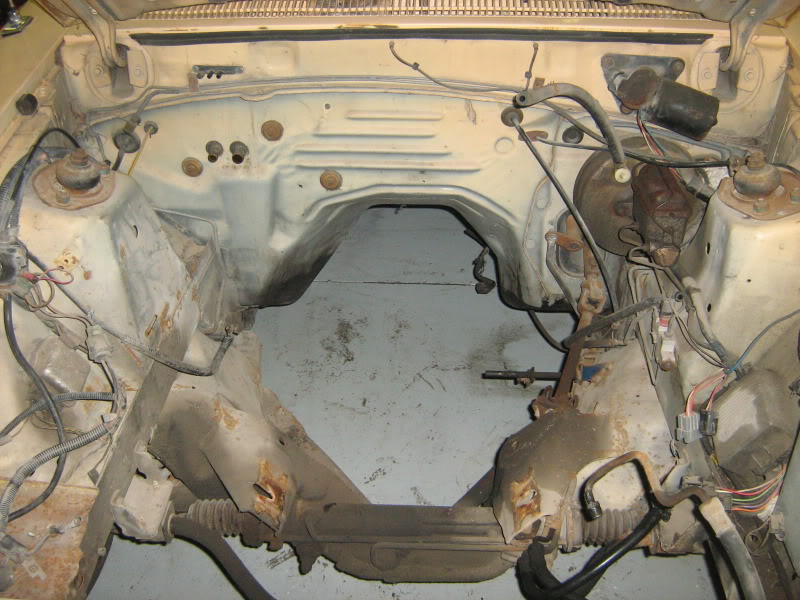
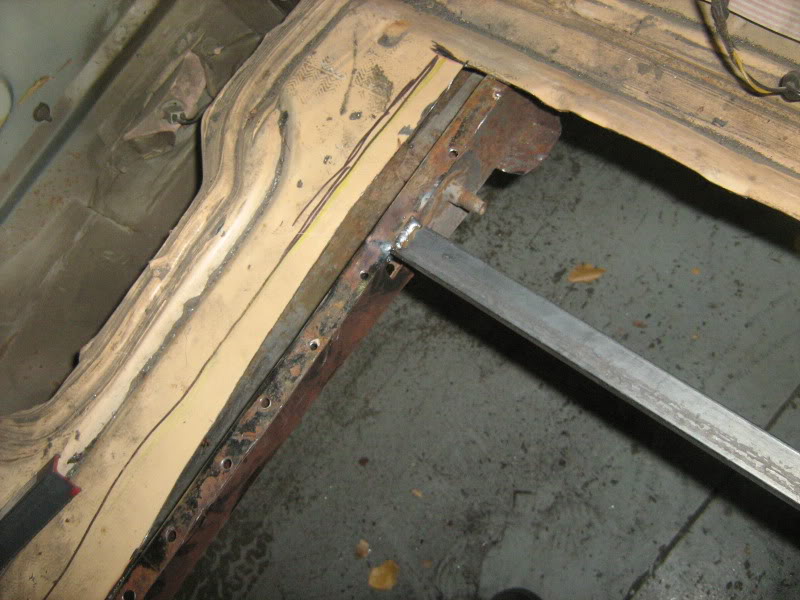
All torque boxes seams have been welded and braced But I still need to do the subframe connectors/cage and lower battle box kit.

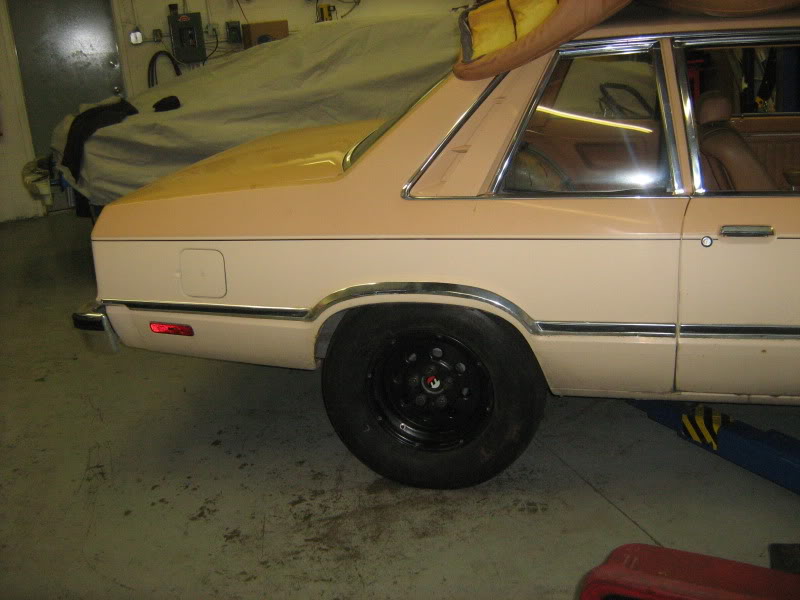
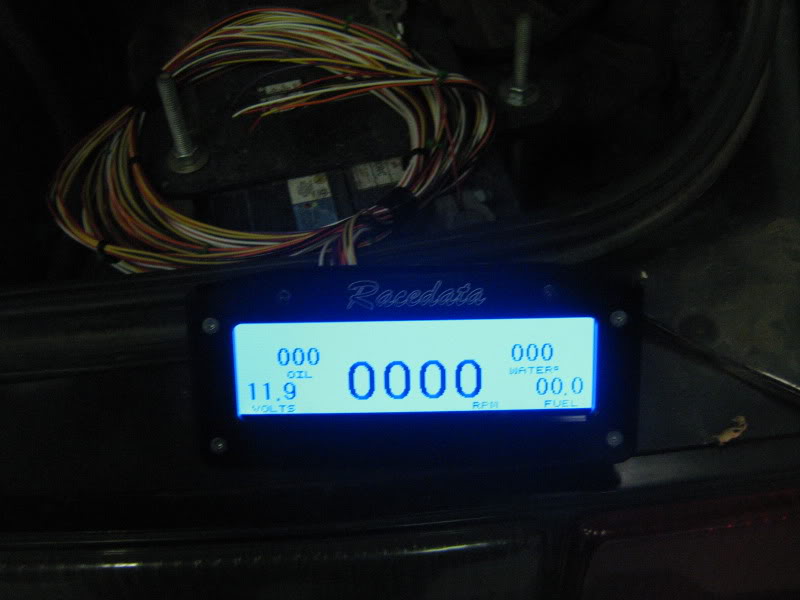
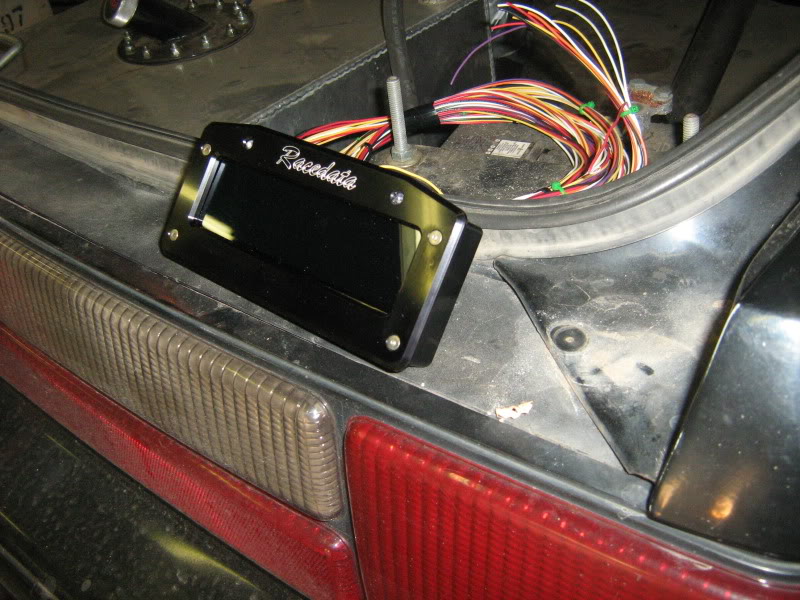
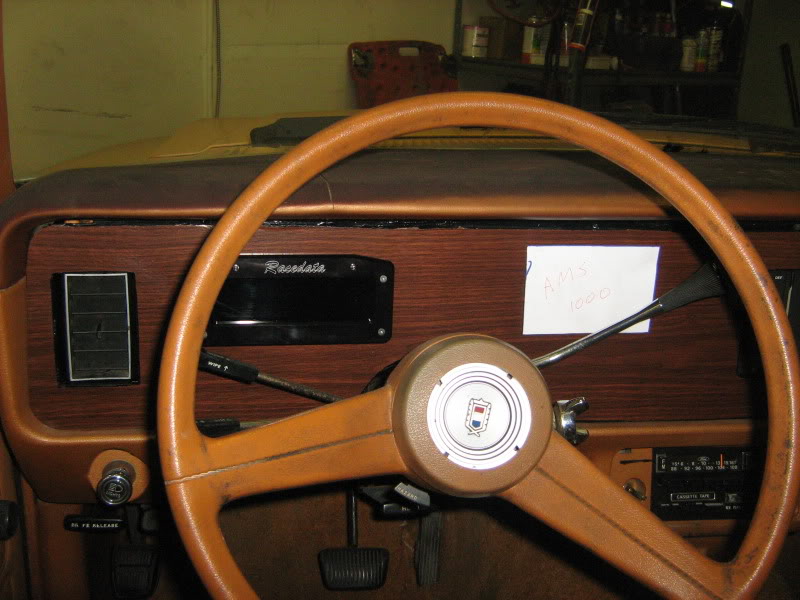
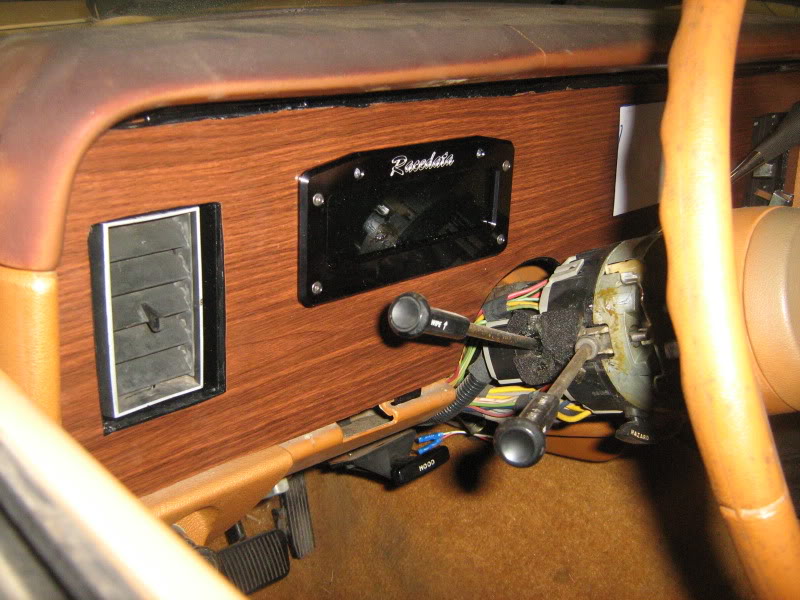
Dash is not done but its coming along,White square is where My boost controller will sit.
Here is some info on what I posted.
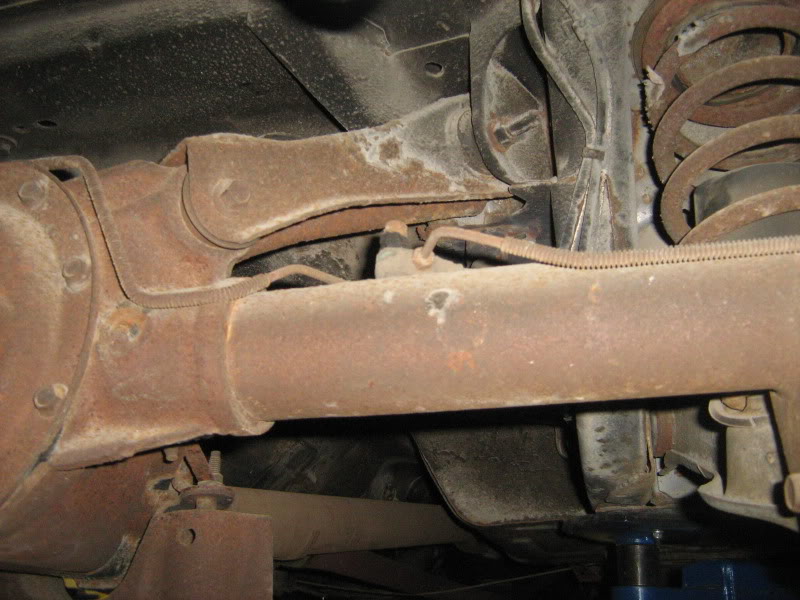
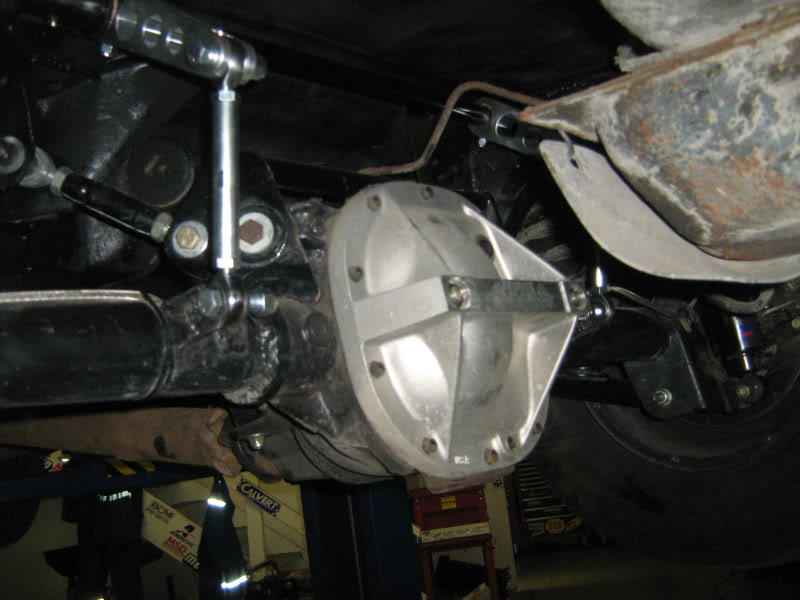
33 spline moser lightweight spool
33 spline moser pro series axles with C clip eliminators
5/8 studs
Axle housing welded and checked for straightness
T/A Diff girdle cover
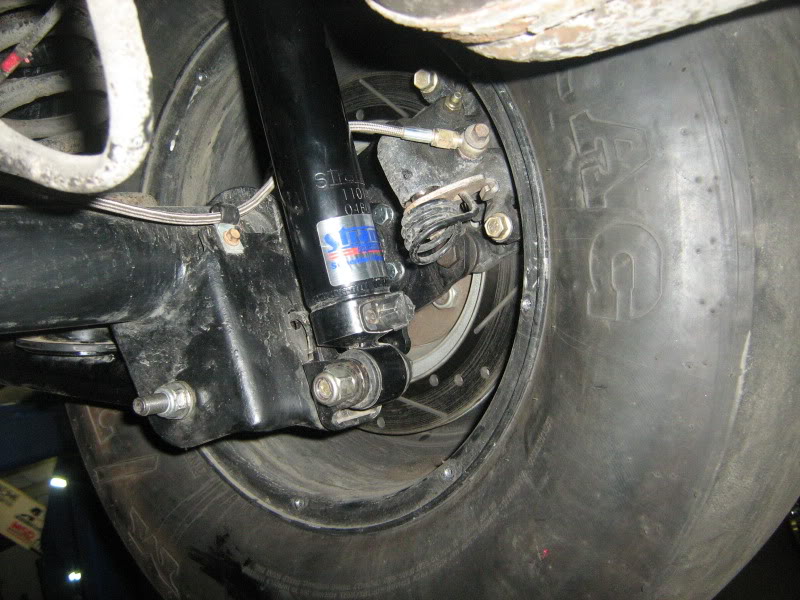
North race cars disk brakes
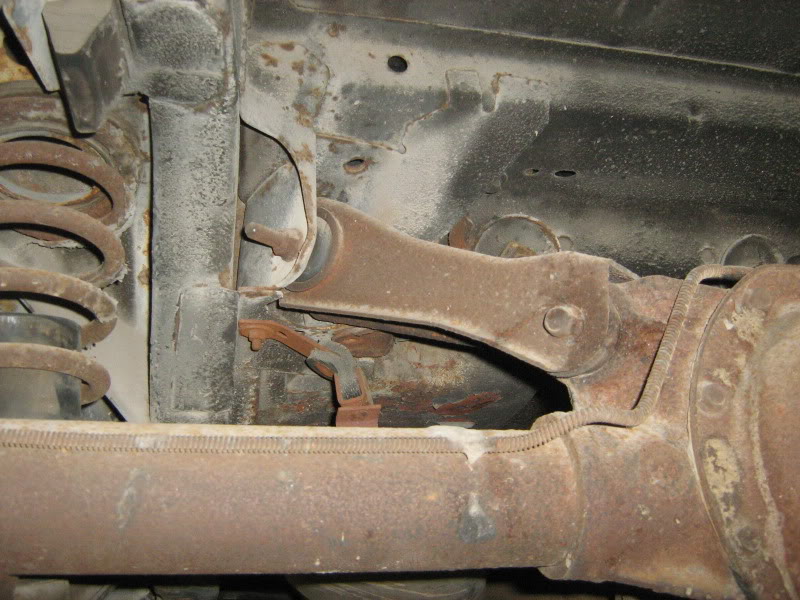
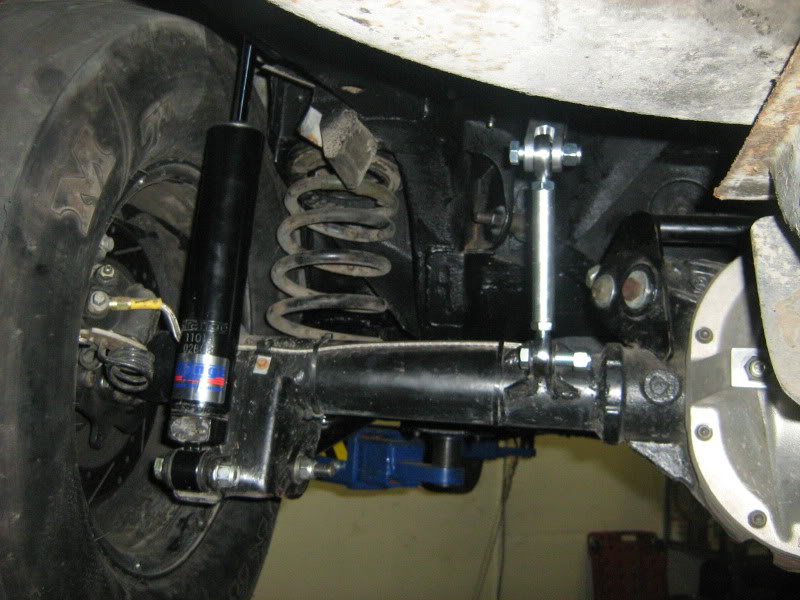
Team Z relocated upper control arms
Team Z adjustable lower control arms
Strange 10 way adjustable shocks
Competition enginering Anti roll bar.
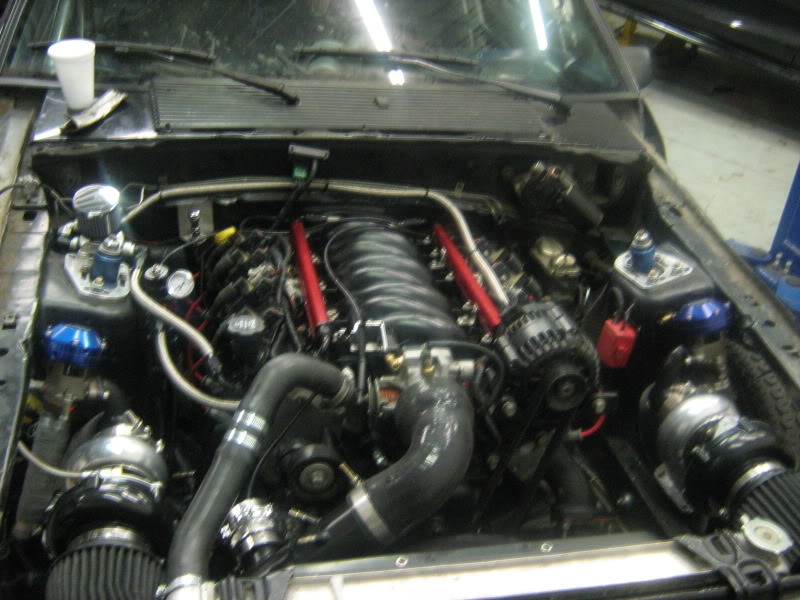
In my mustang this powertrain went 9.51@147 with a soft 60 foot.
The same powertrain in this car should go 9.30-9.20ish i hope.
1979 zephyr 2 door box top.
There is some before and some during and some after. All of this work was done in one day and the dash in another.
All torque boxes seams have been welded and braced But I still need to do the subframe connectors/cage and lower battle box kit.
Dash is not done but its coming along,White square is where My boost controller will sit.
Here is some info on what I posted.
33 spline moser lightweight spool
33 spline moser pro series axles with C clip eliminators
5/8 studs
Axle housing welded and checked for straightness
T/A Diff girdle cover
North race cars disk brakes
Team Z relocated upper control arms
Team Z adjustable lower control arms
Strange 10 way adjustable shocks
Competition enginering Anti roll bar.
In my mustang this powertrain went 9.51@147 with a soft 60 foot.
The same powertrain in this car should go 9.30-9.20ish i hope.
 11-19-2009, 11:41 AM
#2
TECH Resident
Thread Starter
iTrader: (3)
Join Date: Oct 2006
Location: edmonton alberta canada
Posts: 858
Likes: 0
Received 0 Likes
on
0 Posts
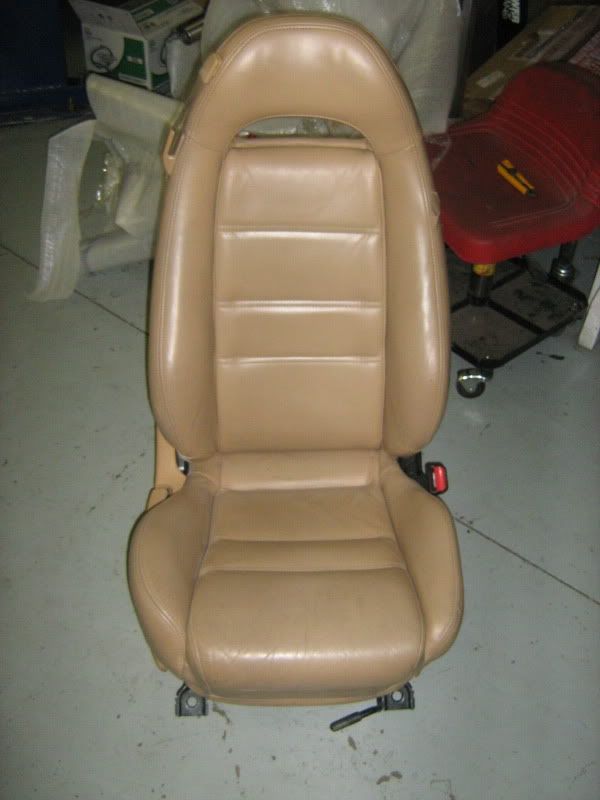
Got some new seats for project gramps, They are out of a 1994 rx7 touring edition and match the tan interior just right, They are worn on the drivers side bolster so I will need to have that fixed up but minor.

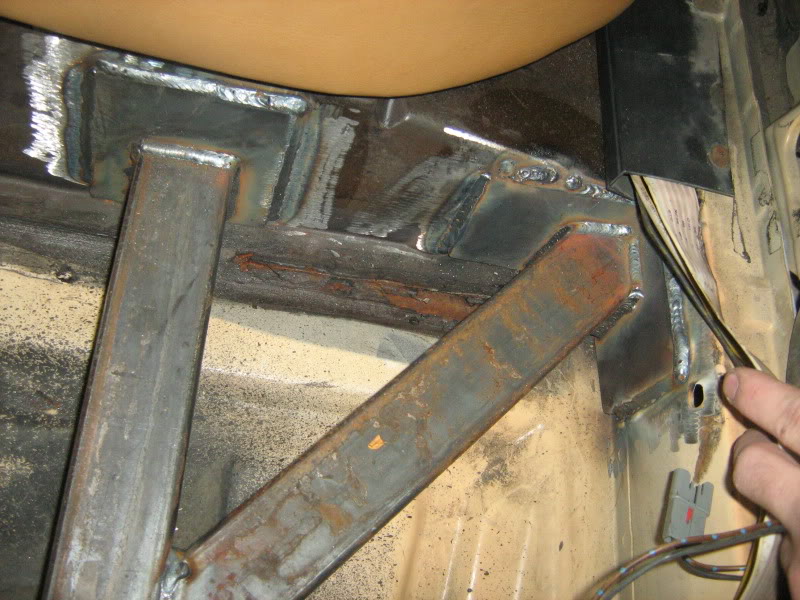
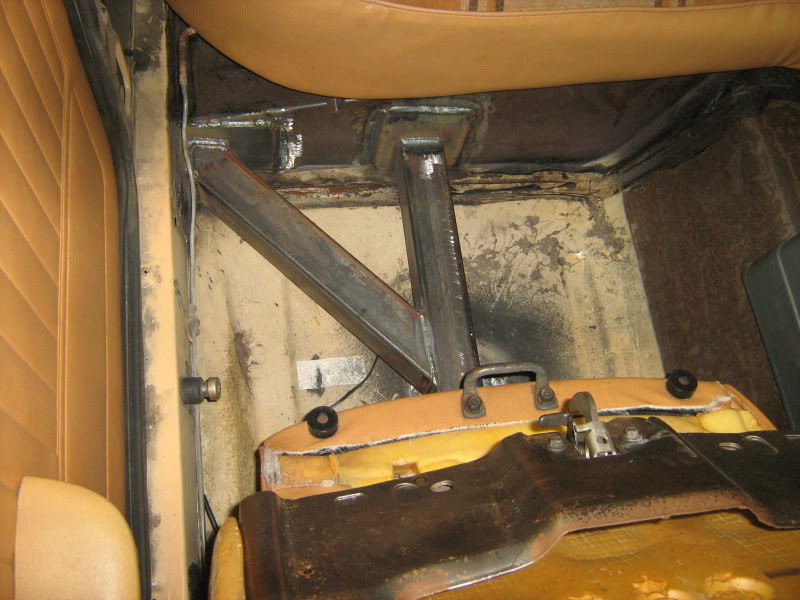
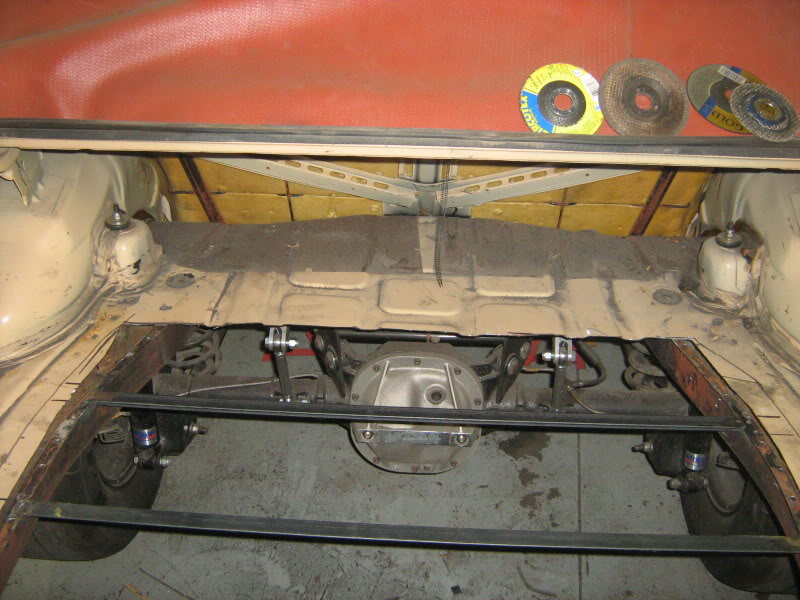
Also had the help of a friend who is a very good welder and we finished the 2x2 through floor subframe connectors with outriggers.We also pulled out about 70 or so lbs of sound deadner/misc brackets that are not needed anymore.
The subframes still need to be seam sealed and undercoated but I am glad the hard part is done.


Oh ya also pulled the old striaght6 c4 combo.

Also had the help of a friend who is a very good welder and we finished the 2x2 through floor subframe connectors with outriggers.We also pulled out about 70 or so lbs of sound deadner/misc brackets that are not needed anymore.
The subframes still need to be seam sealed and undercoated but I am glad the hard part is done.
Oh ya also pulled the old striaght6 c4 combo.
11-19-2009, 11:43 AM
#3
TECH Resident
Thread Starter
iTrader: (3)
Join Date: Oct 2006
Location: edmonton alberta canada
Posts: 858
Likes: 0
Received 0 Likes
on
0 Posts
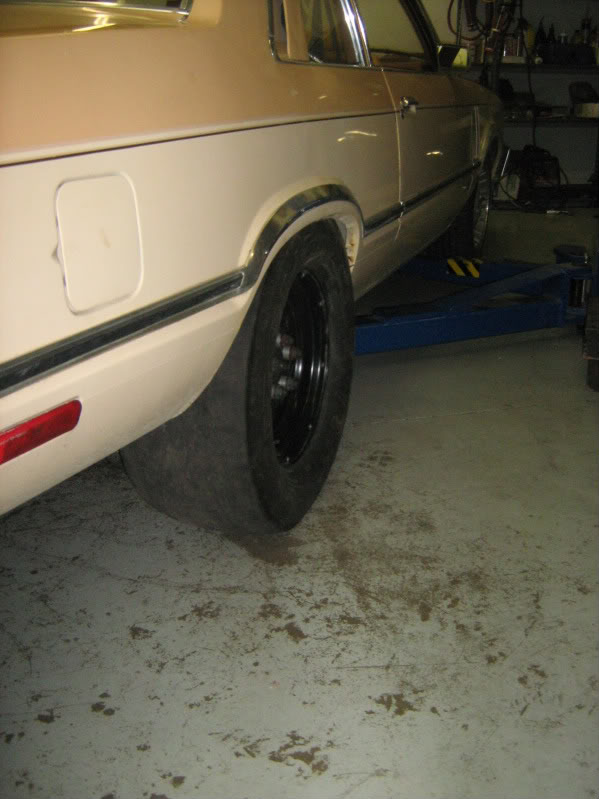
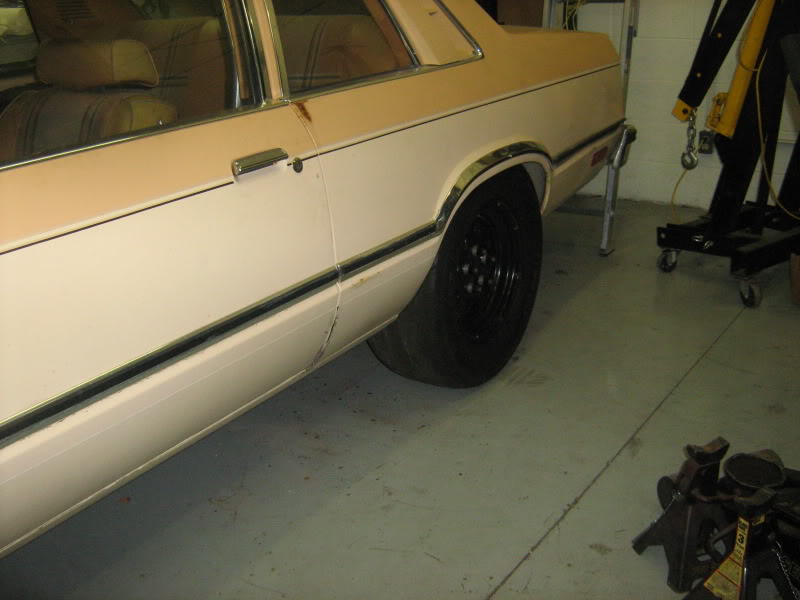
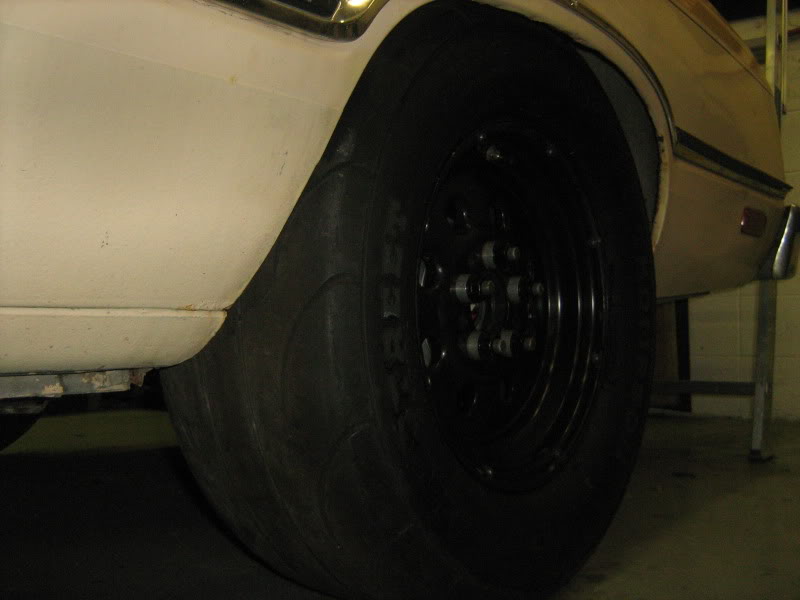
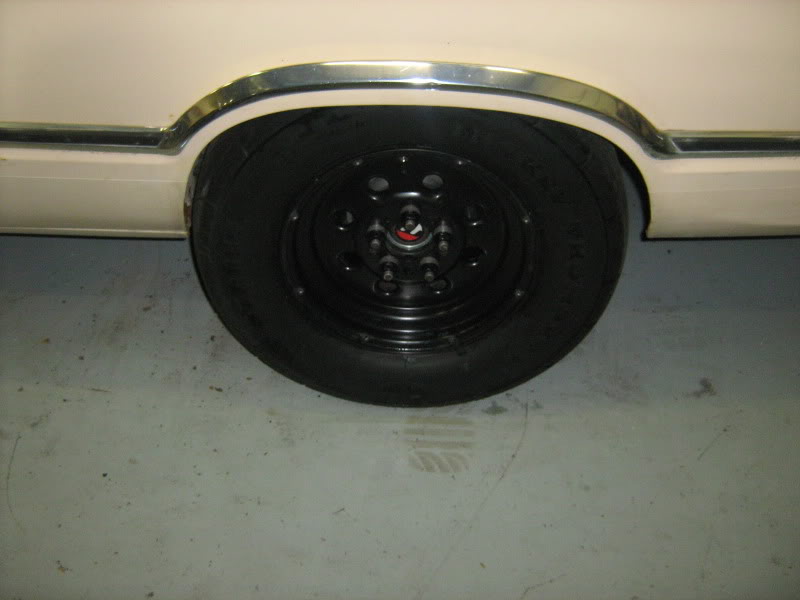
Swapped on the drag radials and got the car sitting back on the ground.
Here is some pics of the turbo kit off the mustang not anything too fancy but I built it all myself and it worked well. Getting ready to pull everything out of the mustang and get it ready for project "gramps"
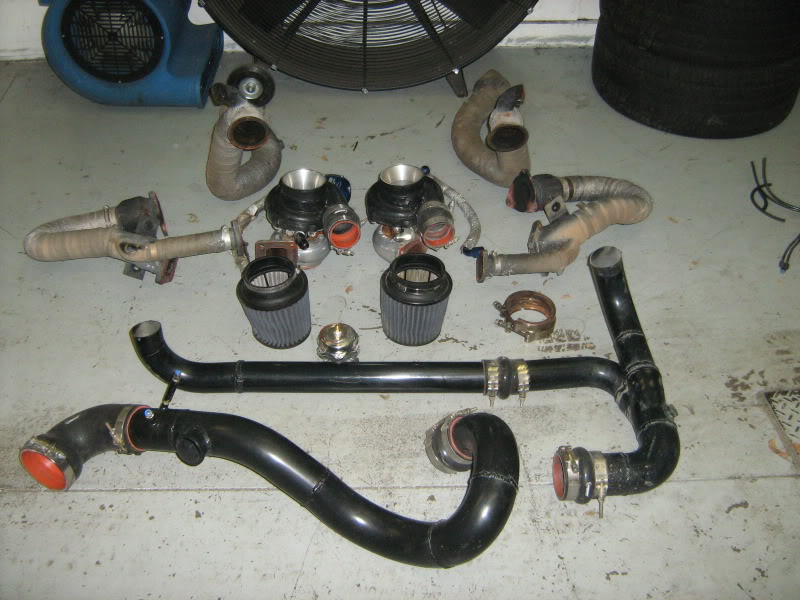
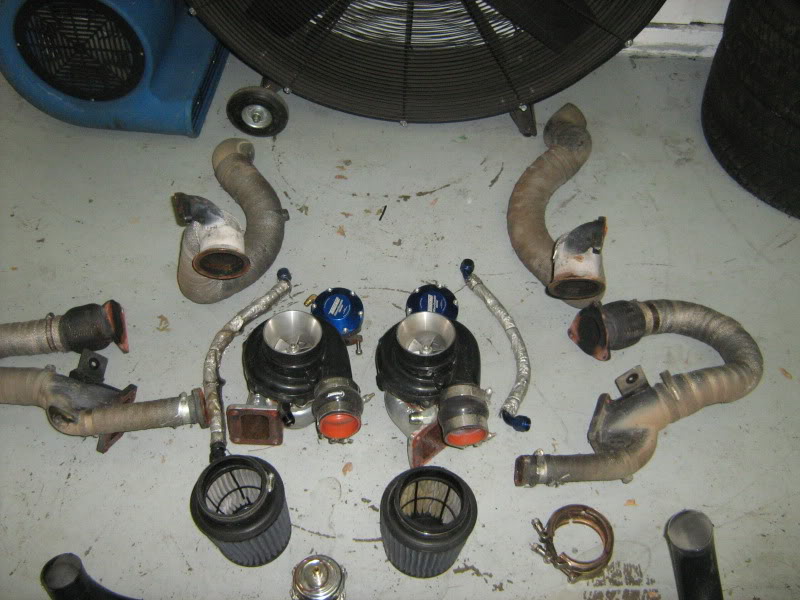
Here is some pics of the turbo kit off the mustang not anything too fancy but I built it all myself and it worked well. Getting ready to pull everything out of the mustang and get it ready for project "gramps"
11-19-2009, 11:47 AM
#4
TECH Resident
Thread Starter
iTrader: (3)
Join Date: Oct 2006
Location: edmonton alberta canada
Posts: 858
Likes: 0
Received 0 Likes
on
0 Posts
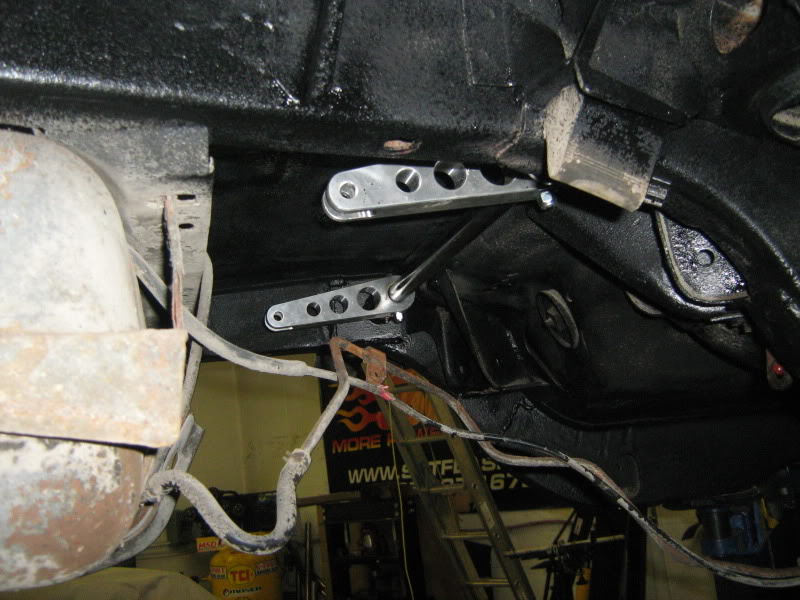
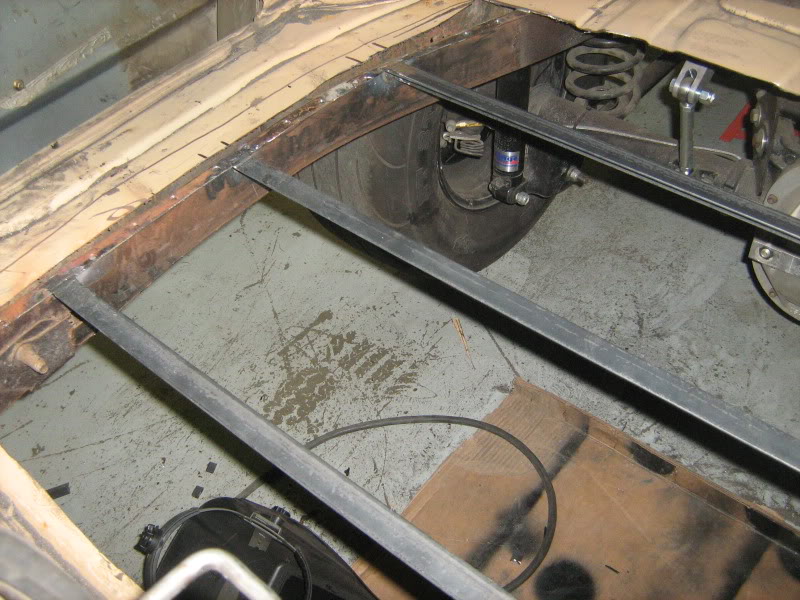
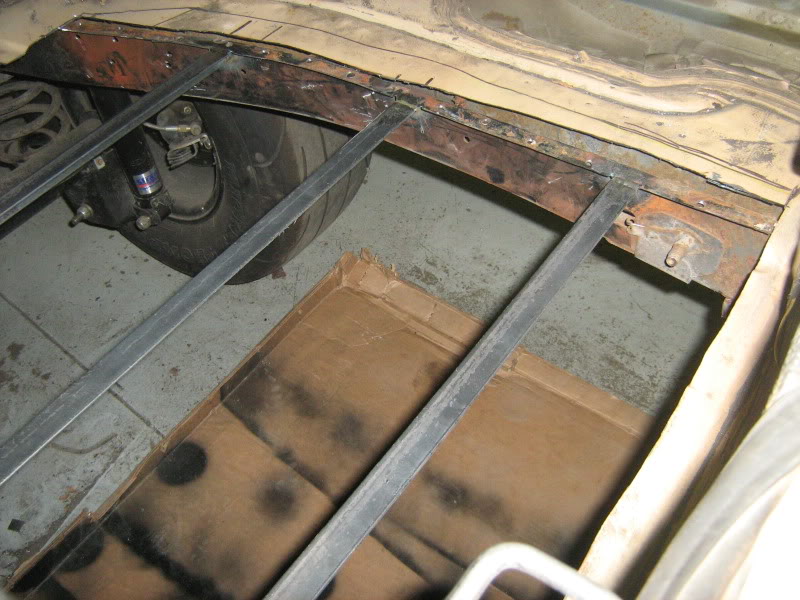
Well I decided to get started on my trunk as I wanted to ditch the factory tank/spare tire well and start fresh with my parts nad mounted where I want them.
My major concern/reason for doing this is in order to move the weight(Fuel cell/battery/meth tank etc) where I want it and to have it mounted the way I want it.
Forgot to take any during the actual cutting but I basically went all the way to the center of the frame rail and now have a nice square flat surface to land all of my sheet/braces too. It was kind of a pain to drill all the spot welds but I think it will be worth it.
I plan to run a peice of tubing between the rear frame rails to give the cage a nice strong point to tie in.

Bracing coming along, I used 3/4" Angle iron in order to be strong but still keep the weight down. This set up can hold me(200lbs) no problem without issue so I think it will be just fine.
My major concern/reason for doing this is in order to move the weight(Fuel cell/battery/meth tank etc) where I want it and to have it mounted the way I want it.
Forgot to take any during the actual cutting but I basically went all the way to the center of the frame rail and now have a nice square flat surface to land all of my sheet/braces too. It was kind of a pain to drill all the spot welds but I think it will be worth it.
I plan to run a peice of tubing between the rear frame rails to give the cage a nice strong point to tie in.
Bracing coming along, I used 3/4" Angle iron in order to be strong but still keep the weight down. This set up can hold me(200lbs) no problem without issue so I think it will be just fine.
11-19-2009, 11:50 AM
#5
TECH Resident
Thread Starter
iTrader: (3)
Join Date: Oct 2006
Location: edmonton alberta canada
Posts: 858
Likes: 0
Received 0 Likes
on
0 Posts
Ok here is some updated pics of the trunk layout.... I am over all fairly happy with the way things are fitting inside the trunk, Still need to set up some bolt in ballast bars,fuel pump,meth pump and possibly trans cooler. Have not decided on that one yet.
Here is some pics of the tabs/mounts for everything with the cells/battery mount out.
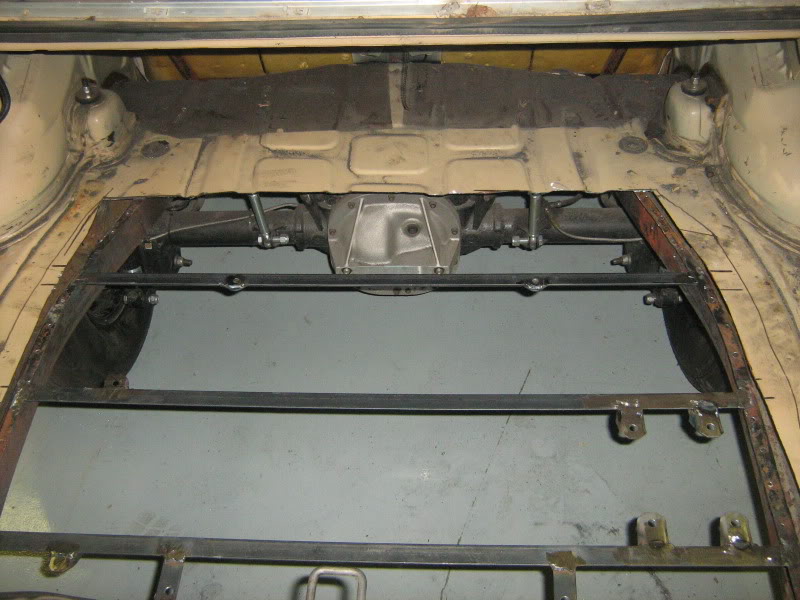
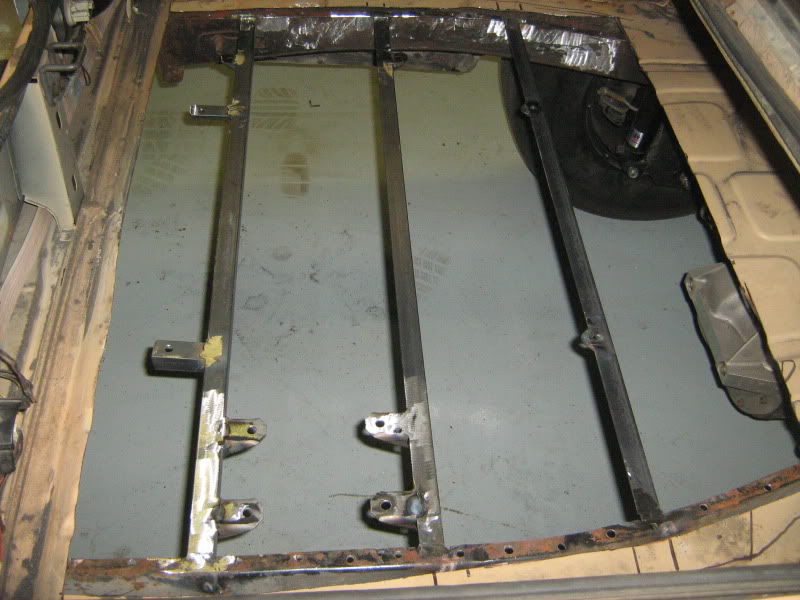
Here is some with everything installed. obviously I still need to sheet the trunk in but that should be pretty straight forward.
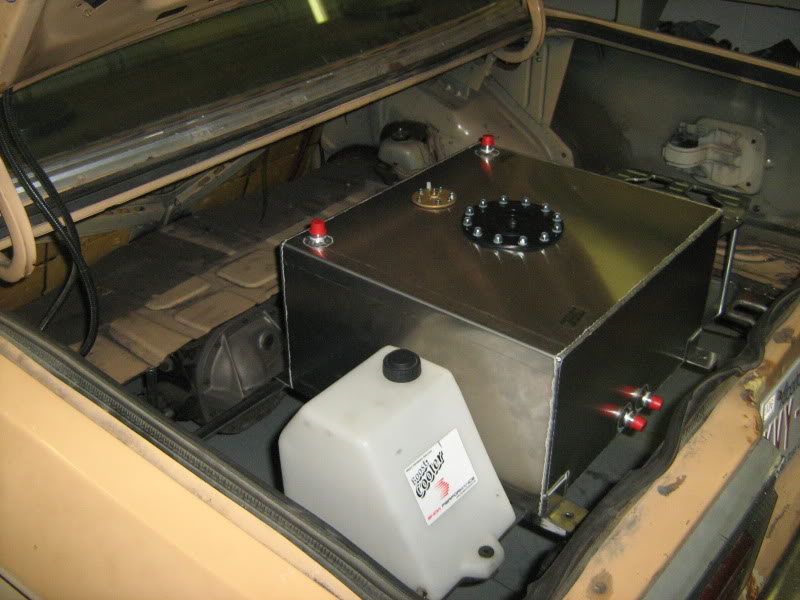

Here is some pics of the tabs/mounts for everything with the cells/battery mount out.
Here is some with everything installed. obviously I still need to sheet the trunk in but that should be pretty straight forward.
 11-19-2009, 12:22 PM
#7
are you going to make up some straps for the fuel cell, or just bolt it directly to the braces? i understand the welds on the 'alignment' tabs (manuf.'s words) can break in the event of a rollover/accident.
love the setup though. gotta love a low 9 sec late-70s turd!
love the setup though. gotta love a low 9 sec late-70s turd!
Trending Topics
11-19-2009, 12:43 PM
#8
TECH Resident
Thread Starter
iTrader: (3)
Join Date: Oct 2006
Location: edmonton alberta canada
Posts: 858
Likes: 0
Received 0 Likes
on
0 Posts
are you going to make up some straps for the fuel cell, or just bolt it directly to the braces? i understand the welds on the 'alignment' tabs (manuf.'s words) can break in the event of a rollover/accident.
love the setup though. gotta love a low 9 sec late-70s turd!
love the setup though. gotta love a low 9 sec late-70s turd!
 11-19-2009, 06:43 PM
#10
TECH Resident
Thread Starter
iTrader: (3)
Join Date: Oct 2006
Location: edmonton alberta canada
Posts: 858
Likes: 0
Received 0 Likes
on
0 Posts
Just wanted something different, I had a 2 door box top fairmont already once that ALMOST got all these parts in it a while back but let it go.... Now I am building what I really want!
 11-19-2009, 09:33 PM
#12
TECH Resident
Thread Starter
iTrader: (3)
Join Date: Oct 2006
Location: edmonton alberta canada
Posts: 858
Likes: 0
Received 0 Likes
on
0 Posts
LOL FEP Is a joke, I understand the preservation thing believe me I do but I too ka ******* grampa inline 6 **** brown 1979 zephyr and am building it ... not like I cut up a SVO or pace car lol jesus.


 11-19-2009, 11:20 PM
#15
TECH Resident
Thread Starter
iTrader: (3)
Join Date: Oct 2006
Location: edmonton alberta canada
Posts: 858
Likes: 0
Received 0 Likes
on
0 Posts
 fully built 32 valve mod motor with a 3.4L whipple .... thing will likely be faster with his motor then mine lol.


