
My LS1 Air conditioning retrofit
 04-25-2010, 05:57 PM
#1
TECH Enthusiast
Thread Starter
iTrader: (8)

Join Date: Dec 2009
Location: N. E. Arkansas
Posts: 639
Likes: 0
Received 0 Likes
on
0 Posts

I picked up one of the F-body motorsports brackets designed for the LS1 engine so you can use a standard round AC compressor used on GM cars and trucks thorughout the 80’s and early 90’s.
http://www.youngsfbody.com/inc/sdetail/12165
This kit was basically an option for 3rd generation camaro owners wanting to keep their factory AC compressor.
The price on their website is $299 + shipping and there is no way I would have payed that much for this kit. I ended up getting it from a member on another forum for $150 shipped still in the box. It didn’t bother me paying this much because it came with all this stuff.
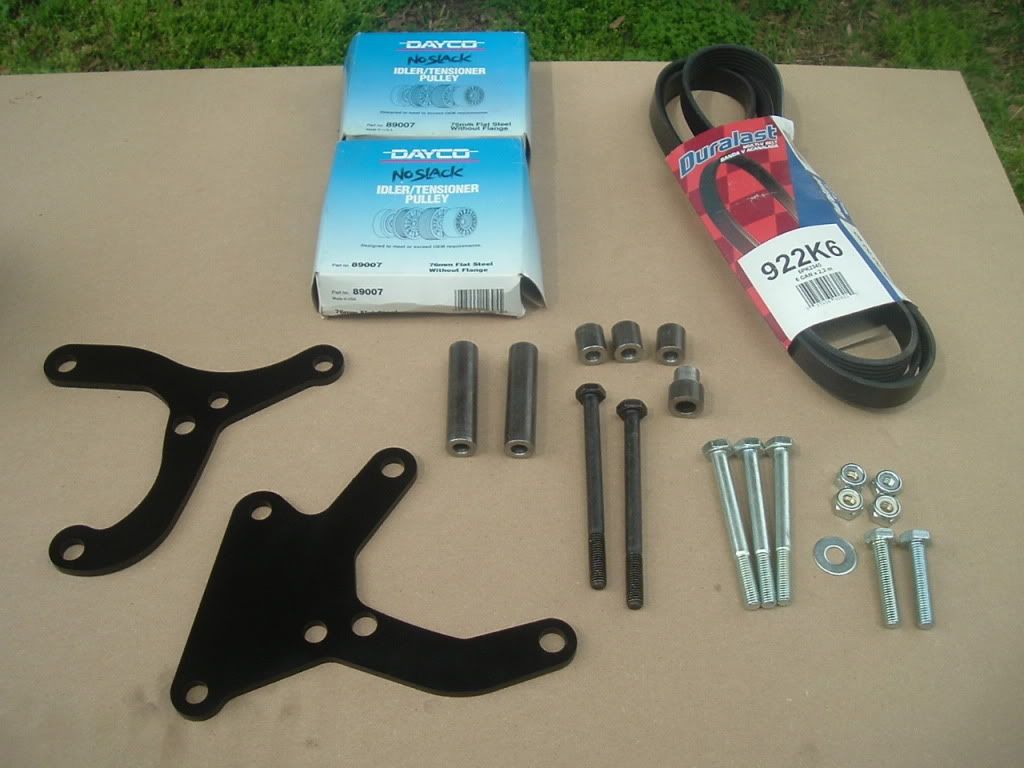
Here’s what you get:
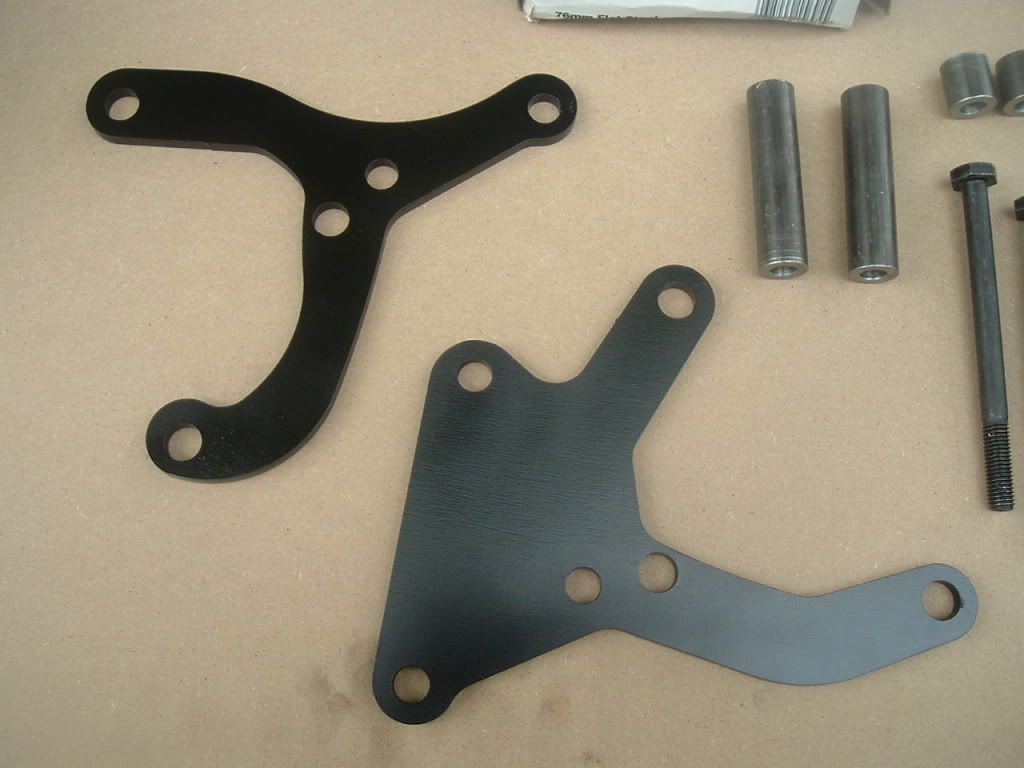
1. Rear Bracket (1)
2. Front Bracket (1)
3. 1” deep spacer for 10 x 1.5 bolts (3)
4. 3” deep spacer for 10 x 1.5mm bolts(2)
5. 10 x 1.5 x 50mm bolt (2)
6. 10 x 1.5 x 100mm bolt (3)
7. 10 x 1.5 x 130mm bolt (2)
8. 10x 1.5 lock nuts (3)
9. Idler pully spacer (1) – this was a custom machined part
10. 3/8” washer for idler pulley (1)
11. Belt – Kelly springfield brand part # 6K922 (1)
12. Idler Pulley – Dayco brand part # 89007 (2)
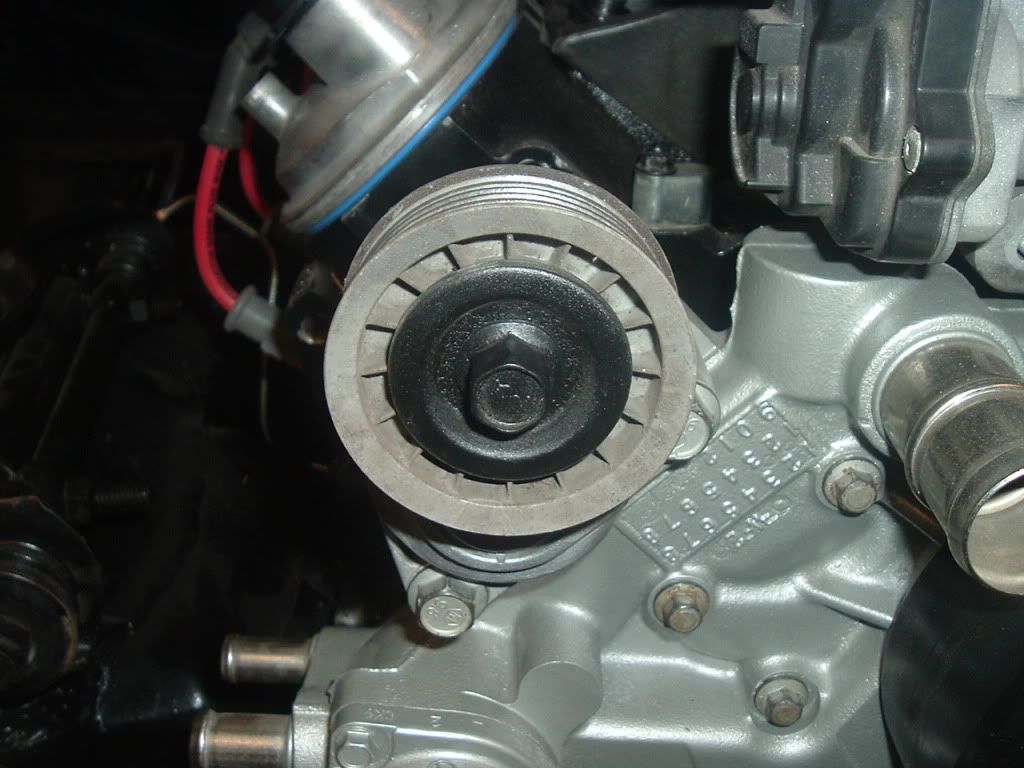
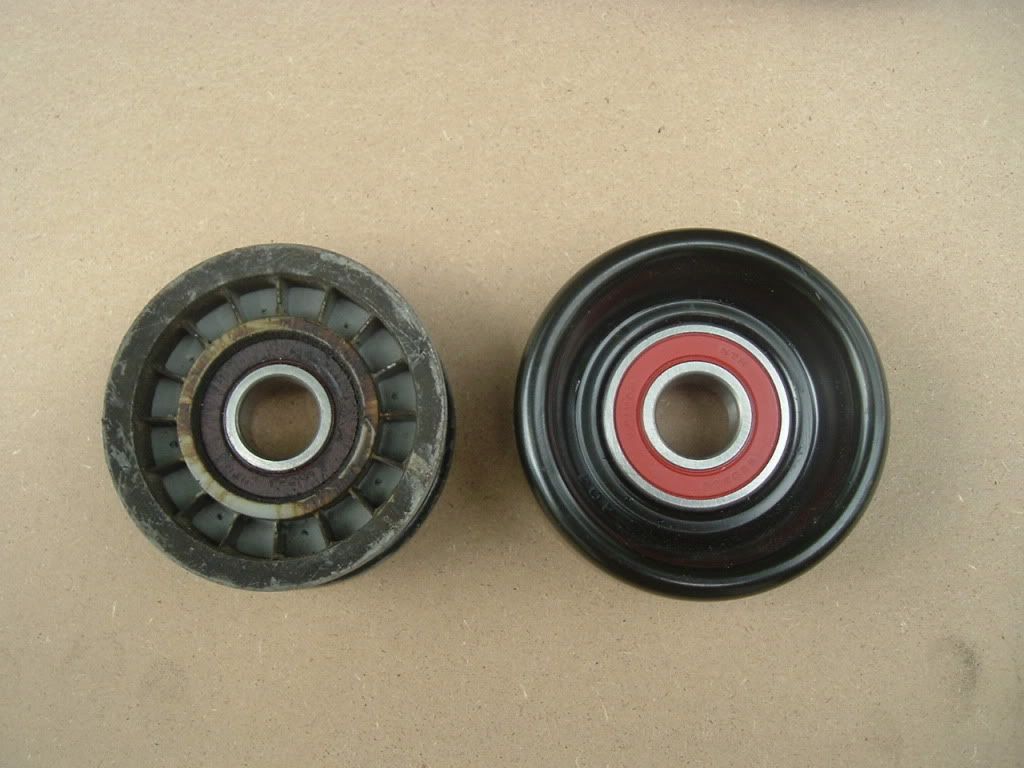
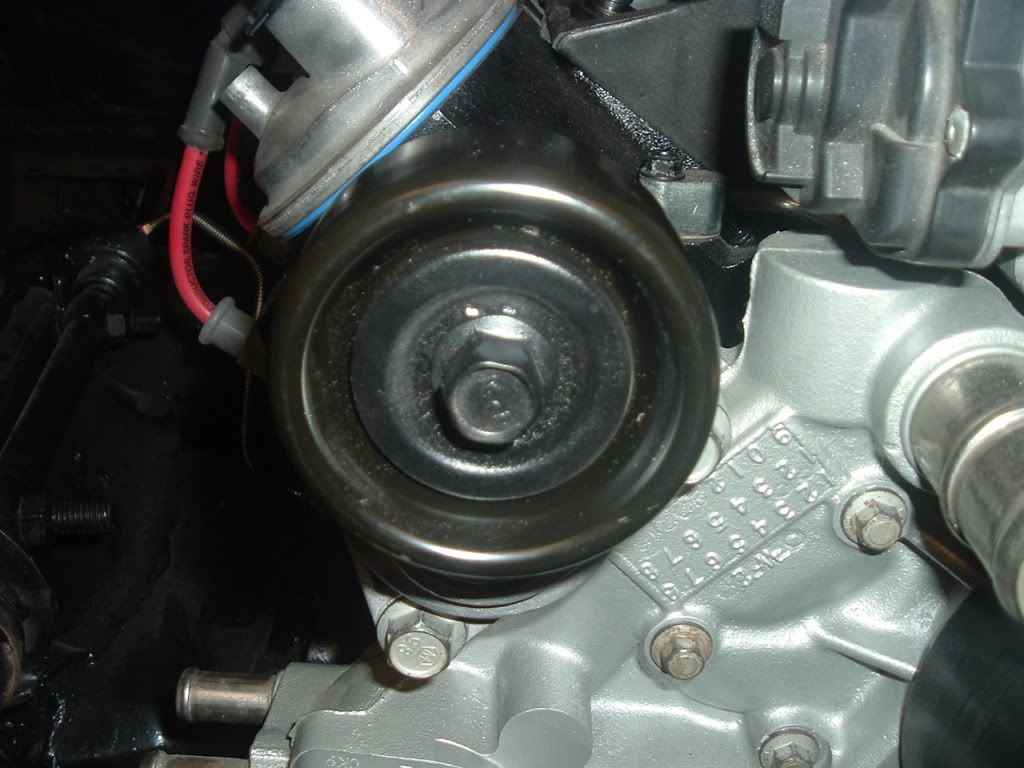
First thing I did was swap out the stock pulley on the tensioner for the dayco #89007 supplied in the kit. I had to remove it while I was installing the brackets
http://www.youngsfbody.com/inc/sdetail/12165
This kit was basically an option for 3rd generation camaro owners wanting to keep their factory AC compressor.
The price on their website is $299 + shipping and there is no way I would have payed that much for this kit. I ended up getting it from a member on another forum for $150 shipped still in the box. It didn’t bother me paying this much because it came with all this stuff.
Here’s what you get:
1. Rear Bracket (1)
2. Front Bracket (1)
3. 1” deep spacer for 10 x 1.5 bolts (3)
4. 3” deep spacer for 10 x 1.5mm bolts(2)
5. 10 x 1.5 x 50mm bolt (2)
6. 10 x 1.5 x 100mm bolt (3)
7. 10 x 1.5 x 130mm bolt (2)
8. 10x 1.5 lock nuts (3)
9. Idler pully spacer (1) – this was a custom machined part
10. 3/8” washer for idler pulley (1)
11. Belt – Kelly springfield brand part # 6K922 (1)
12. Idler Pulley – Dayco brand part # 89007 (2)
First thing I did was swap out the stock pulley on the tensioner for the dayco #89007 supplied in the kit. I had to remove it while I was installing the brackets
Last edited by 1976CamaroGuy; 04-25-2010 at 09:08 PM.
 04-25-2010, 05:58 PM
#2
TECH Enthusiast
Thread Starter
iTrader: (8)
Join Date: Dec 2009
Location: N. E. Arkansas
Posts: 639
Likes: 0
Received 0 Likes
on
0 Posts
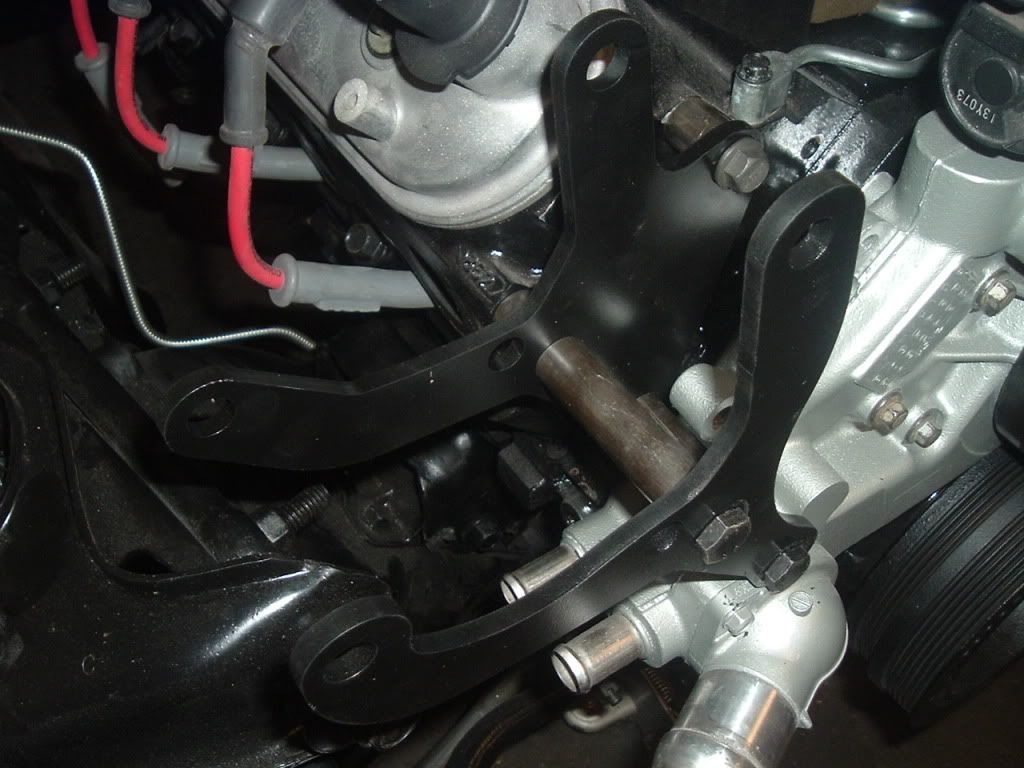
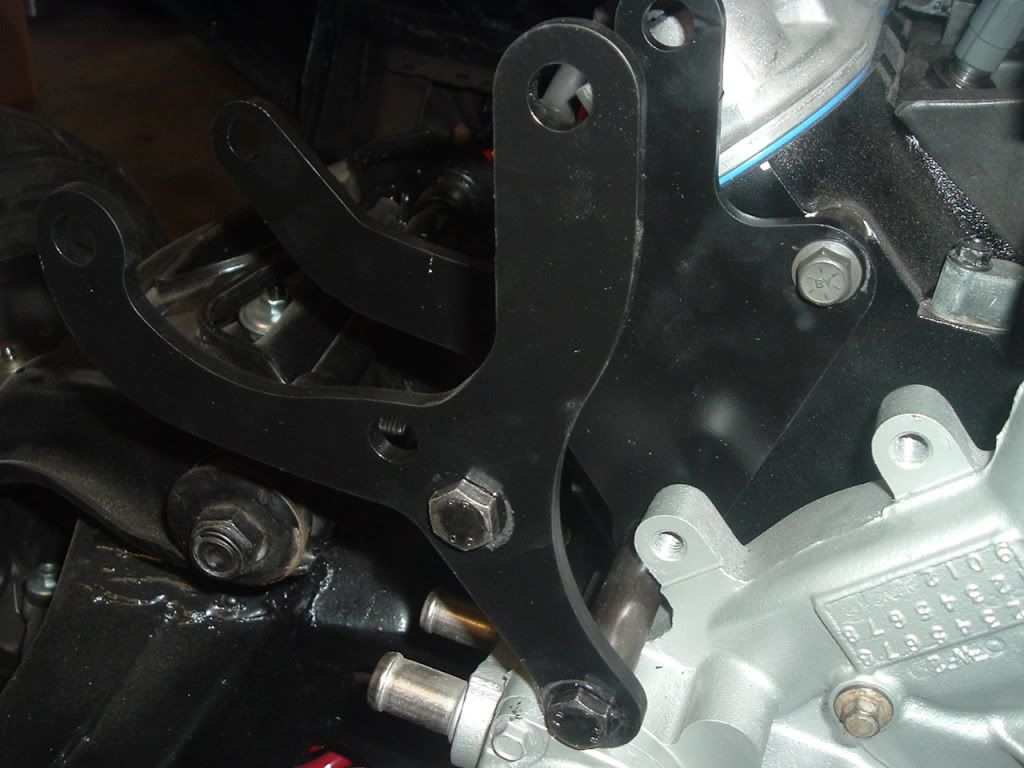
I then position the brackets using the 1” and 3” spacers , two 10 x 1.5 x 130mm bolts, and one of the 10 x 1.5 x 50mm bolts as shown in the picture below.
Here is a pic of the ac compressor installed, I actually had to drill a hole for the stationary tensioner. The hole was missing, but was there in the instructions?? I mounted the tensioner with the last 10 x 1.5 x 50mm bolt, lock nut, washer and machine spacer.
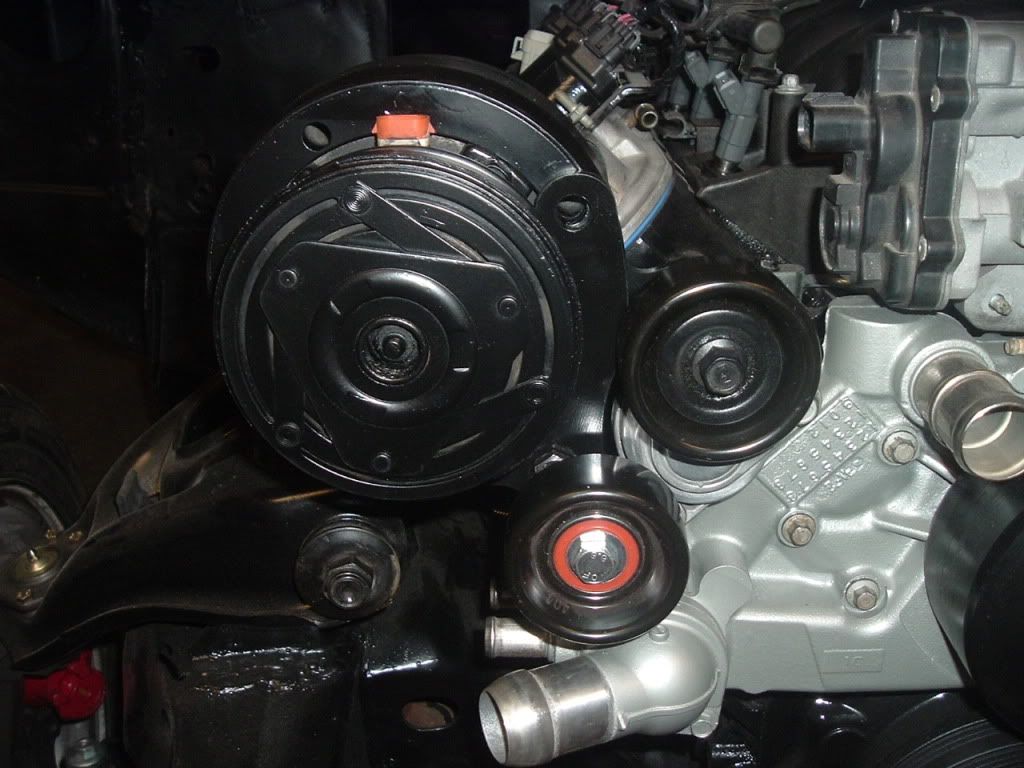
I Use the 10 x 1.5 x 100mm bolts and last three locknuts to secure the compressor…one bolt required me removing the passengers valve cover to get it in.
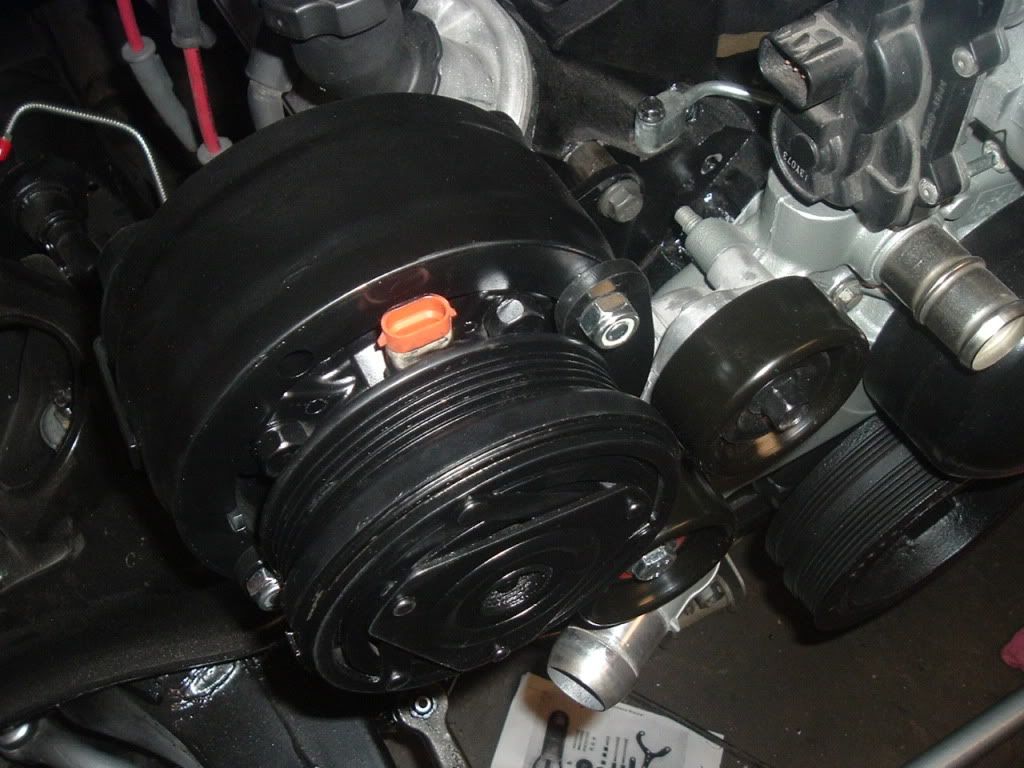
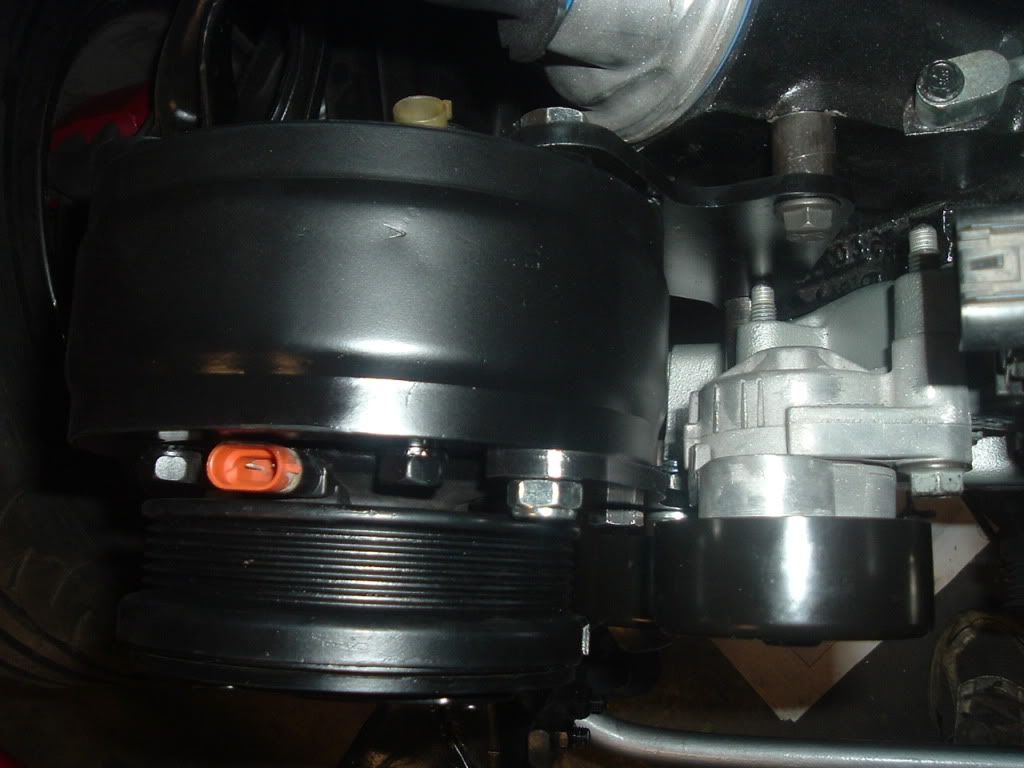
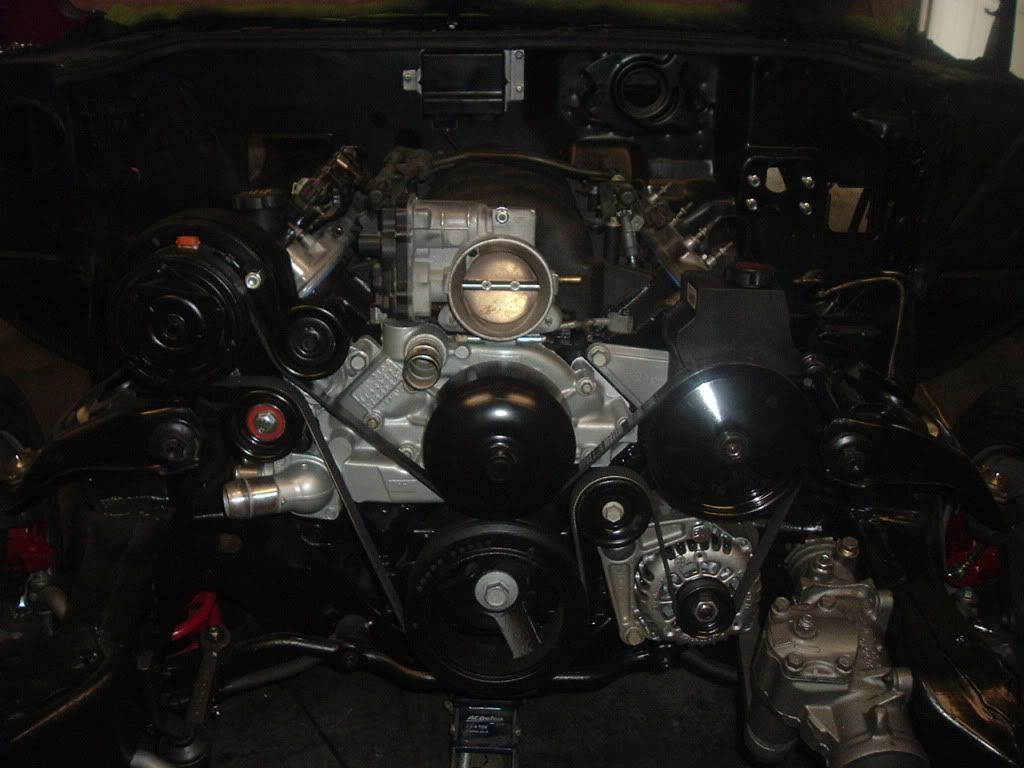
Finished product..looks pretty good..I’m not sure if I got that belt on right, it wasn’t shown in the instructions…but it “looks” right.
Here is a pic of the ac compressor installed, I actually had to drill a hole for the stationary tensioner. The hole was missing, but was there in the instructions?? I mounted the tensioner with the last 10 x 1.5 x 50mm bolt, lock nut, washer and machine spacer.
I Use the 10 x 1.5 x 100mm bolts and last three locknuts to secure the compressor…one bolt required me removing the passengers valve cover to get it in.
Finished product..looks pretty good..I’m not sure if I got that belt on right, it wasn’t shown in the instructions…but it “looks” right.


Trending Topics
 12-24-2010, 01:49 PM
#11
Launching!
iTrader: (10)

Join Date: Oct 2008
Location: Winnipeg Manitoba Canada
Posts: 293
Likes: 0
Received 0 Likes
on
0 Posts
Since alot of people are weight concerned. How much more or less dos a gm compressor weight compared to a sanden? Nice mounting of it and in the same location as the other guys.
12-24-2010, 02:01 PM
#12
TECH Enthusiast
Thread Starter
iTrader: (8)
Join Date: Dec 2009
Location: N. E. Arkansas
Posts: 639
Likes: 0
Received 0 Likes
on
0 Posts
not sure, I didn't compare the weight of both compressors, I would assume that this compressor adds a "little" weight versus the oem but not a whole lot.
Either way its a small price to pay if your going to be driving the car a lot in July/August and want some comfort.
But the 5.3 engine (with aluminumheads and plastic intake) is going to be a little lighter than a standard 100% iron block that came in this car originally so it may balance out. Plus I'm going to gain around a 100 horses or so more with the swap than the engine that came in the car so I'm not going to push the weight issue much anyways.
 12-24-2010, 08:35 PM
#14
TECH Enthusiast
Thread Starter
iTrader: (8)
Join Date: Dec 2009
Location: N. E. Arkansas
Posts: 639
Likes: 0
Received 0 Likes
on
0 Posts
I've got the straight pitman arm, it's close but clears fine. There is about 1/4" clearance when it swings under the alternator.
Last edited by 1976CamaroGuy; 12-24-2010 at 08:43 PM.
12-24-2010, 09:24 PM
#15

I purchased that same kit a few years ago when they were called f-body motorsports. Your brackets look to be a lot better quality than what I received. When I put my kit together the pulleys didn't line up perfectly and thus the belt always made a lot of noise. I'm glad to see that the quality improved with the new owners.
12-25-2010, 09:16 AM
#17
TECH Enthusiast
Thread Starter
iTrader: (8)
Join Date: Dec 2009
Location: N. E. Arkansas
Posts: 639
Likes: 0
Received 0 Likes
on
0 Posts
Plus these compressors were used on TONS of gm vehicles throughout the 80's...I only gave $40 shipped for this one...if it fails I'll snag another one at the boneyard. A lot better than shelling out a few hundred for a sanden.
12-26-2010, 06:16 PM
#18
Launching!
iTrader: (1)

Join Date: Jul 2010
Location: MOntreal, Qc
Posts: 213
Likes: 0
Received 0 Likes
on
0 Posts
So please let me understand this correctly,
I have a 1987 Cadillac Brougham into which I am swapping a 5.3l engine.
If I use this kit I can use the compressor that came originally with the Caddy and I would only have to swap the pulley on the compressor?
I have a 1987 Cadillac Brougham into which I am swapping a 5.3l engine.
If I use this kit I can use the compressor that came originally with the Caddy and I would only have to swap the pulley on the compressor?
12-26-2010, 06:41 PM
#19
Launching!
iTrader: (1)
Join Date: Mar 2005
Location: Katy, Tx
Posts: 220
Likes: 0
Received 0 Likes
on
0 Posts
Since that bracket is set up for the LS1, the compressor brackets would have to be spaced out a little to match the truck accessories. The truck accessories all stick out a little further than the LS1 accessories. All you would need is a few washers or another way to space them out, and possibly longer bolts to bolt on the brackets.