
PRC Heads and LSR cam swap (Build Page)
 03-04-2011, 08:42 PM
#1
In this thread, i will be putting together my heads and cam build. i am not picking my T/A up till next week (moved in december and going back for it on march 11th) so i will be taking pictures and listing all the stuff that goes on to my baby!
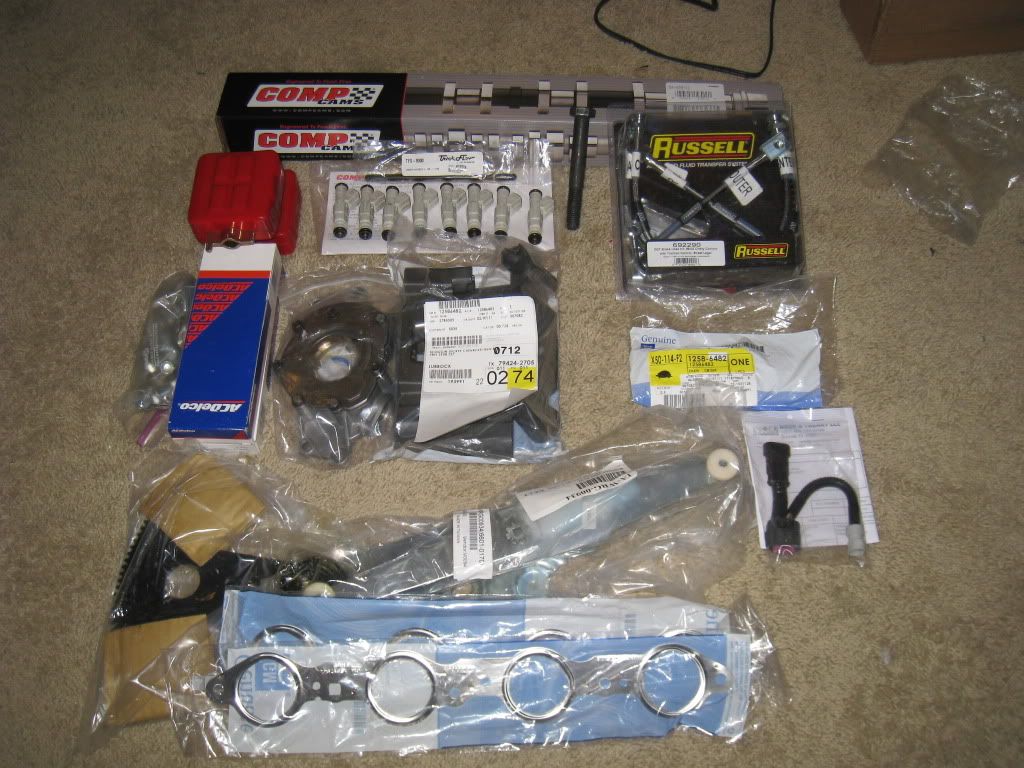
today was a good day. i got a whole box of AWESOME PARTS!!! (over the last couple weeks i have been collecting parts in anticipation of getting my car back next week!) here is a list of the parts i have gotten so far.
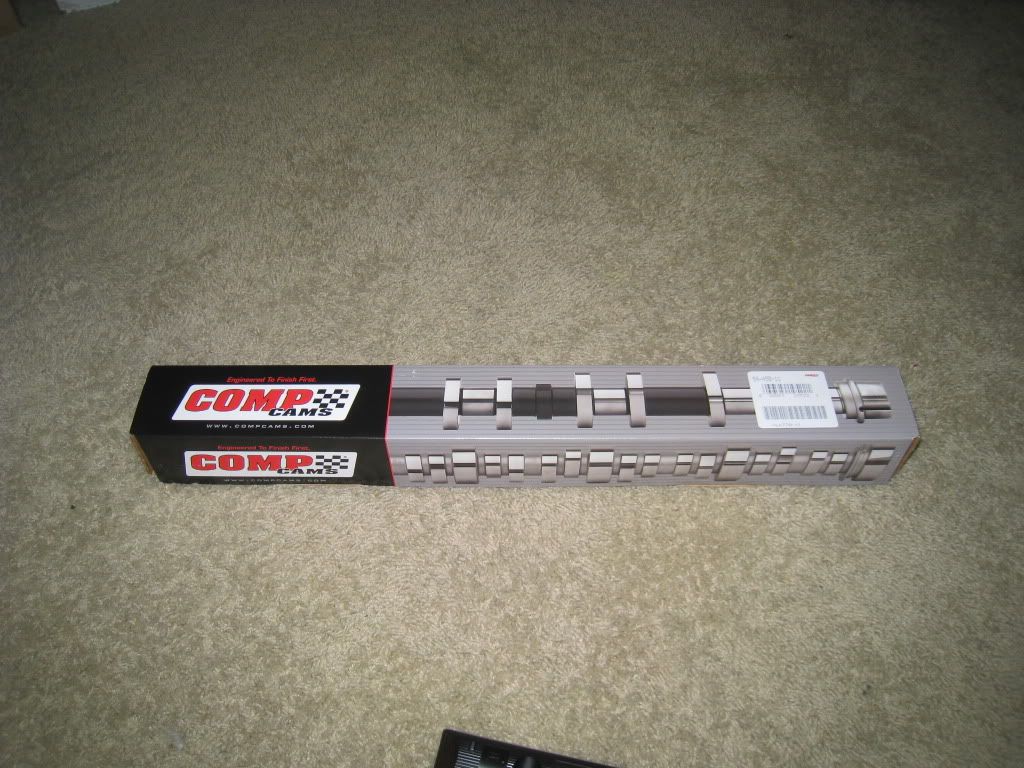
Here is my new cam. it is one of the new LSR cams that have been out for a year or so but you don't see alot of them out there. comp cams suggested this cam for a high performance street application, and said they make great power down low with an exellent peak around 6500 or so. the cam specs out to 227/235 .614/.621 113+4. i specificly got this cam to run with the smaller runners of the 5.3 head with the supperior intake flow with the good exhaust flow. the shorter runners and the 11.1:1 compression i am gonna be running will really wake this cam up! dynamic compression will be just around 8.8:1

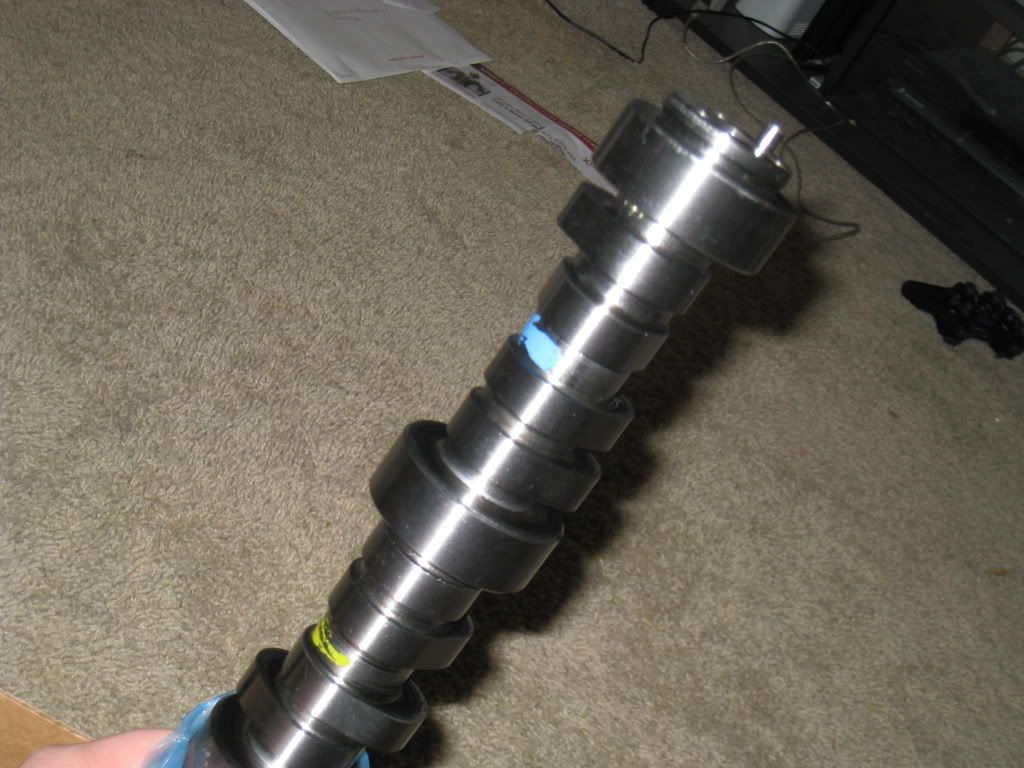
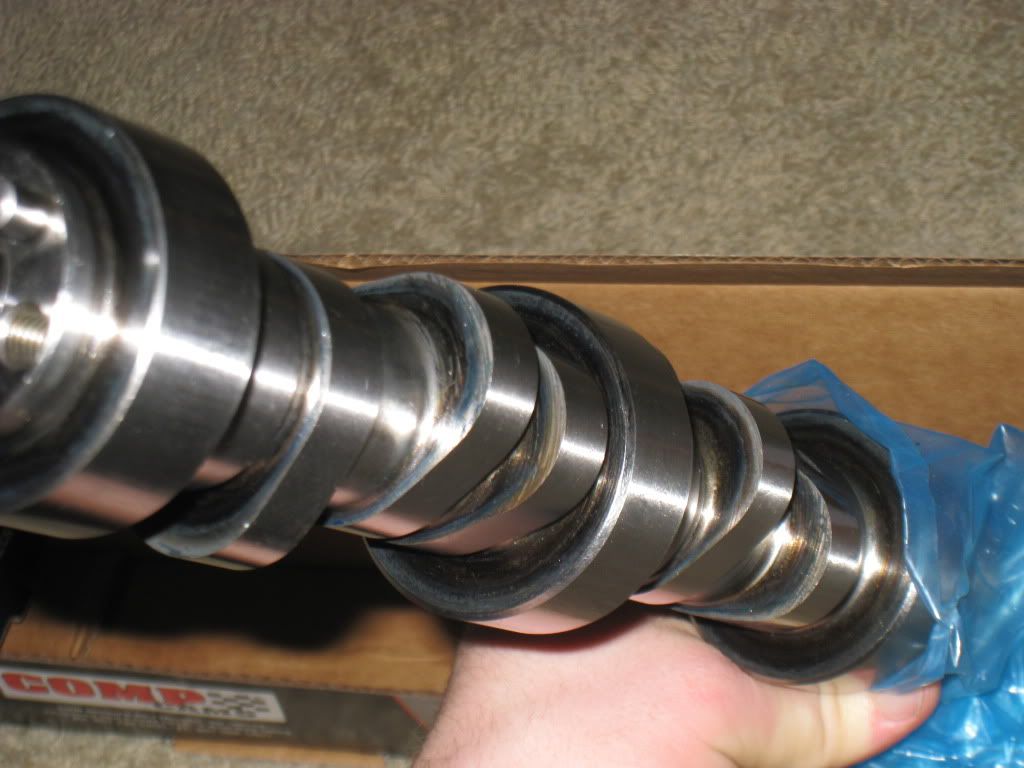
Here are the sexy new LSL lobes that are found on the LSR comp cams ground camshafts...mmm mmm mmmmmmmm...GOOD!
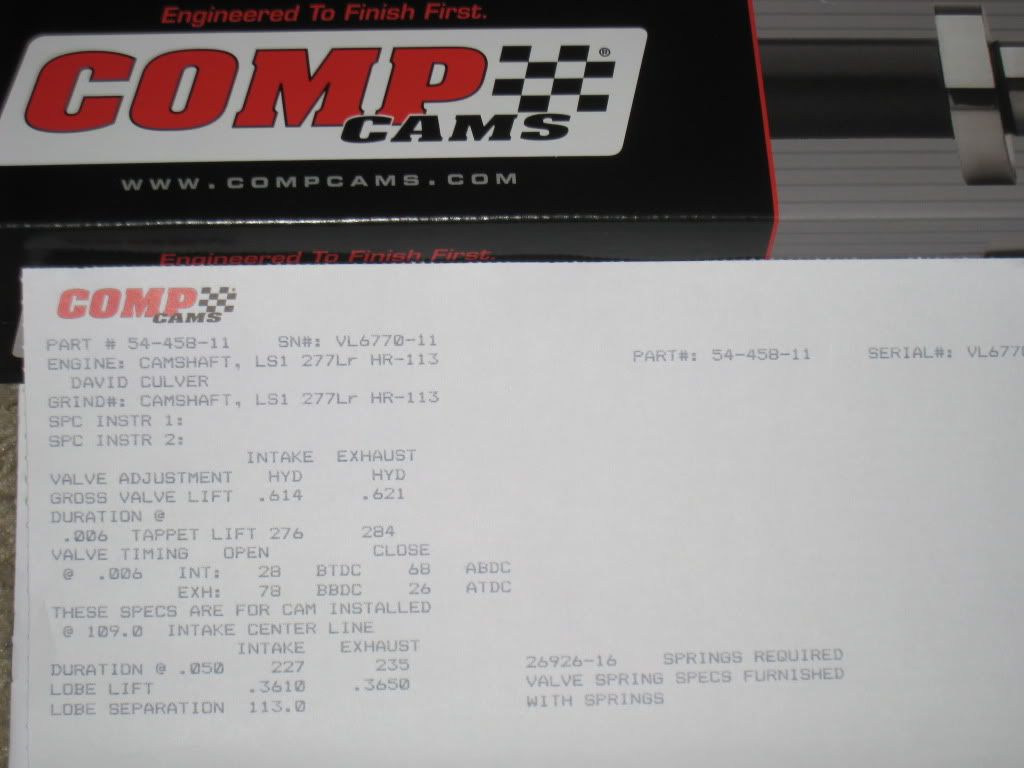
here is the cam card...if you needed anymore information then i gave already
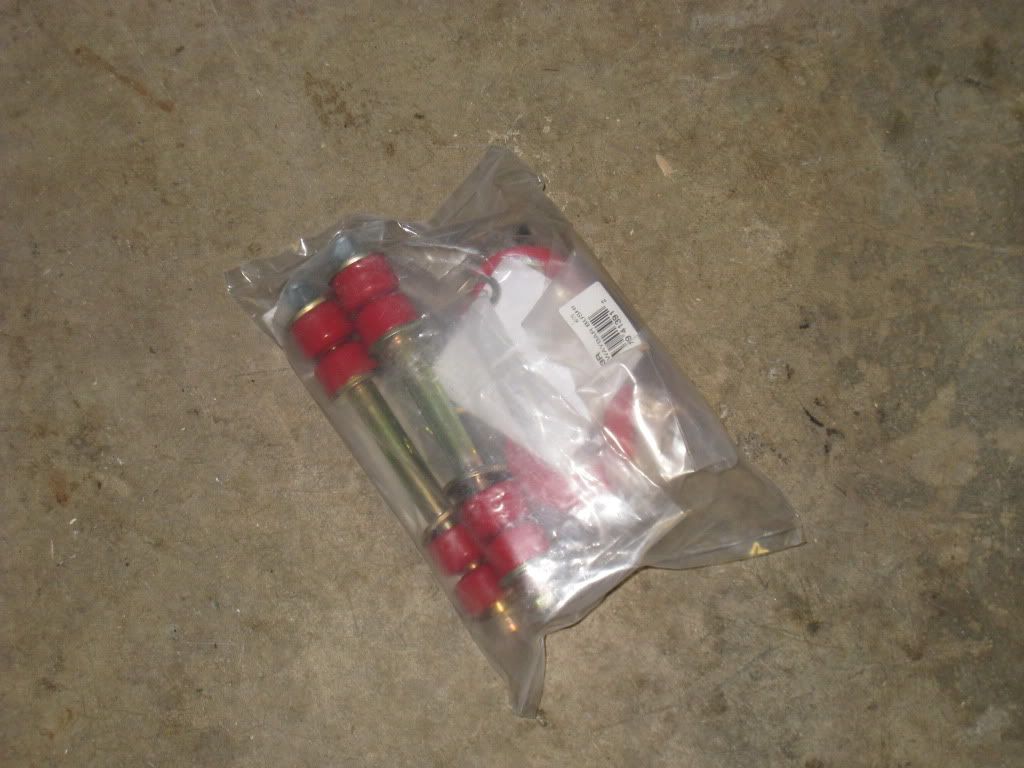
here are my much needed to be installed poly motor mounts. i have had these for over a year and made the mistake of not installing (or purchaseing them) these before installing my long tube headers. sure taking the head off will make this easier but it will still be a pain in the butt. but just look at how nice they are...cant wait to abuse the **** out of them

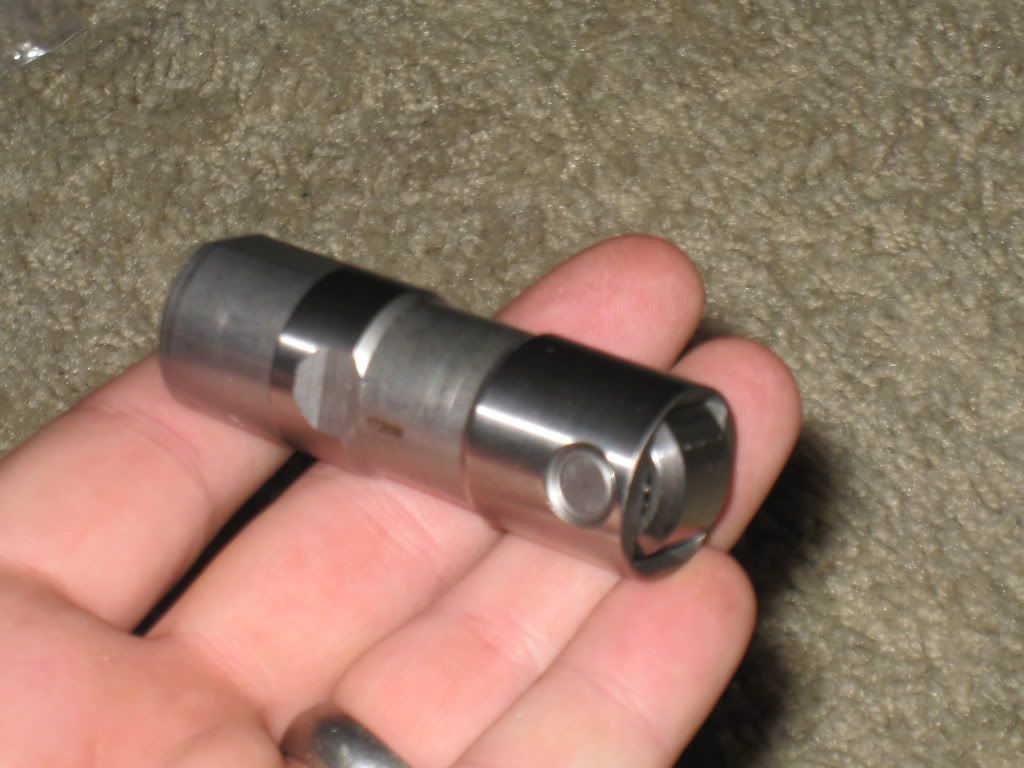
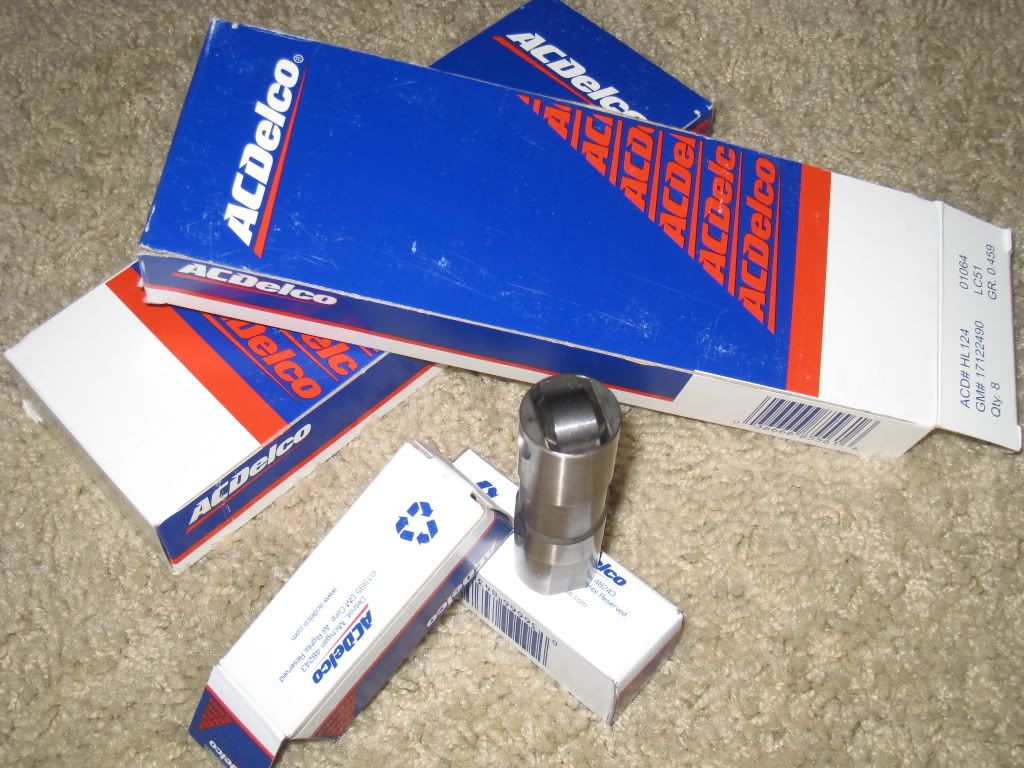
Here are the ridiculously strong yet reliable and cheap LS7 lifters. i think it is funny that it came in an AC Delco box...but hey, cant beat good GM engine technology. some of the stuff they make is the best stuff you can get for the money.
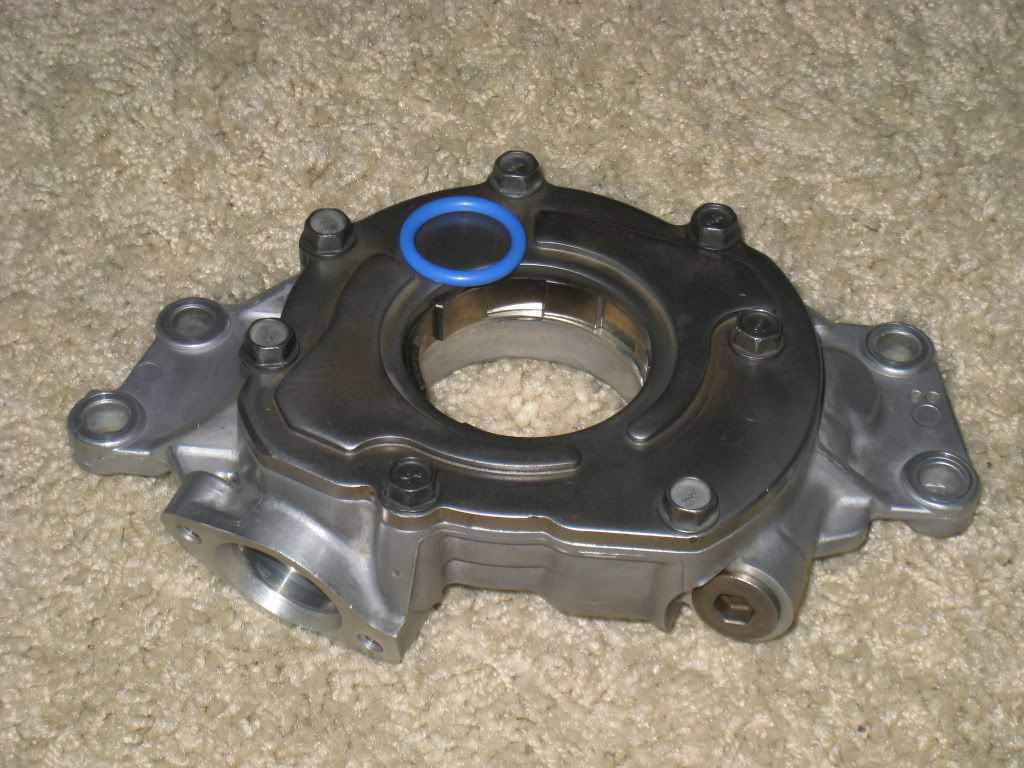
This is my TSP LS6 ported and shimmed oil pump. it was not nessesary to install a new pump, but with 130,000 miles on the clock, i wanted to replace as many internal moving parts as i could. more oil pressure the better!
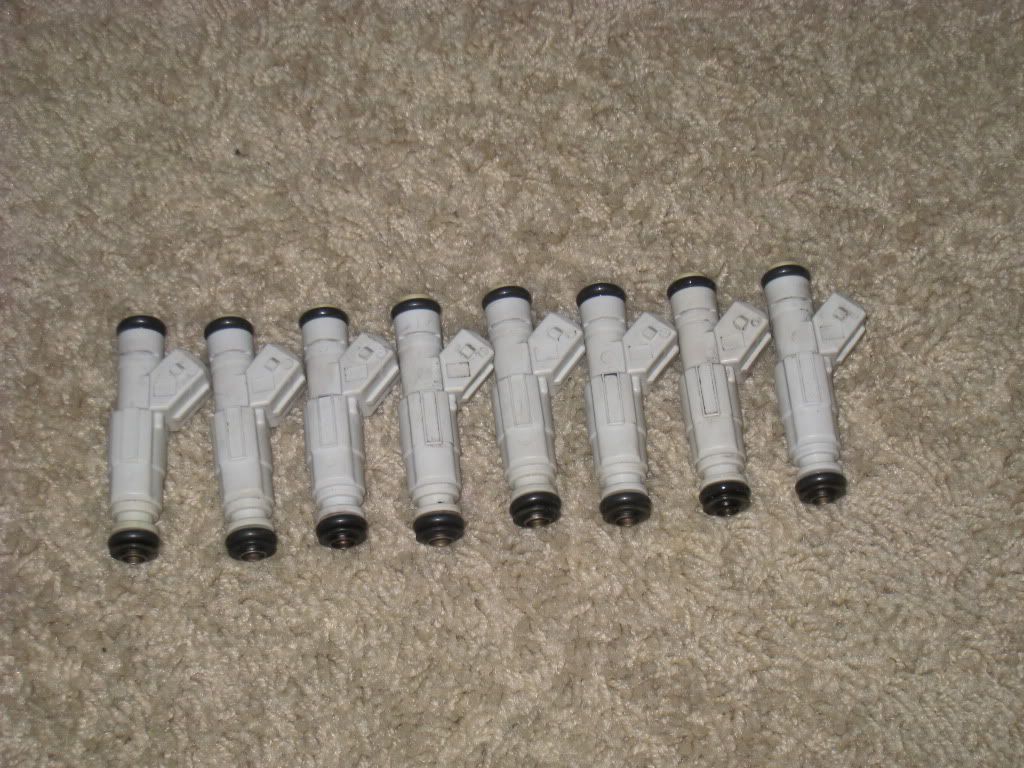
FAST 36lb (@ 3 bar...approximately 41.7lb @ 4 bar) injectors. these are just to insure that the fuel injectors never run over 80% duty cycle, and to replace those crap 26.6lb injectors they put on the 1999-2000 cars. what the hell were they thinking!
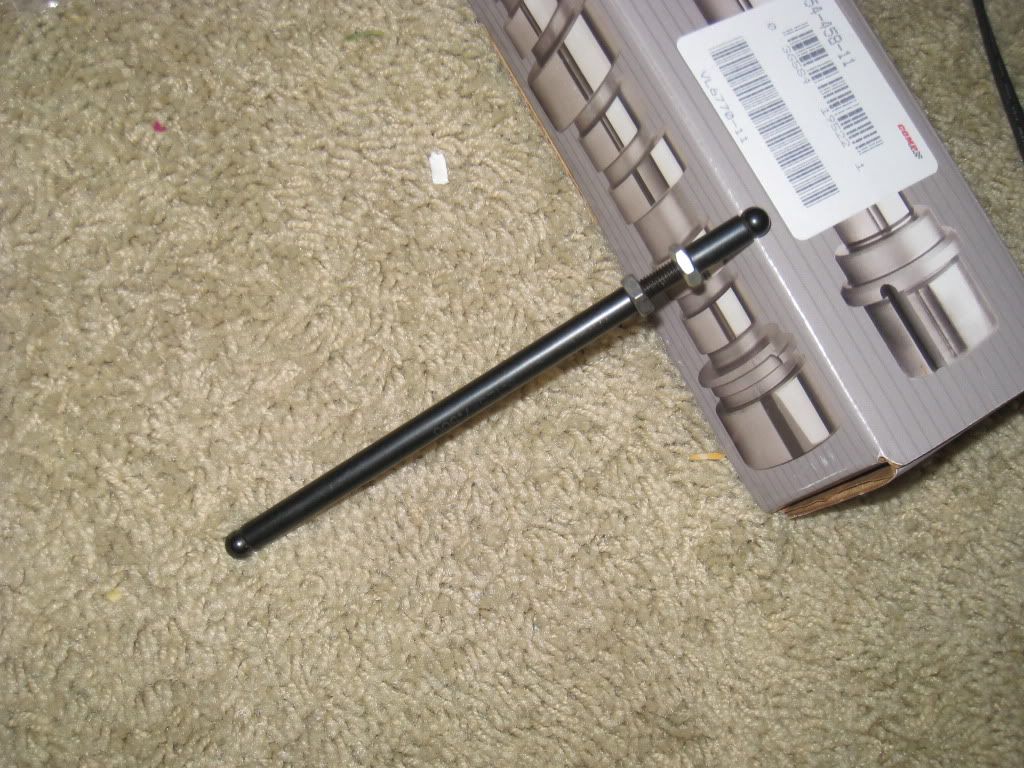
Trick flow pushrod length checker. there was no way i was just gonna wing it and throw a bunch of money at random length pushrods...that is just to much of a headache
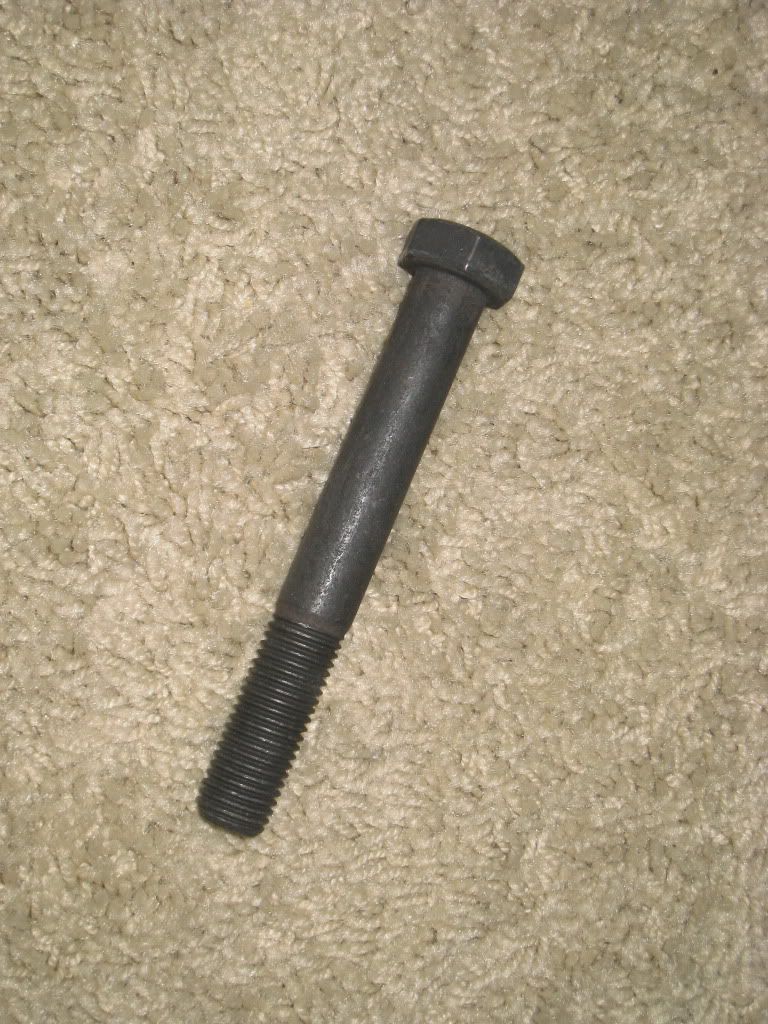
longer crank pulley bolt, cause $7 for easy insurance of not damaging a $200 part just seems right...dont u think?
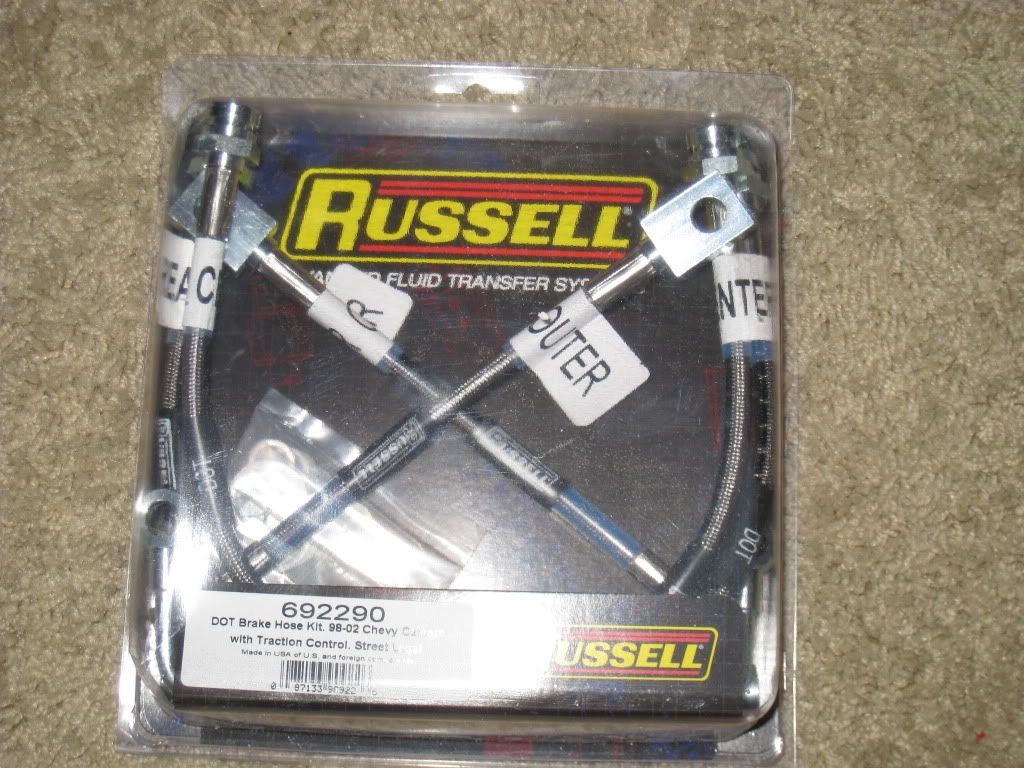
Stainless steel braided brake lines. i have seen rubber hoses explode on my jeep while wheeling and i am gonna be seeing autocross where temps will get crazy hot...so these are good insurance that i wont loose my brakes and crash into a wall or something. stopping is good 4 u and good 4 me
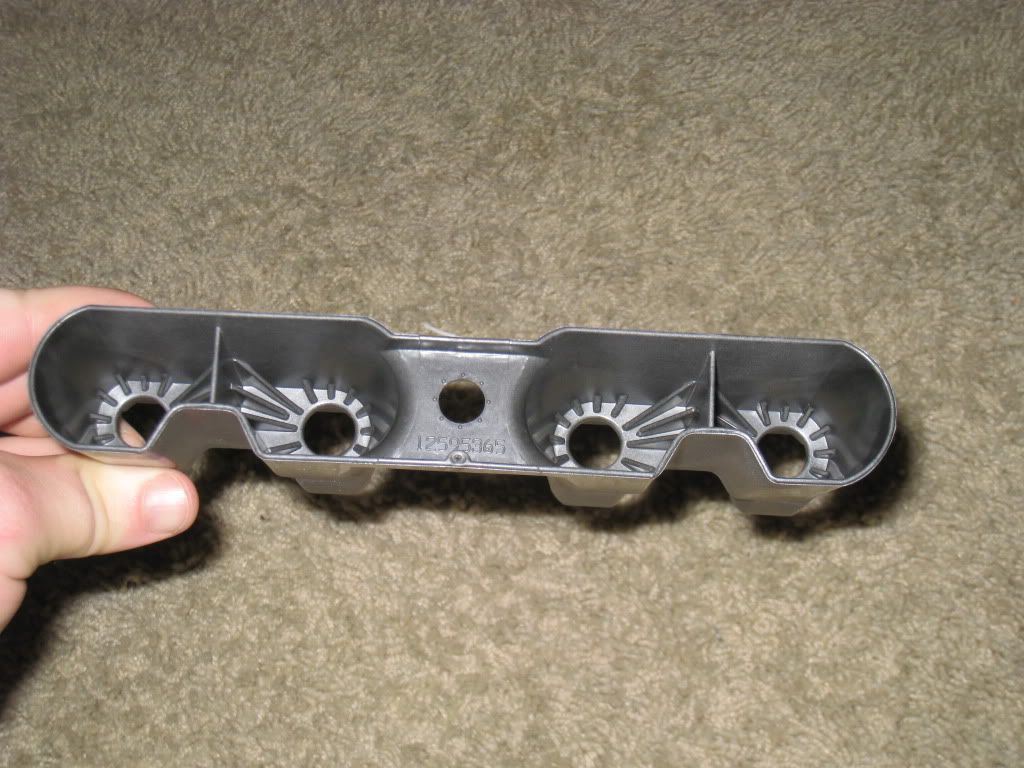
not necessary but just cause they cost $6 each, y the hell wouldn't you replace these! i replaced the LS1 lifter retainers with the LS2 type, they are stronger (even though i have never seen an LS1 retainer break)
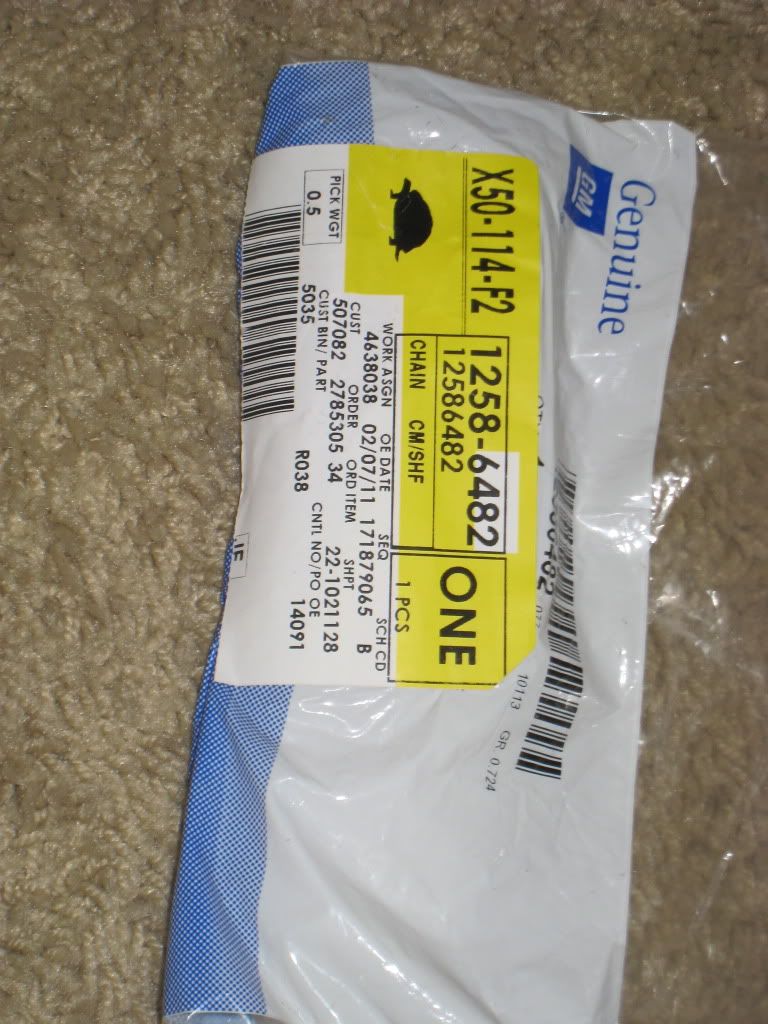
LS2 timing chain, i left it in the package till i am ready to soak and install it...dont want dirt in there now do i
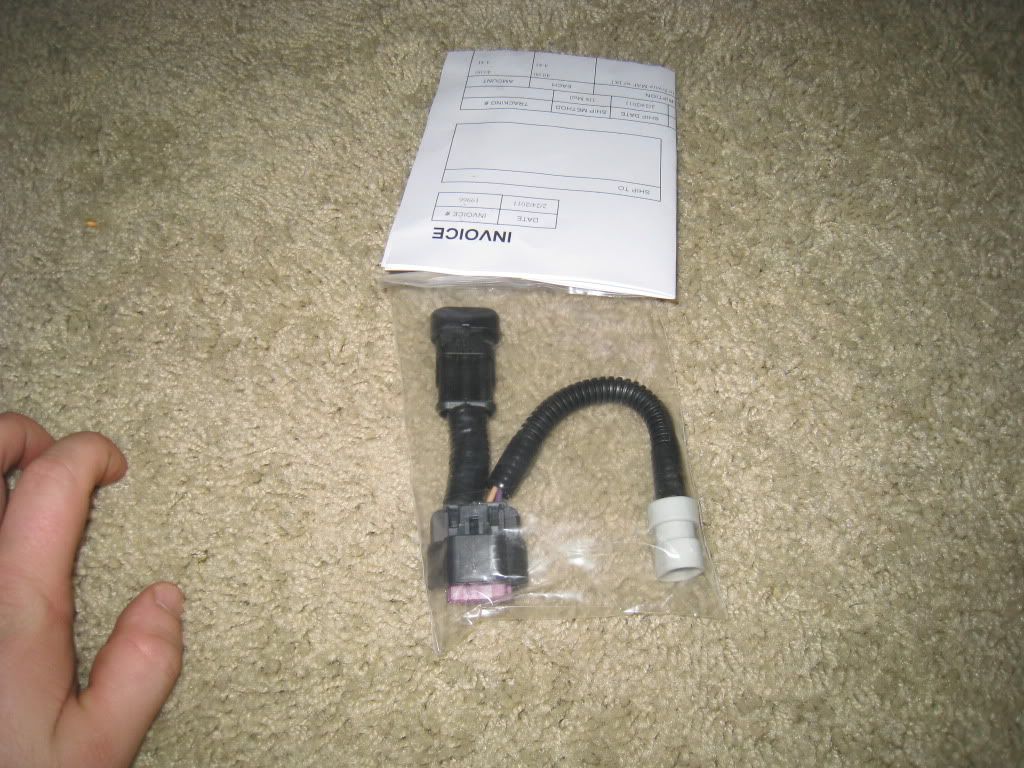
this is the 5-3 pin adapter to run a 85mm MAF sensor on an LS1 engine with a stock harness, it has the 2 pin connector to be able to use the integrated IAC sensor so no need to drill my FTP 98mm lid
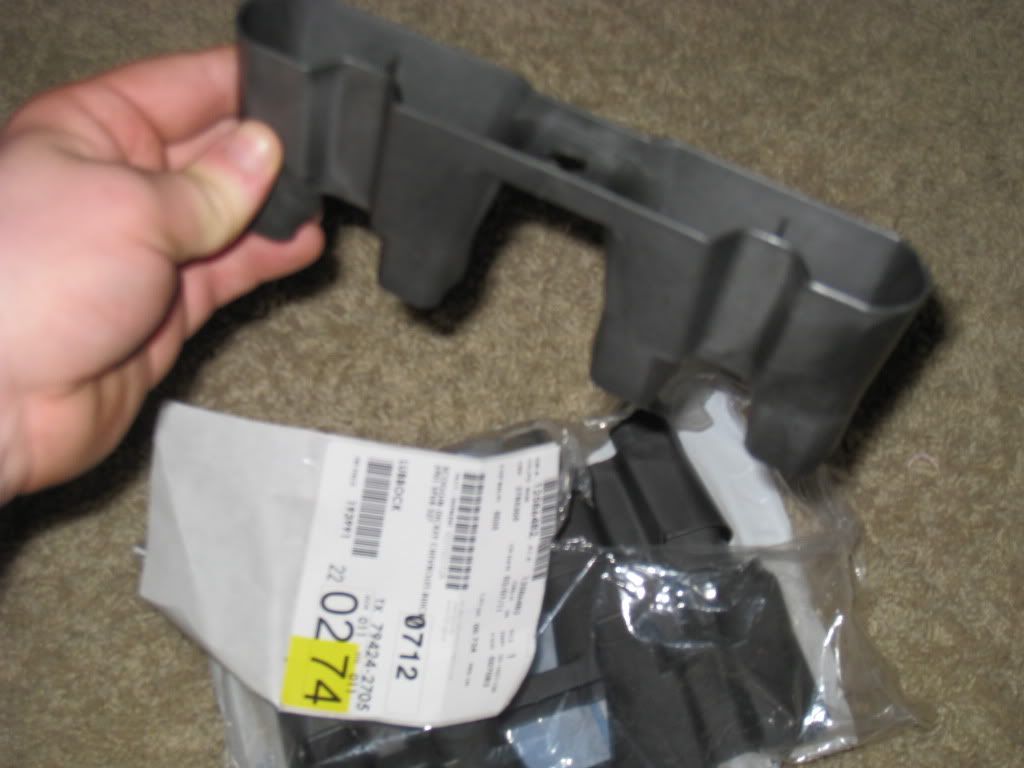
This is the Drivers side power window regulator, my spring fell of mine a year ago and it is slowly killing my motor. it cost me $30 or something like that from A1 Auto. good investment, i also have the window fixes for both the passenger side and drivers side ready to be installed
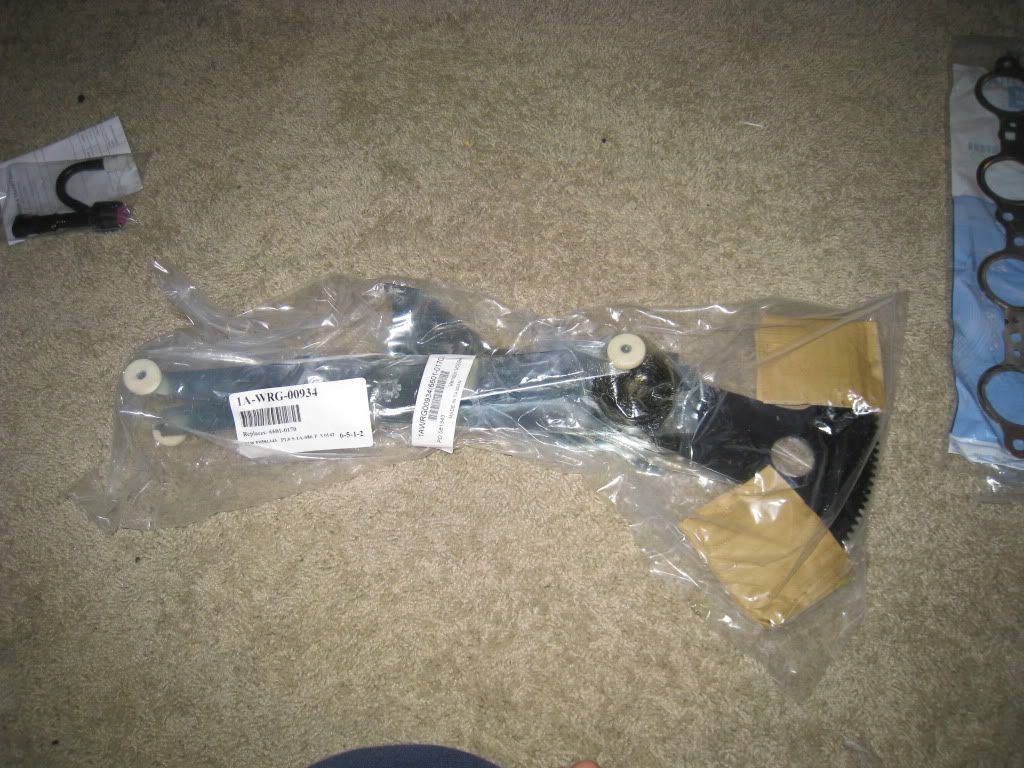
and here is a pic of all the parts together, i have new exhaust maniford gaskets some where in there, i am still waiting for my 5.3 stage 2.5 heads (62cc) and heads and cam install kit (includes .040 cometic head gasket, new crank pully bolt, head bolts, all other needed gaskets, and seals
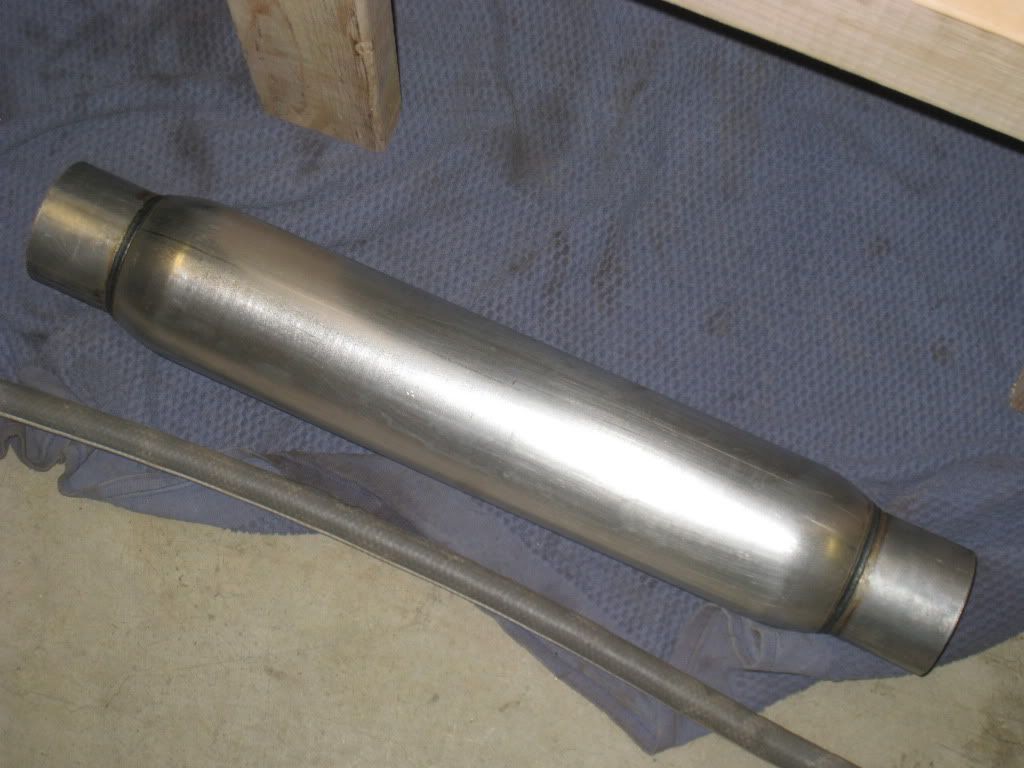
here is my new Dynomax 23.5" bullet (longest one they have)to replace my SLP LM resonator...try to quiet it down some without really restricting the exhaust any more.
looking forward to picking up my baby and installing all these goodies! till then, i will keep you posted. please feel free to comment of add anything to my list that i dont have that i should replace. all the parts in the pics is everything i have (vise the heads and install kit) so far and everything in my sig. open for suggestions if there are any and comments are welcome. thanks for reading my long thread and there will be more to come!
today was a good day. i got a whole box of AWESOME PARTS!!! (over the last couple weeks i have been collecting parts in anticipation of getting my car back next week!) here is a list of the parts i have gotten so far.
Here is my new cam. it is one of the new LSR cams that have been out for a year or so but you don't see alot of them out there. comp cams suggested this cam for a high performance street application, and said they make great power down low with an exellent peak around 6500 or so. the cam specs out to 227/235 .614/.621 113+4. i specificly got this cam to run with the smaller runners of the 5.3 head with the supperior intake flow with the good exhaust flow. the shorter runners and the 11.1:1 compression i am gonna be running will really wake this cam up! dynamic compression will be just around 8.8:1
Here are the sexy new LSL lobes that are found on the LSR comp cams ground camshafts...mmm mmm mmmmmmmm...GOOD!
here is the cam card...if you needed anymore information then i gave already
here are my much needed to be installed poly motor mounts. i have had these for over a year and made the mistake of not installing (or purchaseing them) these before installing my long tube headers. sure taking the head off will make this easier but it will still be a pain in the butt. but just look at how nice they are...cant wait to abuse the **** out of them
Here are the ridiculously strong yet reliable and cheap LS7 lifters. i think it is funny that it came in an AC Delco box...but hey, cant beat good GM engine technology. some of the stuff they make is the best stuff you can get for the money.
This is my TSP LS6 ported and shimmed oil pump. it was not nessesary to install a new pump, but with 130,000 miles on the clock, i wanted to replace as many internal moving parts as i could. more oil pressure the better!
FAST 36lb (@ 3 bar...approximately 41.7lb @ 4 bar) injectors. these are just to insure that the fuel injectors never run over 80% duty cycle, and to replace those crap 26.6lb injectors they put on the 1999-2000 cars. what the hell were they thinking!
Trick flow pushrod length checker. there was no way i was just gonna wing it and throw a bunch of money at random length pushrods...that is just to much of a headache
longer crank pulley bolt, cause $7 for easy insurance of not damaging a $200 part just seems right...dont u think?
Stainless steel braided brake lines. i have seen rubber hoses explode on my jeep while wheeling and i am gonna be seeing autocross where temps will get crazy hot...so these are good insurance that i wont loose my brakes and crash into a wall or something. stopping is good 4 u and good 4 me
not necessary but just cause they cost $6 each, y the hell wouldn't you replace these! i replaced the LS1 lifter retainers with the LS2 type, they are stronger (even though i have never seen an LS1 retainer break)
LS2 timing chain, i left it in the package till i am ready to soak and install it...dont want dirt in there now do i
this is the 5-3 pin adapter to run a 85mm MAF sensor on an LS1 engine with a stock harness, it has the 2 pin connector to be able to use the integrated IAC sensor so no need to drill my FTP 98mm lid
This is the Drivers side power window regulator, my spring fell of mine a year ago and it is slowly killing my motor. it cost me $30 or something like that from A1 Auto. good investment, i also have the window fixes for both the passenger side and drivers side ready to be installed
and here is a pic of all the parts together, i have new exhaust maniford gaskets some where in there, i am still waiting for my 5.3 stage 2.5 heads (62cc) and heads and cam install kit (includes .040 cometic head gasket, new crank pully bolt, head bolts, all other needed gaskets, and seals
here is my new Dynomax 23.5" bullet (longest one they have)to replace my SLP LM resonator...try to quiet it down some without really restricting the exhaust any more.
looking forward to picking up my baby and installing all these goodies! till then, i will keep you posted. please feel free to comment of add anything to my list that i dont have that i should replace. all the parts in the pics is everything i have (vise the heads and install kit) so far and everything in my sig. open for suggestions if there are any and comments are welcome. thanks for reading my long thread and there will be more to come!
Last edited by trans_am7935; 07-10-2011 at 02:51 PM.
 03-06-2011, 08:48 AM
#3
TECH Fanatic
iTrader: (7)
Join Date: Oct 2005
Location: Western NY
Posts: 1,416
Likes: 0
Received 0 Likes
on
0 Posts

You are doing a lot of the same stuff I am right now. I almost bought that cam too. I ended up going a different direction and bought an FTI StreetSweeper. I'll be really interested to see what happens with your setup and that cam though.
Edit: Also would like to know what the part # on the trickflow pr length checker is.
Edit: Also would like to know what the part # on the trickflow pr length checker is.
03-10-2011, 07:52 PM
#5
well i am picking up my T/A on Saturday and i couldn't be more excited. i am so excited my wife told me to leave the room and stop talking about it! cant wait to get it back and haul ***!!! i drive a jeep around on 35" mud terrains and 4.56 gears for my DD right now, it doesn't go very fast, so it will be a big change for not driving it for like 4 months.
SUPER EXCITED!!!!!!!
SUPER EXCITED!!!!!!!
03-21-2011, 07:58 PM
#6
well i finally picked up my T/A!!! i was so excited but then i hit a freak hail storm in north cali and we got 5" of hail in 10 min, and San Francisco got a tornado! wut a crappy weekend. so i got stuck there for a day but made it up the next day. damn that thing is scarry to drive in the snow!
on another note, i came home to a bunch of beautiful things. here are some more pictures of the things that showed up!
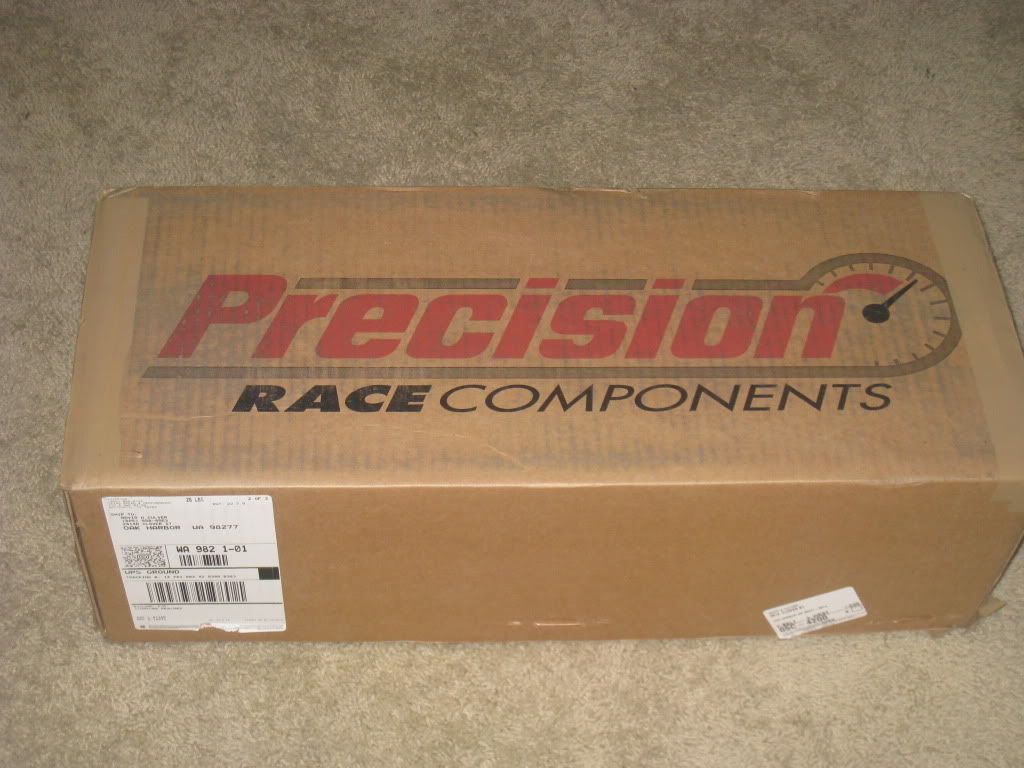
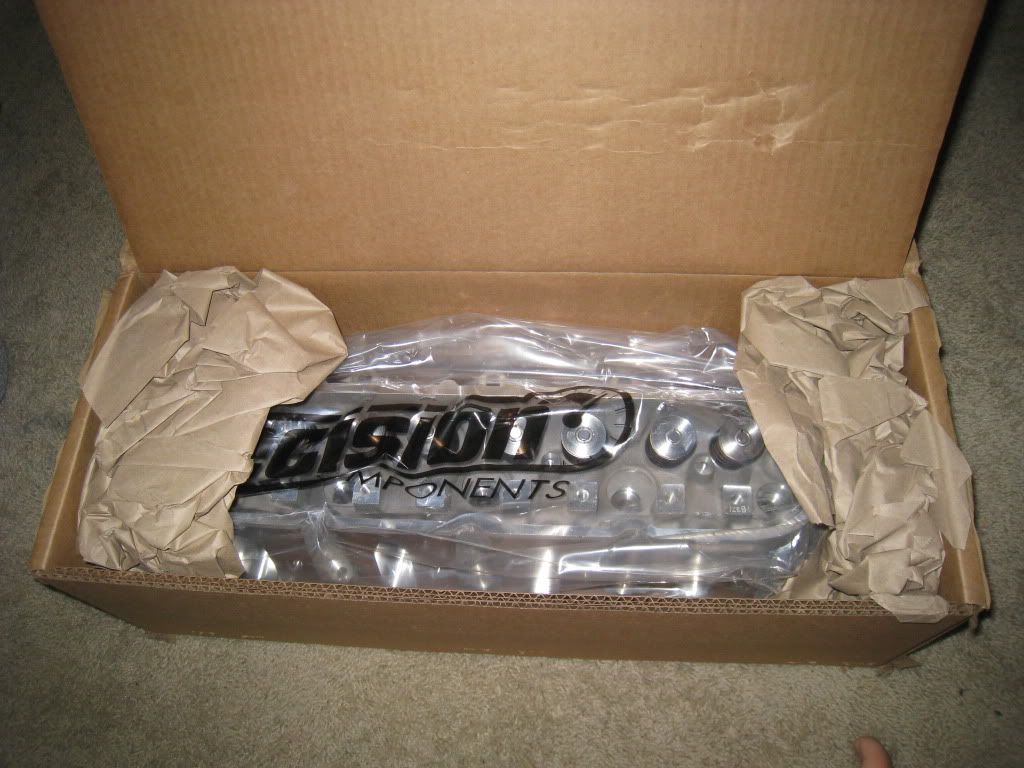
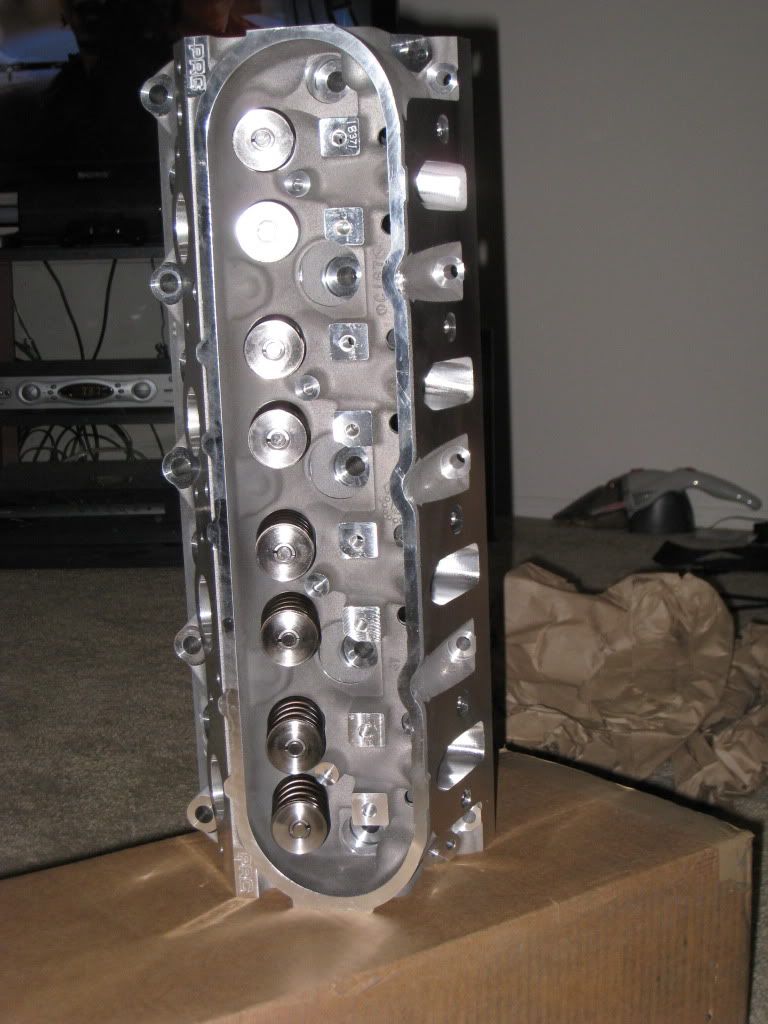
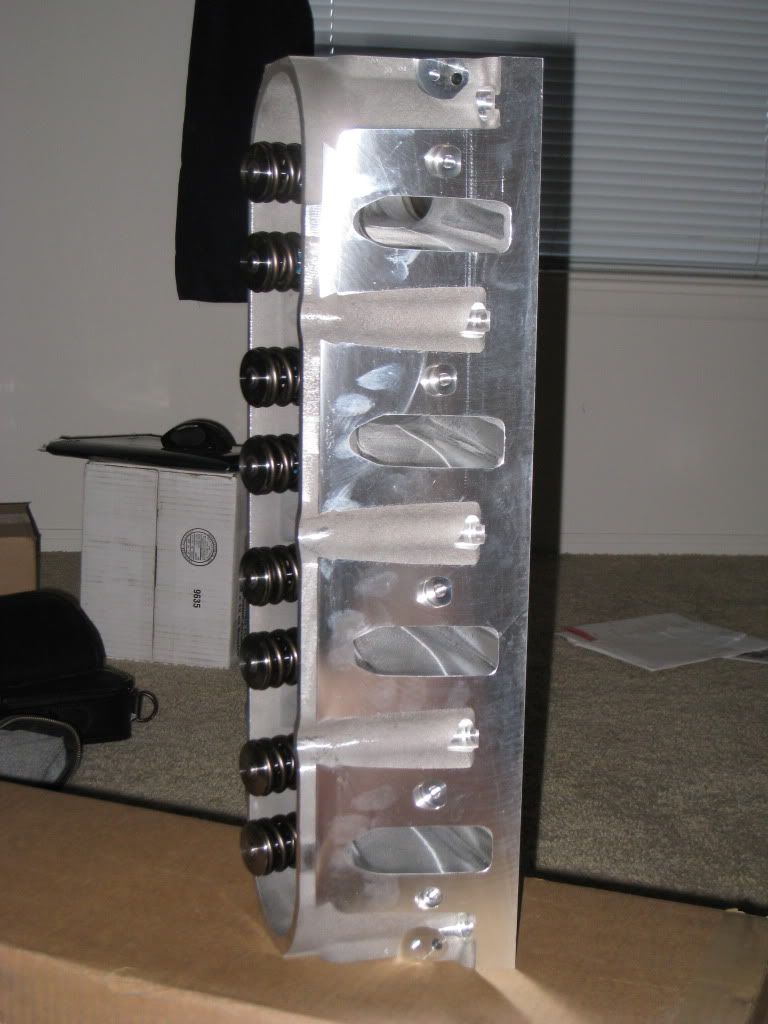
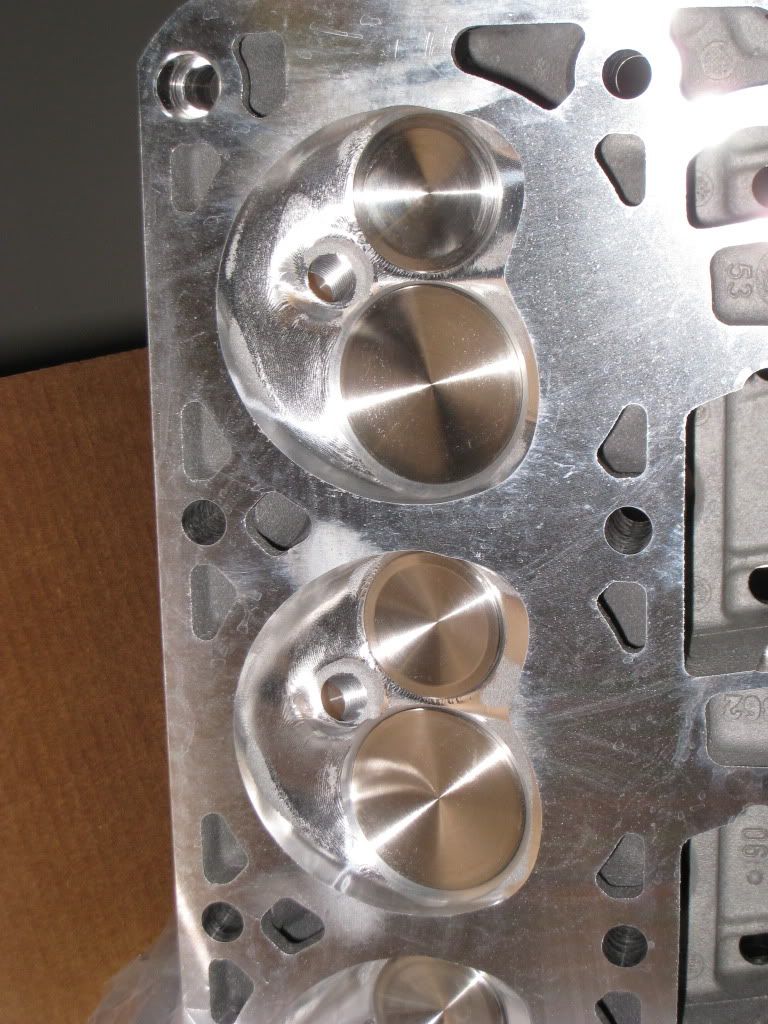
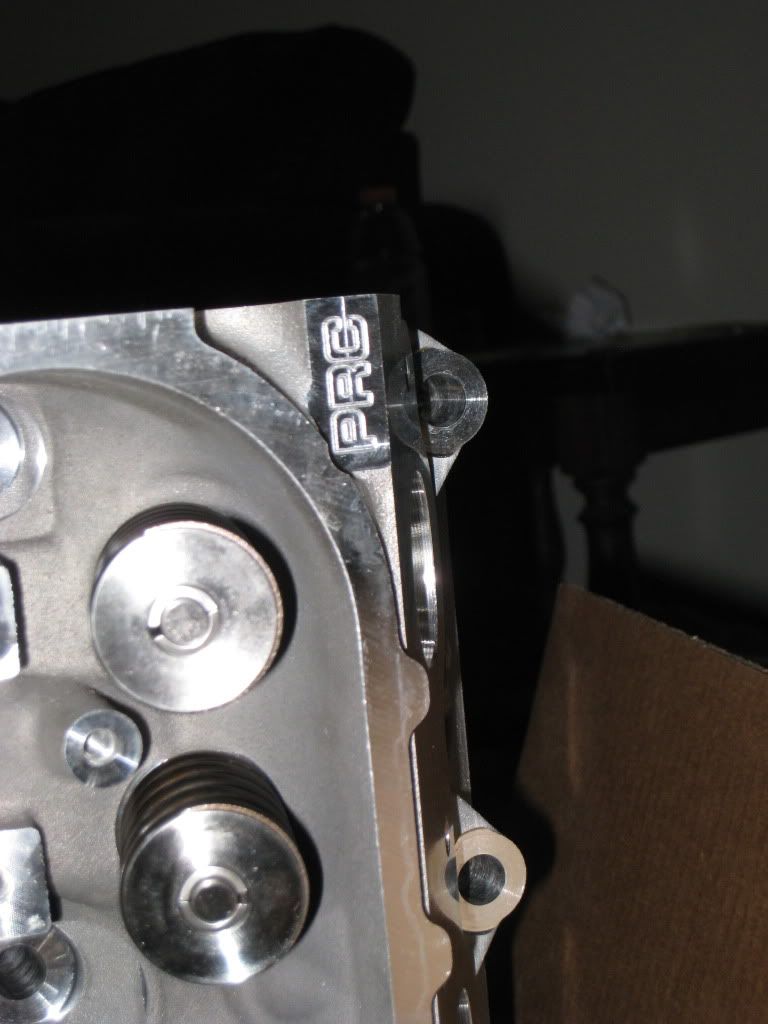
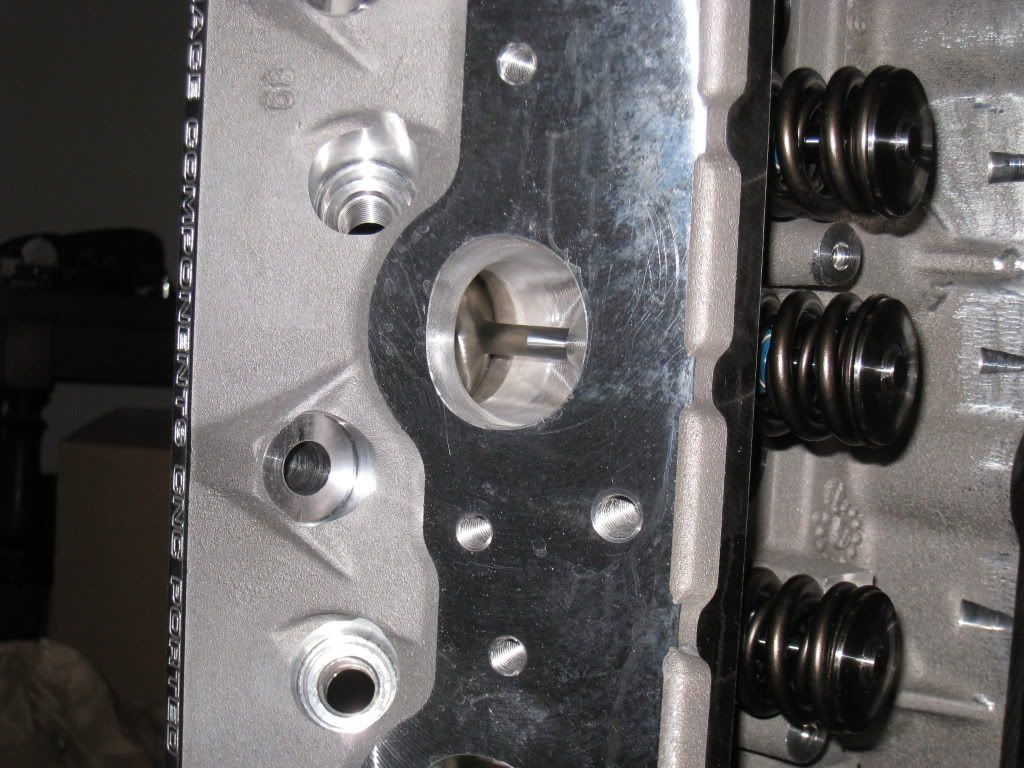
Here is my PRC 5.3 stage 2.5 heads, with EHT .675 duel springs, titanium locks and retainers, and powder metal valve guides/seals

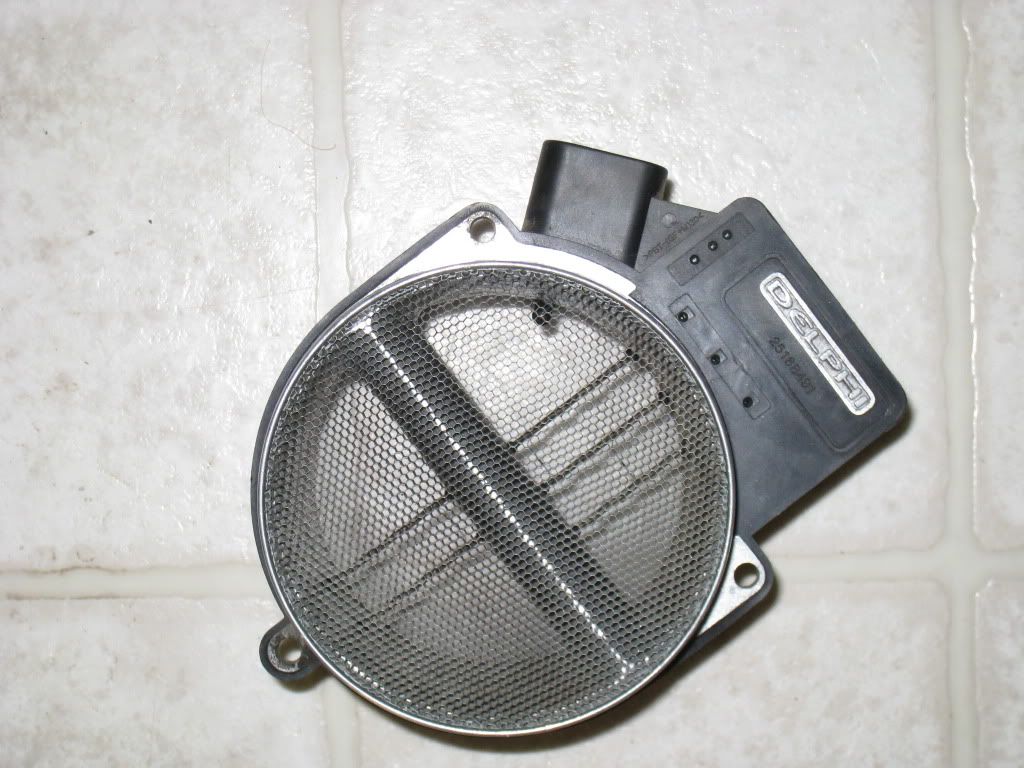
2003 Z06 85mm MAF
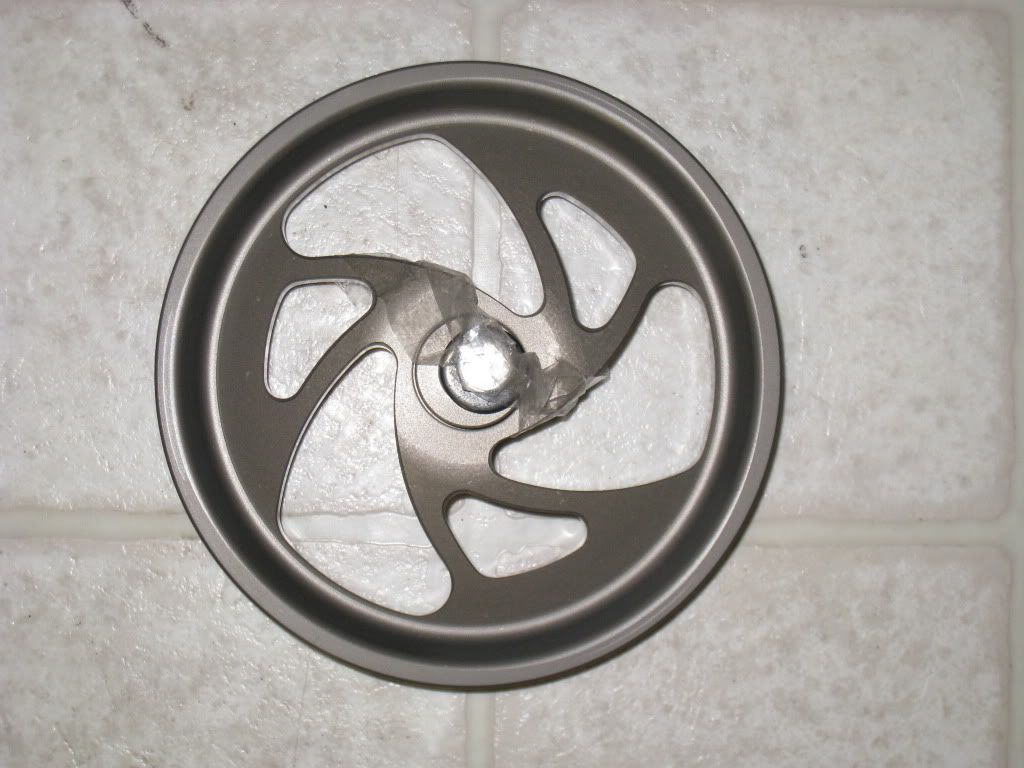
TurnOne power steering pulley (broke my other one replacing the pump, what a piece of ******* **** it is, the pulley i mean)
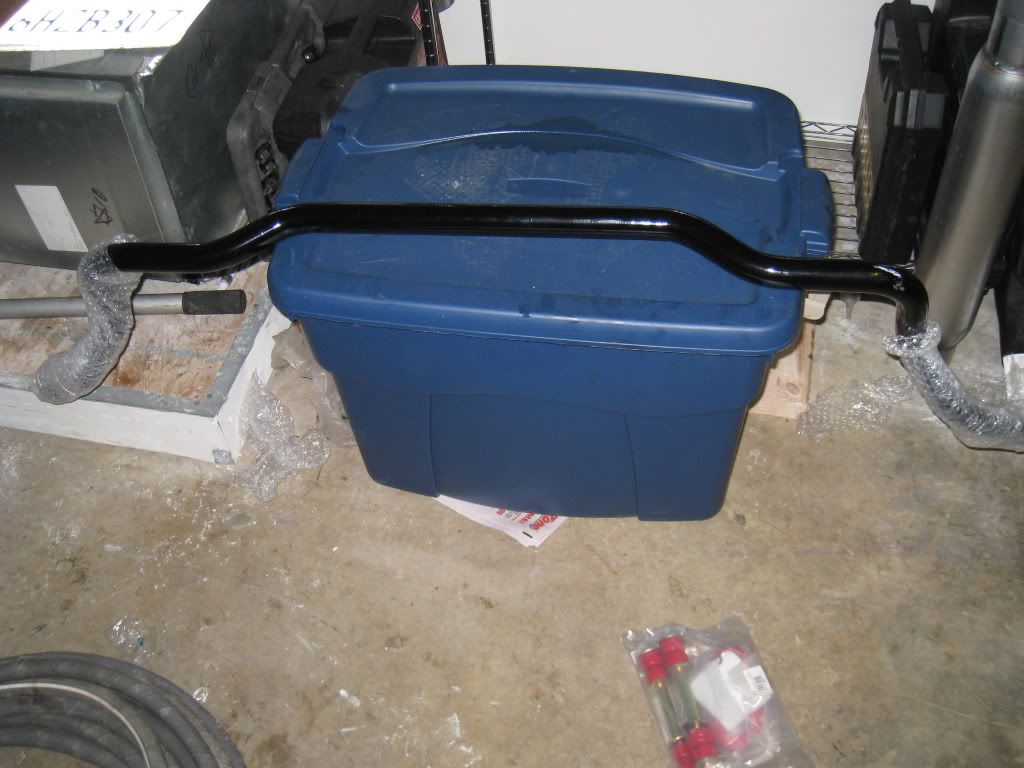
UMI 35mm solid chromoly front swaybar. this bitch weighs 33lbs!!
on another note, i came home to a bunch of beautiful things. here are some more pictures of the things that showed up!
Here is my PRC 5.3 stage 2.5 heads, with EHT .675 duel springs, titanium locks and retainers, and powder metal valve guides/seals
2003 Z06 85mm MAF
TurnOne power steering pulley (broke my other one replacing the pump, what a piece of ******* **** it is, the pulley i mean)
UMI 35mm solid chromoly front swaybar. this bitch weighs 33lbs!!
03-21-2011, 08:08 PM
#7
i look forward to taking this thing apart and installing all these goodies i got. still waiting for
Brand new stock replacement water pump
99-02 oil pressure sensor
LS1 timing chain gears
that is all i can remember right now, but seems like everything should be here my friday, and i should start by build this weekend!
Brand new stock replacement water pump
99-02 oil pressure sensor
LS1 timing chain gears
that is all i can remember right now, but seems like everything should be here my friday, and i should start by build this weekend!
Trending Topics
03-21-2011, 09:36 PM
#8

i was told that i can use the ls2 chain on the ls1 sprockets. how much do you think your setup will make. i was almost going with that setup but i decided to go with a eps 226/234 cam and trick flow 215. i know the heads are more expencive but alot of guys have wished they went with them first. i was told by the end i will make 470rwhp. hope idont go broke doing it. bought the lisfters trays and chain and pump you did. good luck.
03-21-2011, 09:50 PM
#10
the TFS heads are some of the best out there right now, but for half the price, and better springs, i am really happy. i have seen people make over 480rwhp with these heads, so my aim is for 450-460rwhp with my cam selection and supporting mods.
03-23-2011, 07:19 PM
#12
now before i get all started on pulling the heads, what is the best way to check the PTV clearance. i know TSP told me my cam would clear the heads, but i want to check anyway. also any method suggested could you explain them cause i dont know how to do any of them.
03-30-2011, 02:37 AM
#14
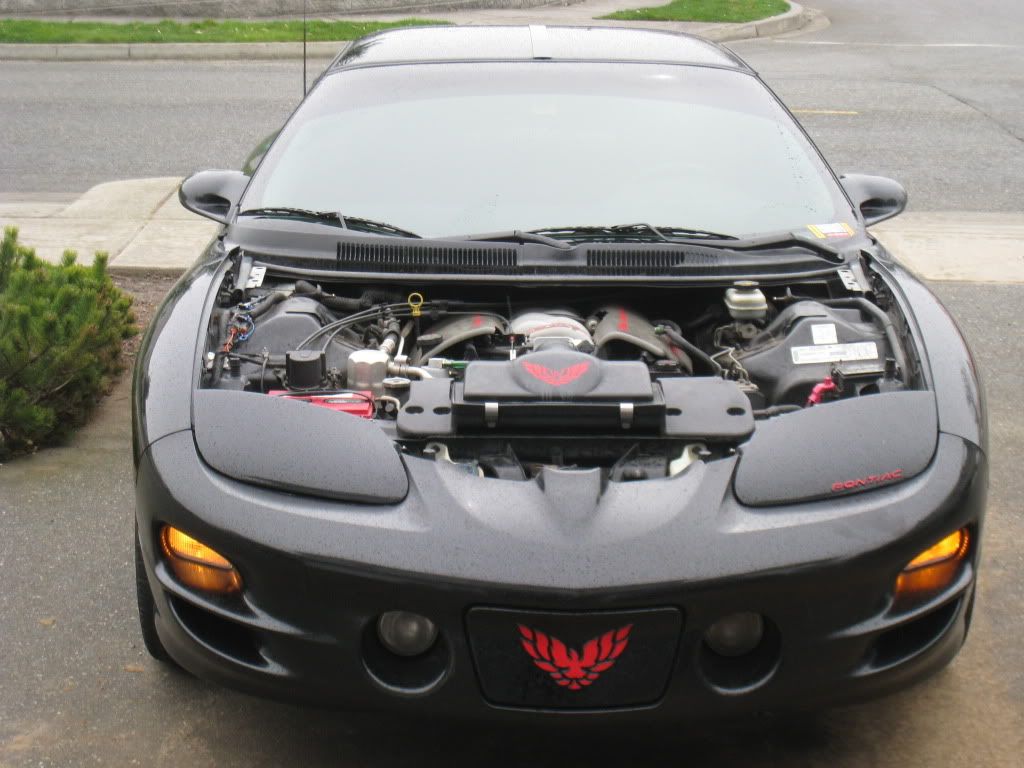
started taking off parts. now my hood paint wasn't in the best (and pealing a little under the hood near the ram air nostrils) so i dropped it off an the paint shop, and drove it home. i only had to drive like 5 or 6 miles away but once i passed this woman cop the look on her face was priceless! she got right back in here car (she was in the middle of writing a ticket or something) and turned the lights on, flipped a bitch and started at me at full speed. now i wasnt about to get no ticket so a few quick turns and home i was. what a bitch! oh well. car looked pretty funny driving it without a hood, and wasn't any noticeably louder.
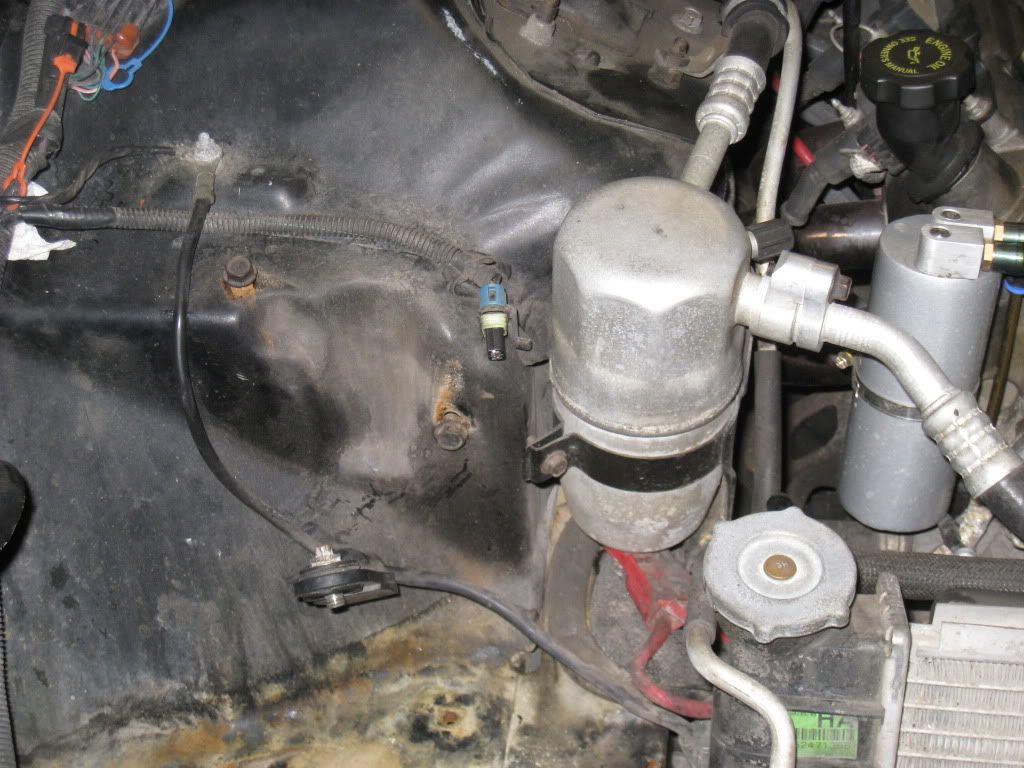
catch can is probobly gonna be lowered about 2-3 inches with longer hoses to add the gravity effect in the favor of the oil flow, and to make it look a little better so you can see those new heads under the hood
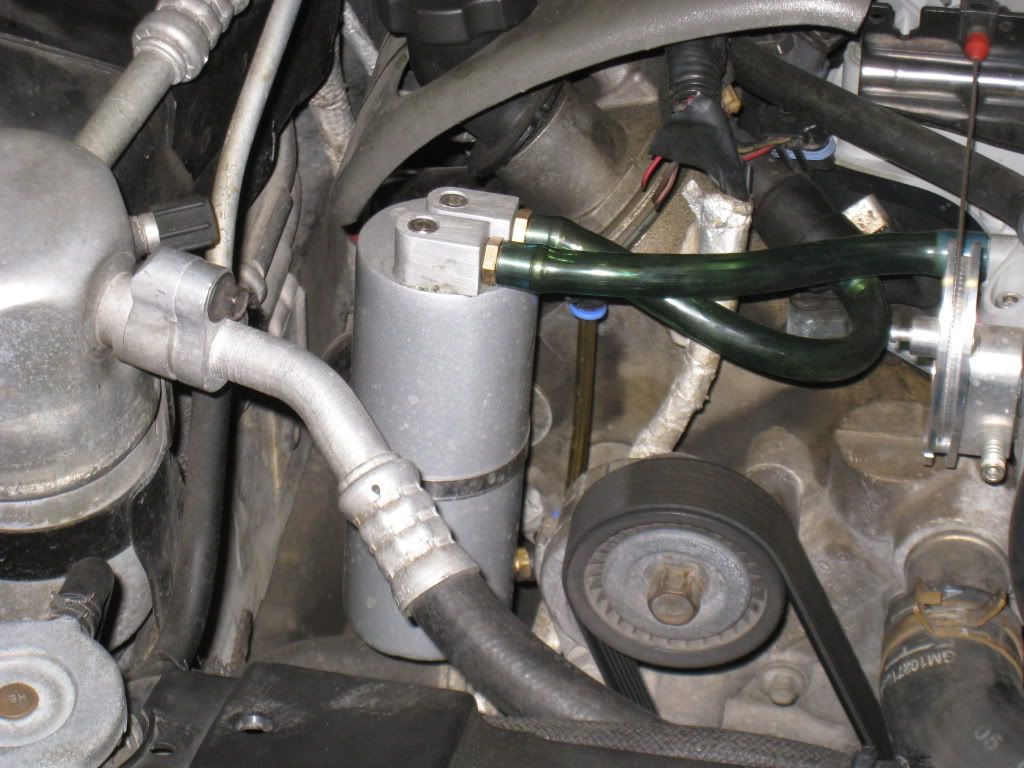
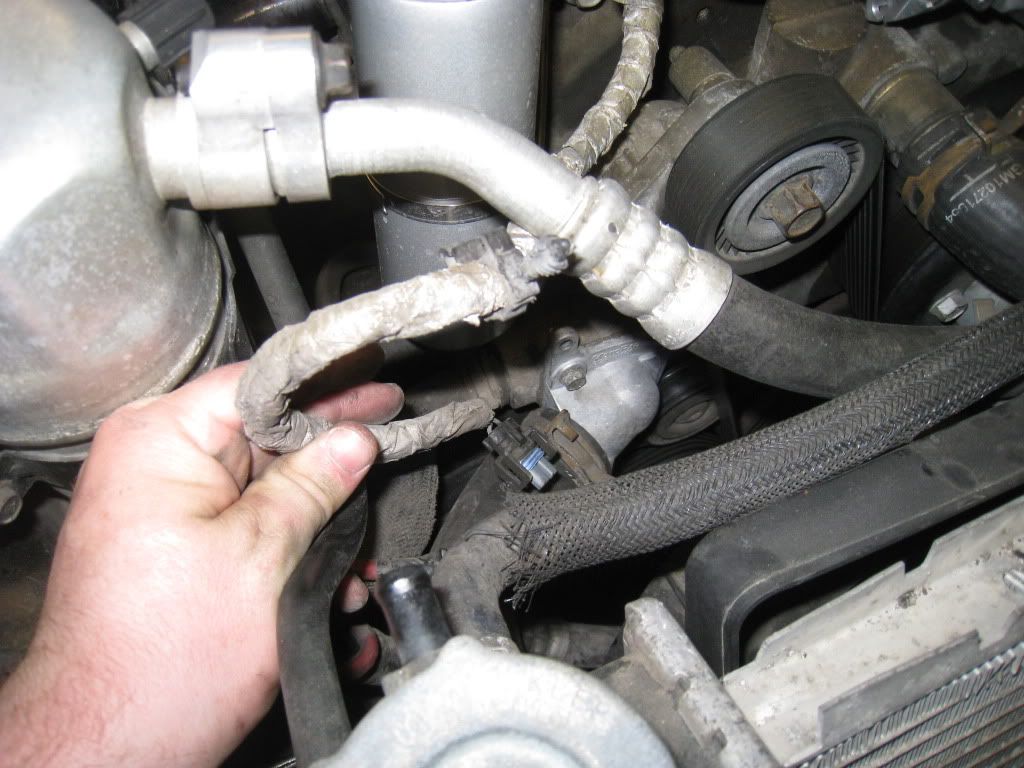
broken power steering pulley will be replaced. hasnt seem to cause me any problems but still. i got a turnone metal one, and it has holes cut out so the pump can be removed without taking the pulley off.

i bought this lid when i broke my original one laying on it too hard installing my LS6 intake a while back. i noticed it was not the ram air version after it arrived, an was a little pissed. now i am in the market for a replacement WS6 ram air lower intake box. damn those things are hard to find.
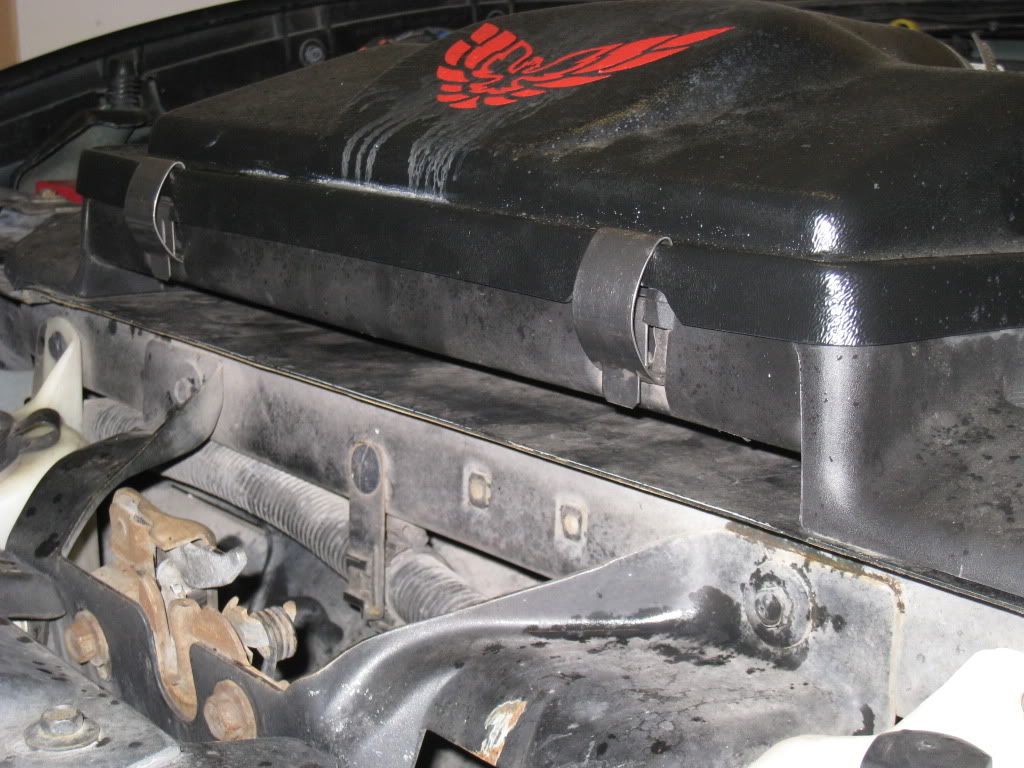
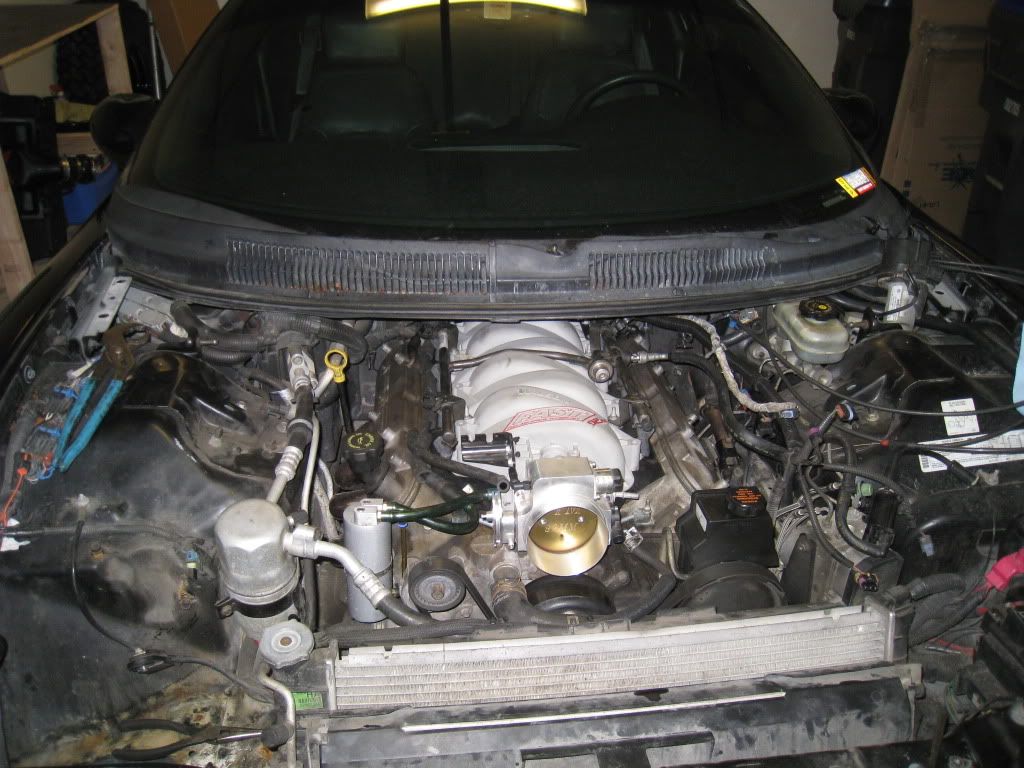
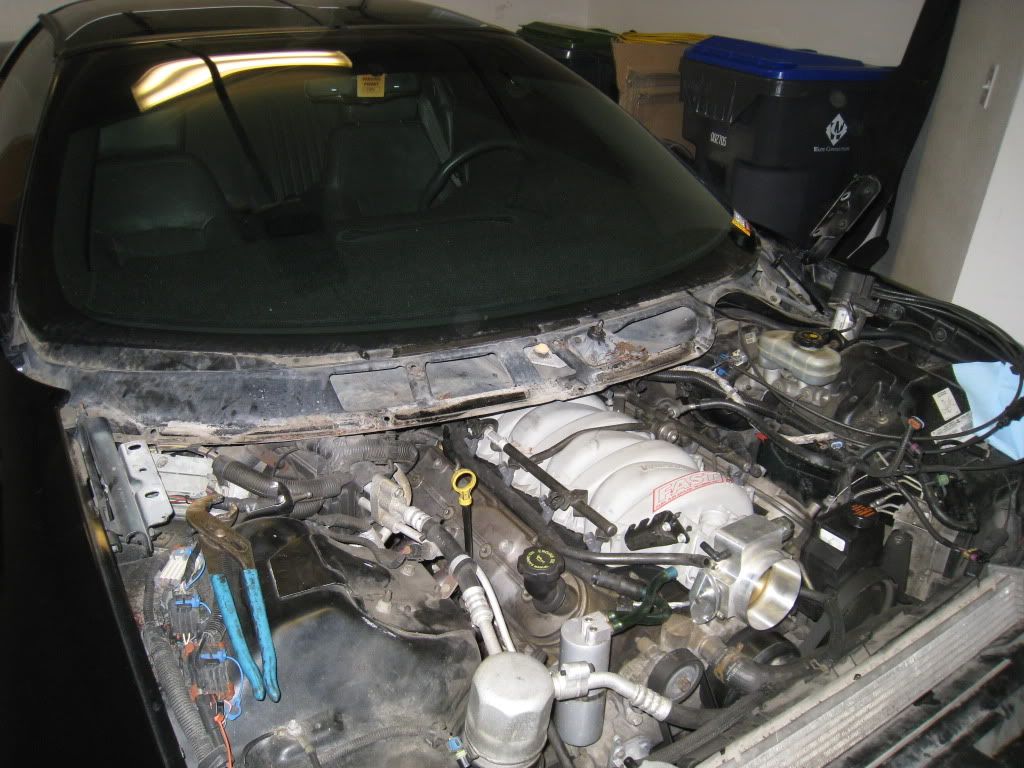
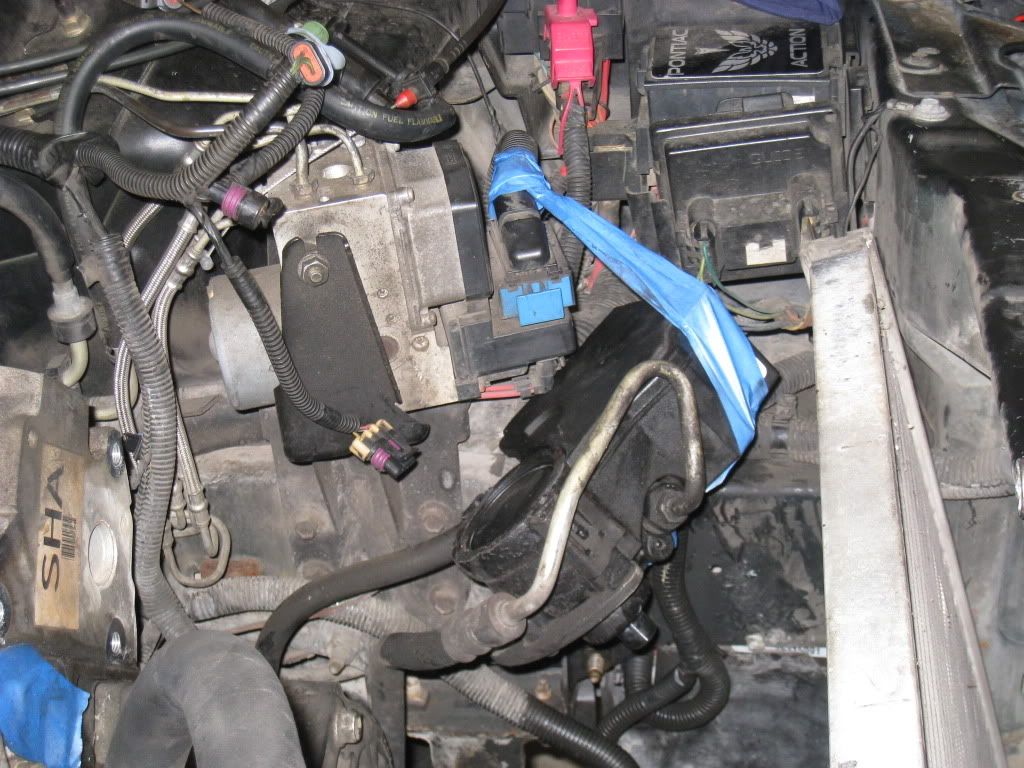
Radiator support/lower intake box, lid, MAF, bellow, and filter removed as one piece...the disassembly begins!


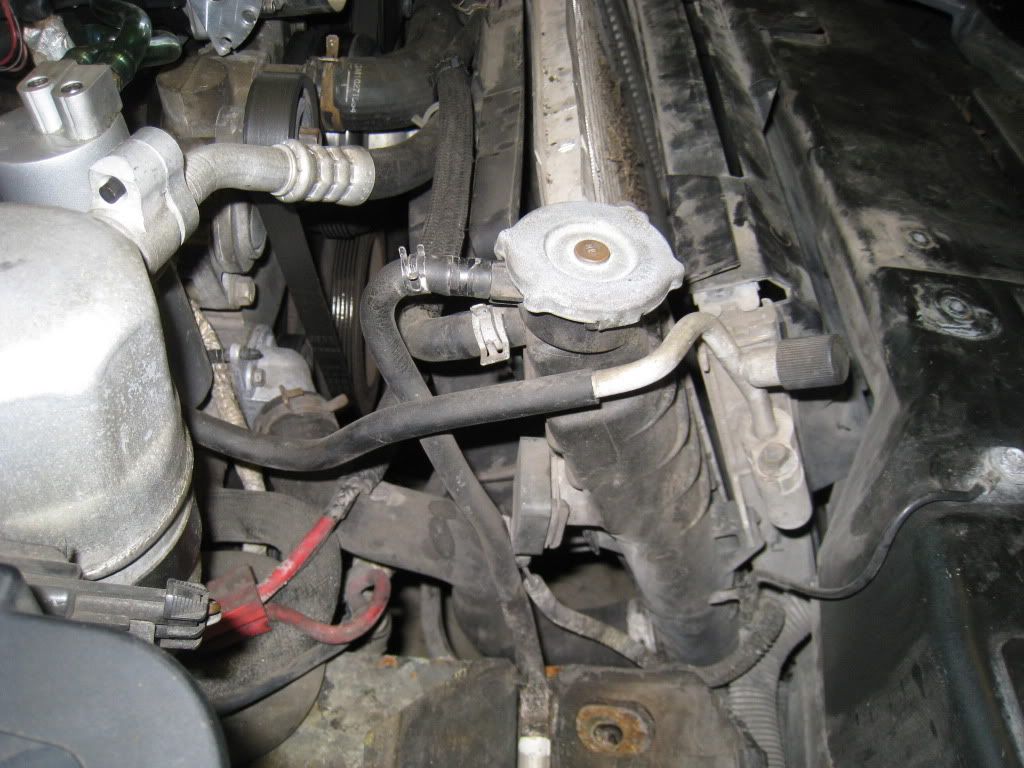
this is so i remember not to cross the lines when i put them back together. common mistake which causes major problems after heads and cam swap
battery removed. then then battery tray/overflow bottle removed...a little bigger then i thought.
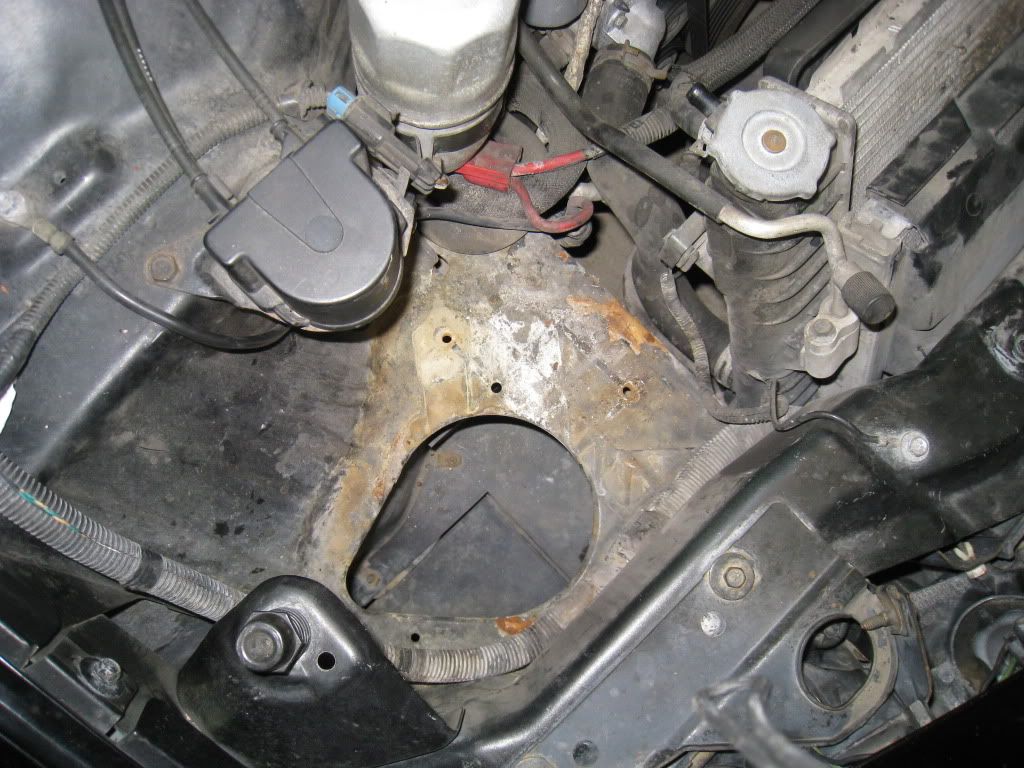
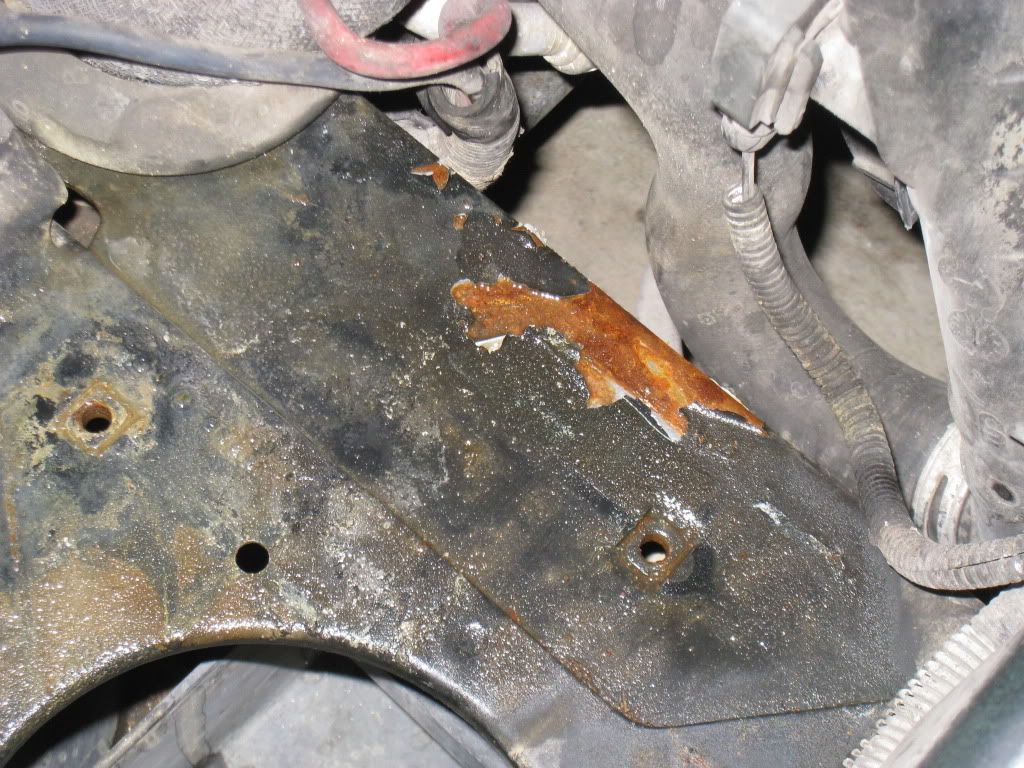
looks like i had a slow leak or previous leak that dripped and messed up the paint on the frame. looks like it will need a little restoring before the heads go on, but after the dreaded motor mounts go in.
catch can is probobly gonna be lowered about 2-3 inches with longer hoses to add the gravity effect in the favor of the oil flow, and to make it look a little better so you can see those new heads under the hood
broken power steering pulley will be replaced. hasnt seem to cause me any problems but still. i got a turnone metal one, and it has holes cut out so the pump can be removed without taking the pulley off.
i bought this lid when i broke my original one laying on it too hard installing my LS6 intake a while back. i noticed it was not the ram air version after it arrived, an was a little pissed. now i am in the market for a replacement WS6 ram air lower intake box. damn those things are hard to find.
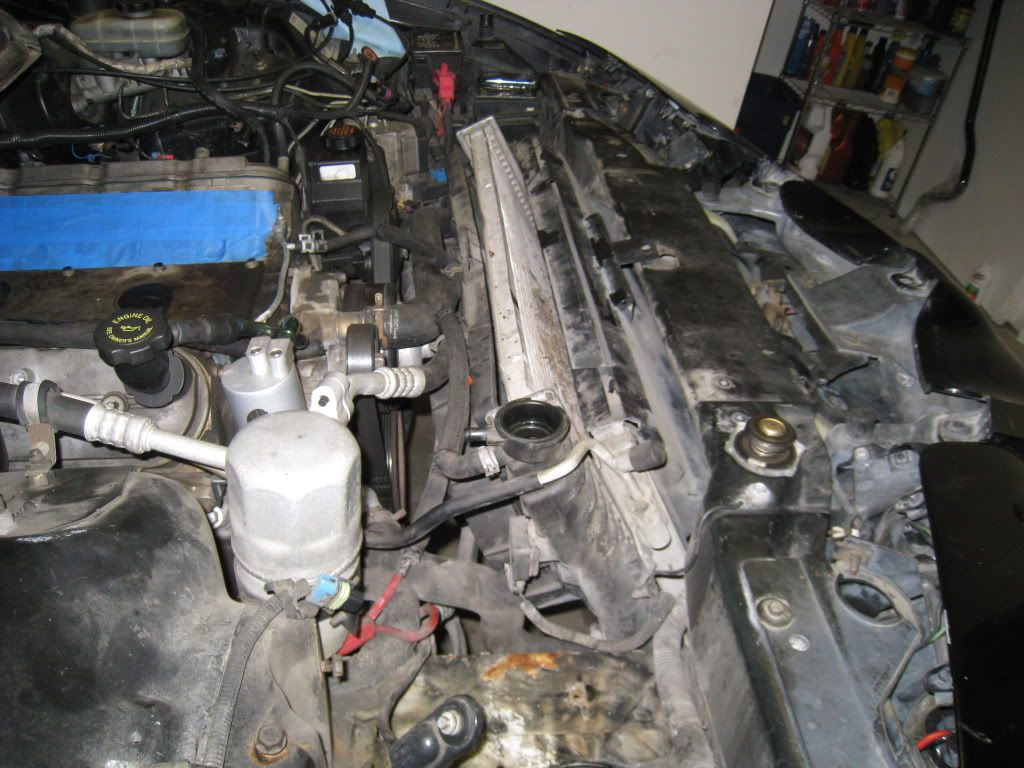
Radiator support/lower intake box, lid, MAF, bellow, and filter removed as one piece...the disassembly begins!
this is so i remember not to cross the lines when i put them back together. common mistake which causes major problems after heads and cam swap
battery removed. then then battery tray/overflow bottle removed...a little bigger then i thought.
looks like i had a slow leak or previous leak that dripped and messed up the paint on the frame. looks like it will need a little restoring before the heads go on, but after the dreaded motor mounts go in.
03-30-2011, 03:11 AM
#15
fuel rail covers pulled, will need to reshape these a little as the FAST intake is a little to big for them to clip to the fuel rails and more and were just sitting there.
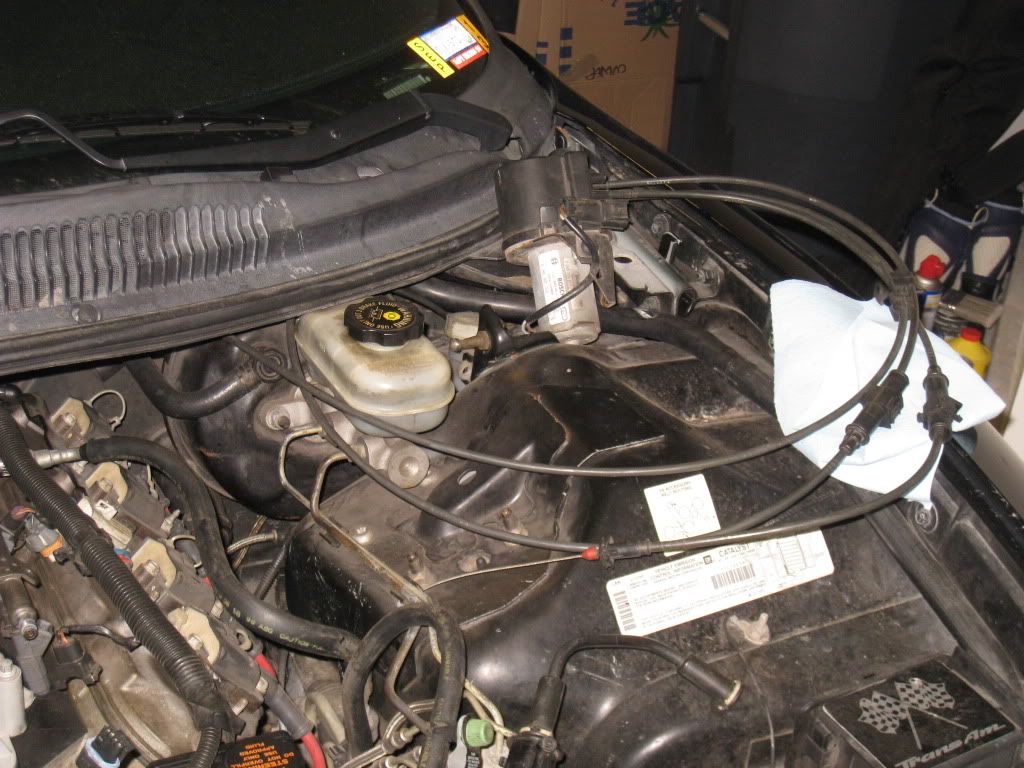
TCS system removed....trying to decide if i should just remove this entirely...doesn't work half the time anyway!
TCS system set off to the side, perfect little spot between the brake booster and the clutch fluid reservoir.
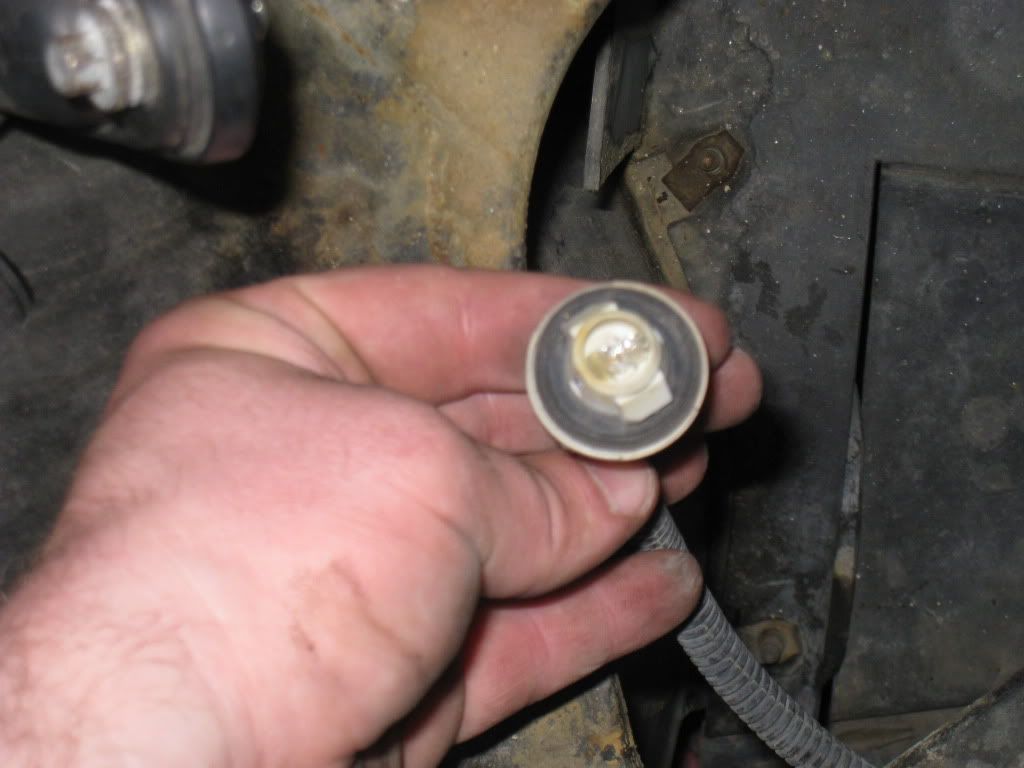
side marker bulb completly broke off inside the socket, this is gonna be a real freakin bitch to get out
Coil pack removed and labeled for each side
A/C disconnected, and photographed for reference later when i say "WTF does this go to?"
Wiring harness pulled up and out of the way, currently sitting behind the intake
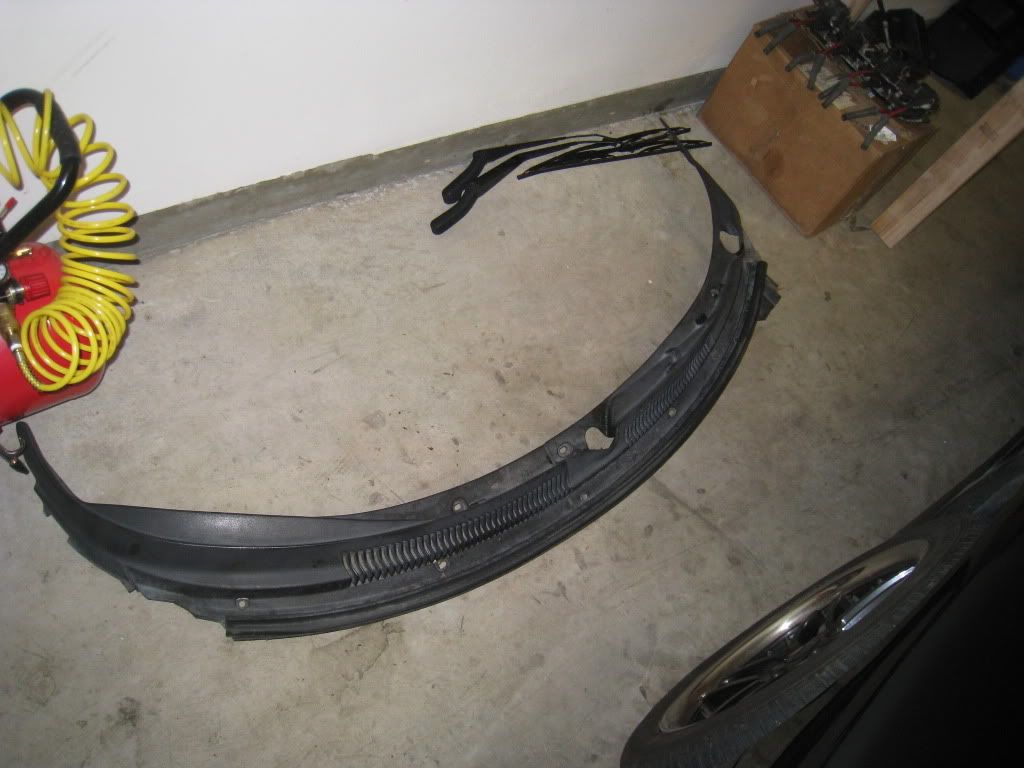
cowl removed for easier all around access.
set off to the side for now, just have to find a flat spot to put this bitch so it is not in the way the whole install
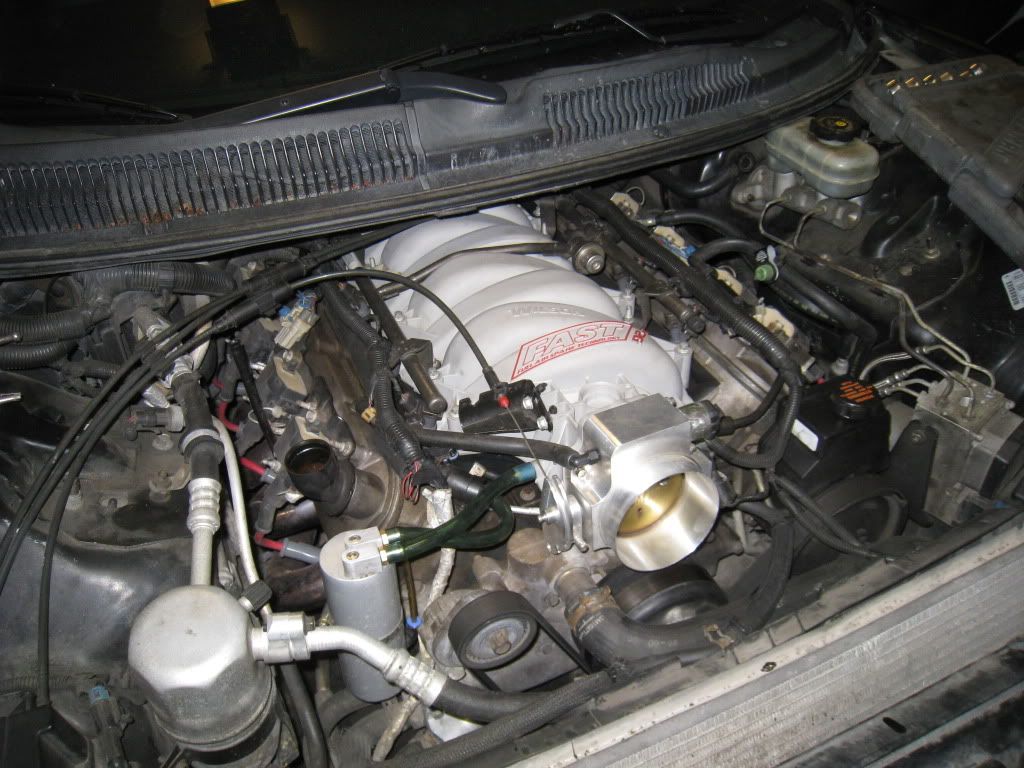
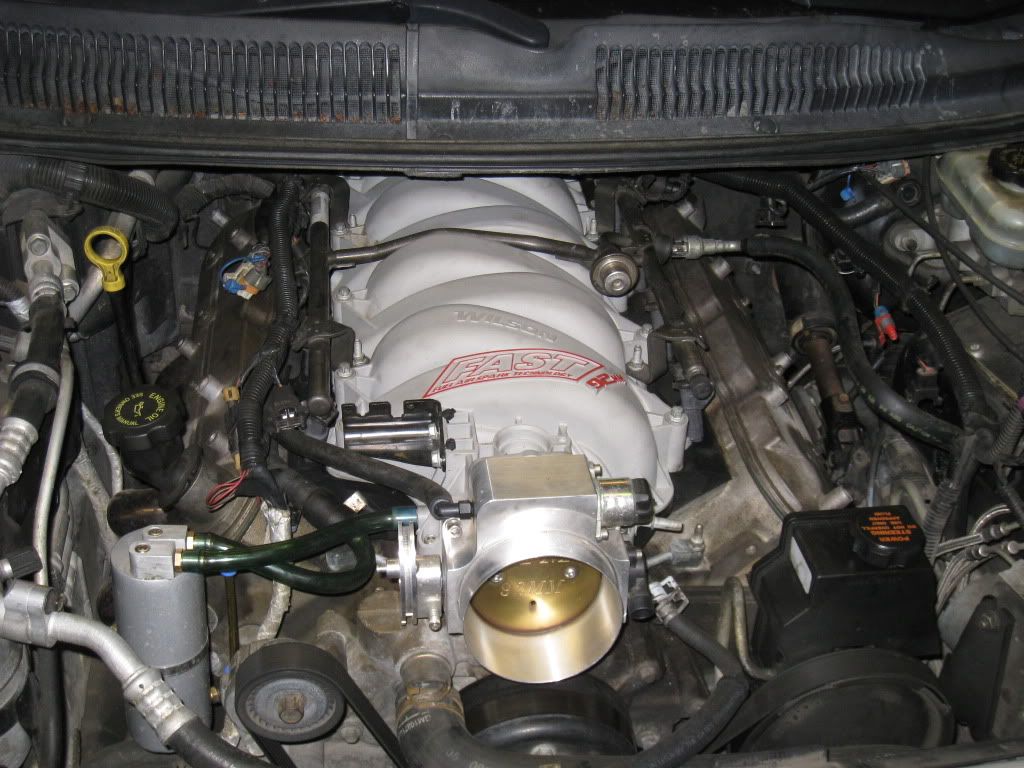
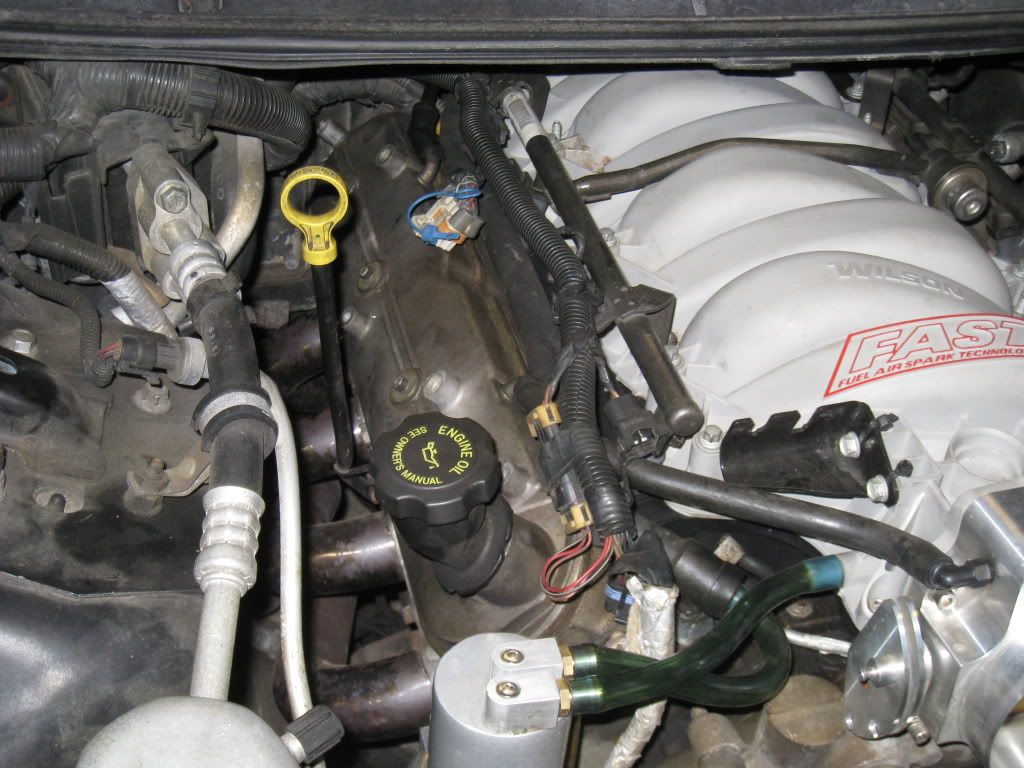
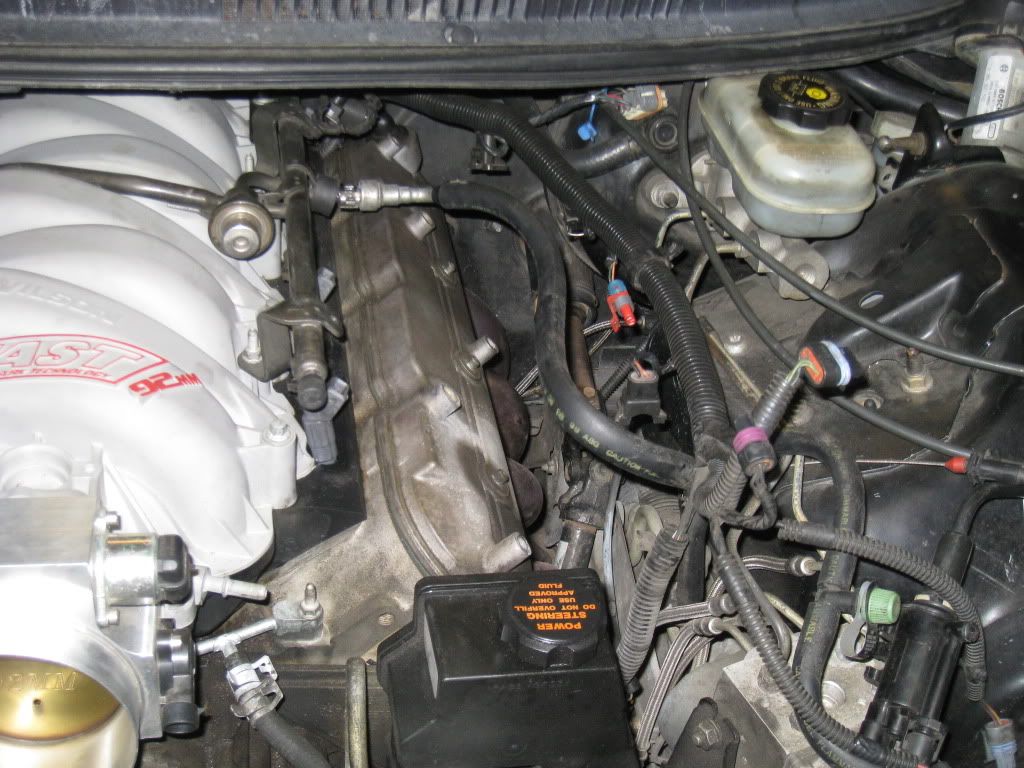
FAST intake removed. i have done this so many times now it took me like 20 minutes to do. routed the brake booster above the oil sensor last time as to not break it this time, it is getting replaced anyway cause it is giving me a bad reading, and dont want to replace it later when the intake goes back on.
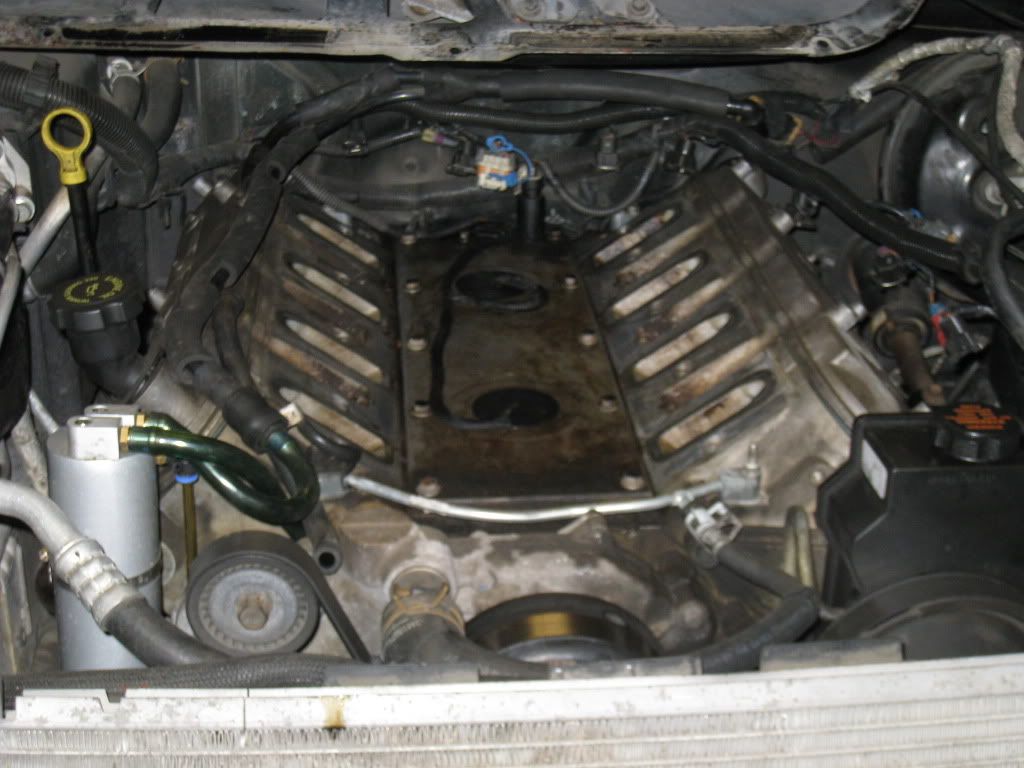
now that is a big pile of dirty crap. also see how on the last cylinder how the oil seems to be a little burned on to the intake runner, my assumption is this is caused by the block offs in the rear. it didn't look like this till after i put them on for my LS6 intake, i also didnt get the catch can till after i put my FAST intake on about 3000 or so miles ago. so the block offs are being ditched for another LS6 crossover tube and i am gonna custom route some fuel line to connect the front and rear crossovers, almost as if it was functioning like the original LS1 crossover tube. this way no hot spots will be had in the rear cylinders and maybe my ring lands will take a little more abuse.
radiator fluid looks good, nice and green so no problems there, there is just a **** ton for crap in front of the radiator. this thing is gonna be reverse flushed and cleaned before it is replaced back in the vehicle.
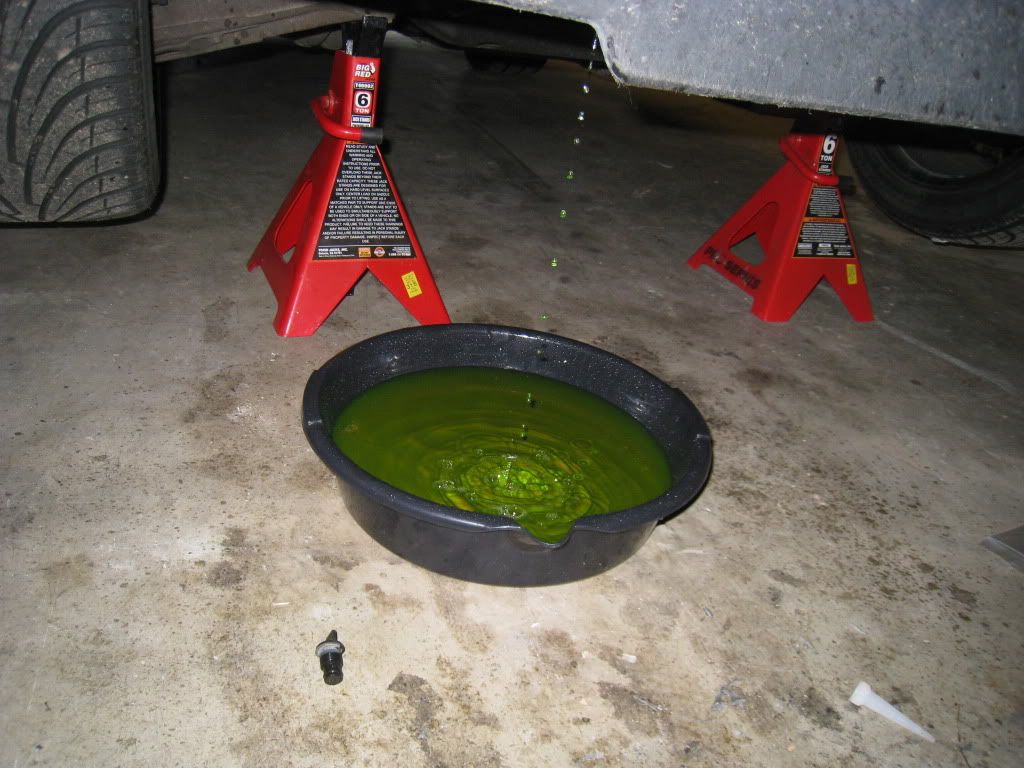
if you look close enough in front of the radiator you can see all the crap i have picked up over the years of driving. idk how it all got passed the condenser but hey, i am not a physics major.
well i am done for the day, wife said the i told her i was gonna make dinner (i never recall saying that), but hey, it was only spaghetti so i went ahead and got on it. tomorrow the cooling system comes out (haven't decided if i am gonna pull the condenser out yet or not....still deciding....still deciding) and all the accessories. maybe even pull the heads. we shall see.
TCS system removed....trying to decide if i should just remove this entirely...doesn't work half the time anyway!
TCS system set off to the side, perfect little spot between the brake booster and the clutch fluid reservoir.
side marker bulb completly broke off inside the socket, this is gonna be a real freakin bitch to get out
Coil pack removed and labeled for each side
A/C disconnected, and photographed for reference later when i say "WTF does this go to?"
Wiring harness pulled up and out of the way, currently sitting behind the intake
cowl removed for easier all around access.
set off to the side for now, just have to find a flat spot to put this bitch so it is not in the way the whole install
FAST intake removed. i have done this so many times now it took me like 20 minutes to do. routed the brake booster above the oil sensor last time as to not break it this time, it is getting replaced anyway cause it is giving me a bad reading, and dont want to replace it later when the intake goes back on.
now that is a big pile of dirty crap. also see how on the last cylinder how the oil seems to be a little burned on to the intake runner, my assumption is this is caused by the block offs in the rear. it didn't look like this till after i put them on for my LS6 intake, i also didnt get the catch can till after i put my FAST intake on about 3000 or so miles ago. so the block offs are being ditched for another LS6 crossover tube and i am gonna custom route some fuel line to connect the front and rear crossovers, almost as if it was functioning like the original LS1 crossover tube. this way no hot spots will be had in the rear cylinders and maybe my ring lands will take a little more abuse.
radiator fluid looks good, nice and green so no problems there, there is just a **** ton for crap in front of the radiator. this thing is gonna be reverse flushed and cleaned before it is replaced back in the vehicle.
if you look close enough in front of the radiator you can see all the crap i have picked up over the years of driving. idk how it all got passed the condenser but hey, i am not a physics major.
well i am done for the day, wife said the i told her i was gonna make dinner (i never recall saying that), but hey, it was only spaghetti so i went ahead and got on it. tomorrow the cooling system comes out (haven't decided if i am gonna pull the condenser out yet or not....still deciding....still deciding) and all the accessories. maybe even pull the heads. we shall see.
03-30-2011, 06:59 AM
#16
TECH Fanatic
iTrader: (7)
Join Date: Oct 2005
Location: Western NY
Posts: 1,416
Likes: 0
Received 0 Likes
on
0 Posts
That's one dusty engine bay. I probably would have hosed it down / degreased it before you started on all this stuff if it were me. Regardless the progress looks good though, keep it up.
03-30-2011, 08:43 AM
#17
i pulled the valve cover this morning, and i was wondering how much freeplay side to side should the stock rockers have, i had one you could move back and forth (side to side) a 1/4"!! i took a c-clamp and pressed that one together a little for a better clearance. is this normal with the stock rockers? i was hoping to re-use these things. if i cant then i will be going yella terra.
03-31-2011, 07:12 PM
#18
ok last night i got the the head pulled from the passenger side, and all the accessorys off. gonna do the motor mounts first. the project so far has not had any major issues, and in a good timly mannor. so far i only have about 8 hours into this project...good for me, at this pace with no major issues i should finish this weekend. it is really tiring working 8 hours a day then 4 more at home, but hey...its for a good cause  so back to the build
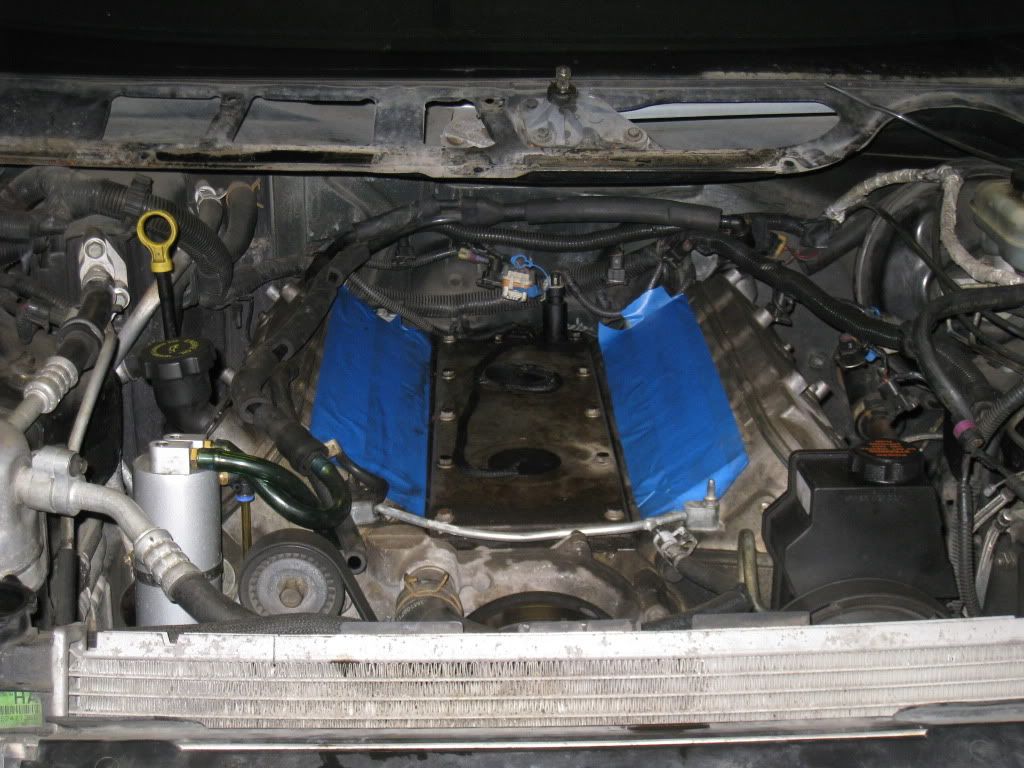
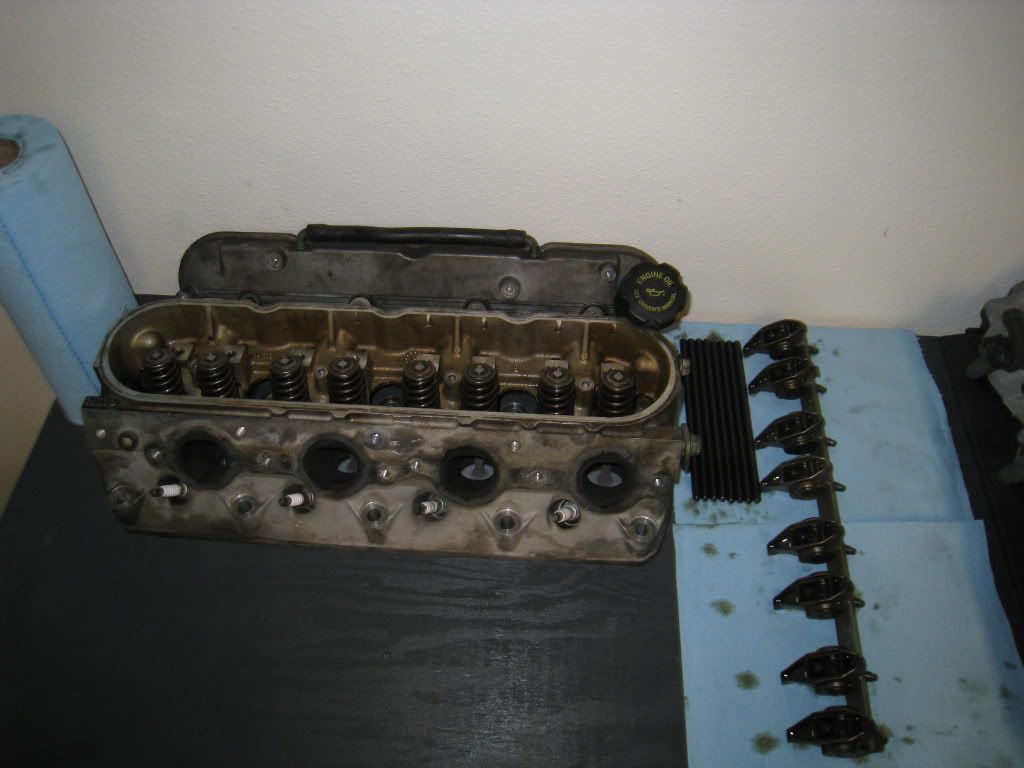
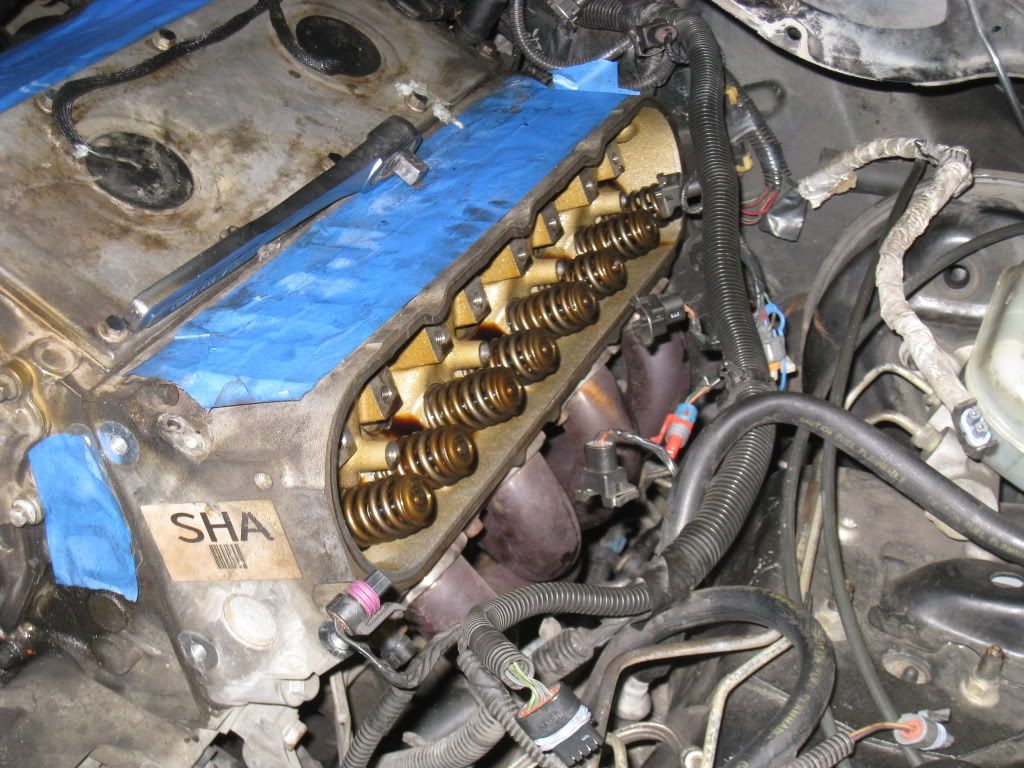
here is the valve cover, rockers, and pushrods removed. no issues here
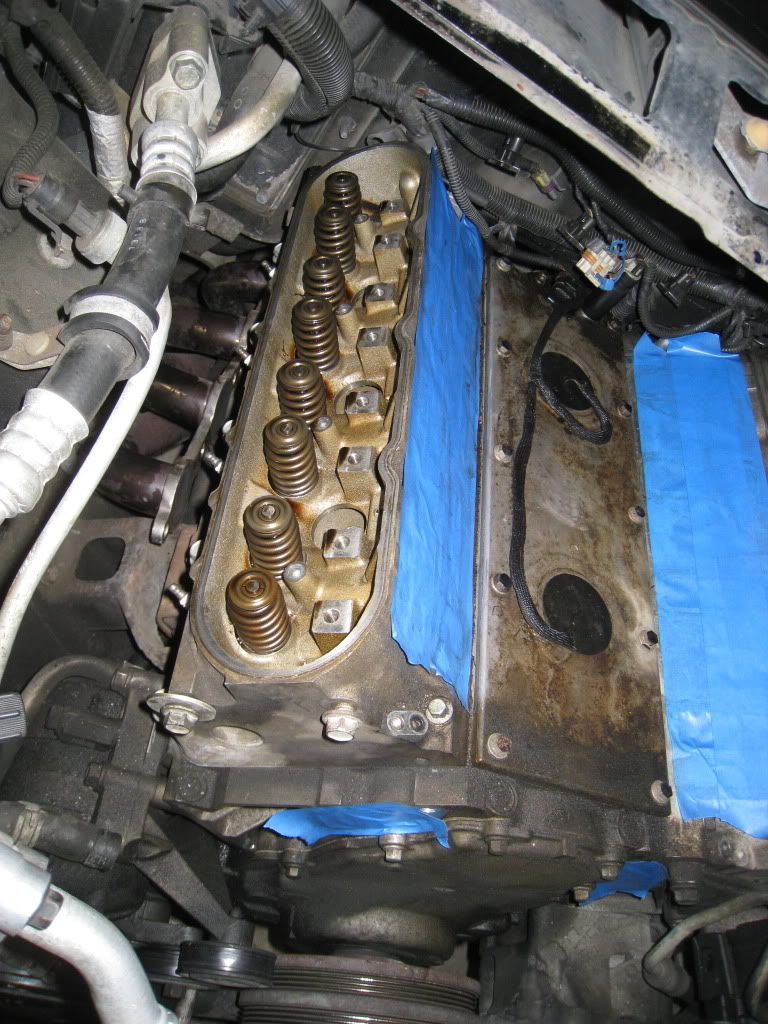
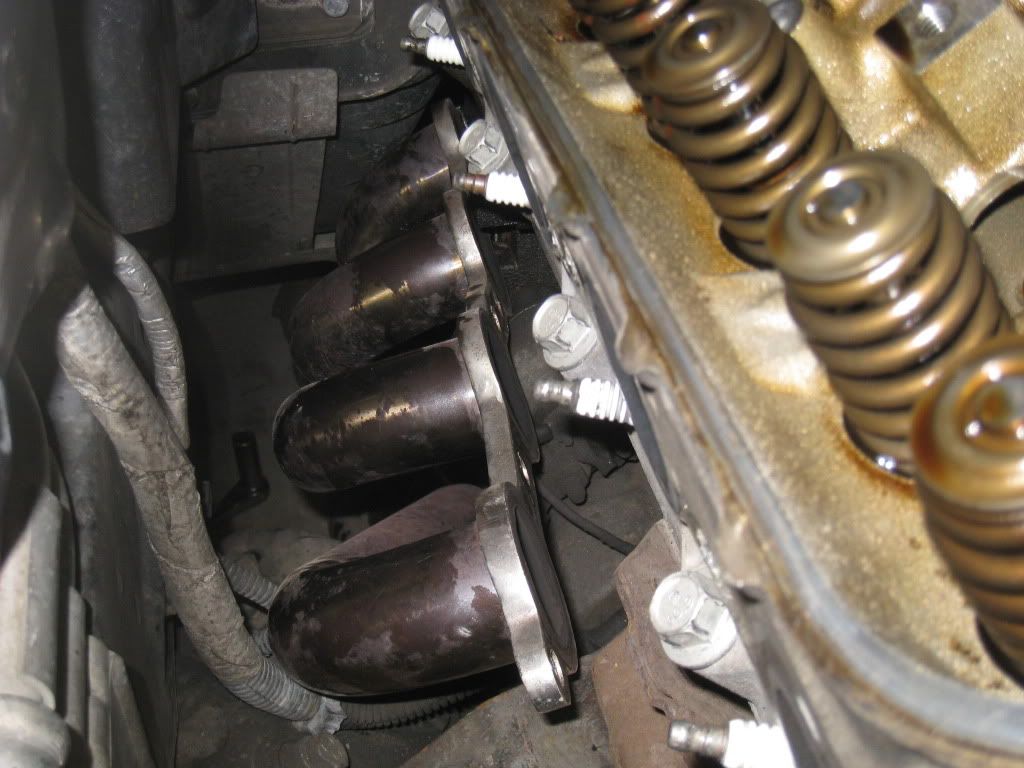
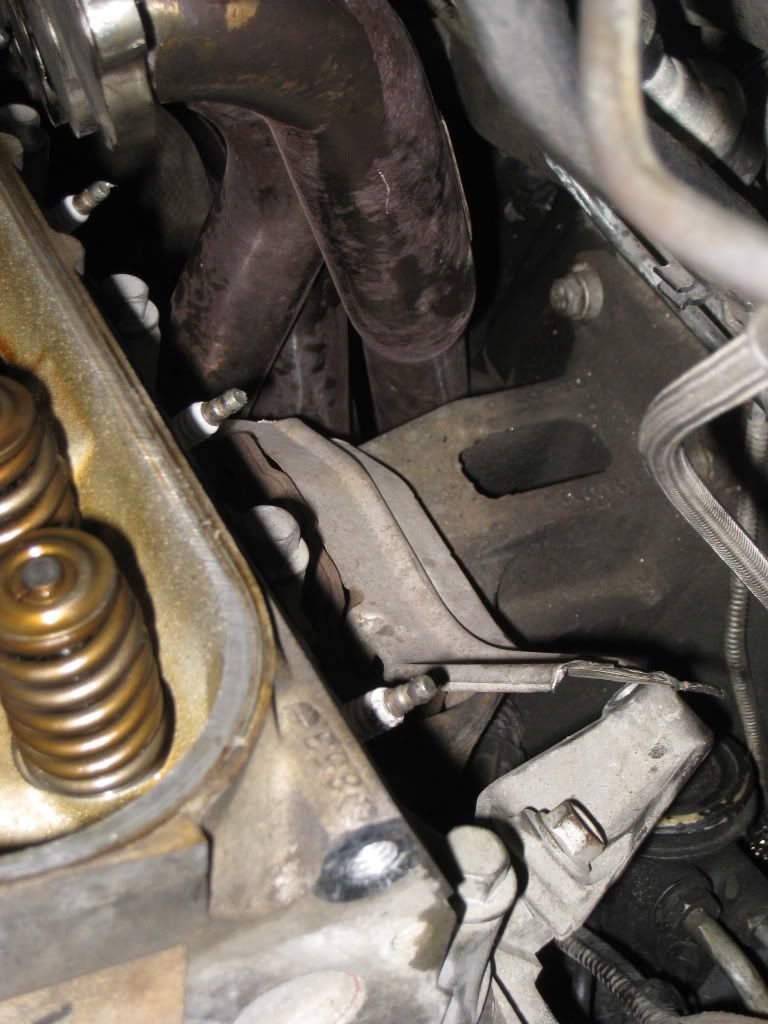
got the passenger side header dropped back far enough to clear the motor mount for easy removal.
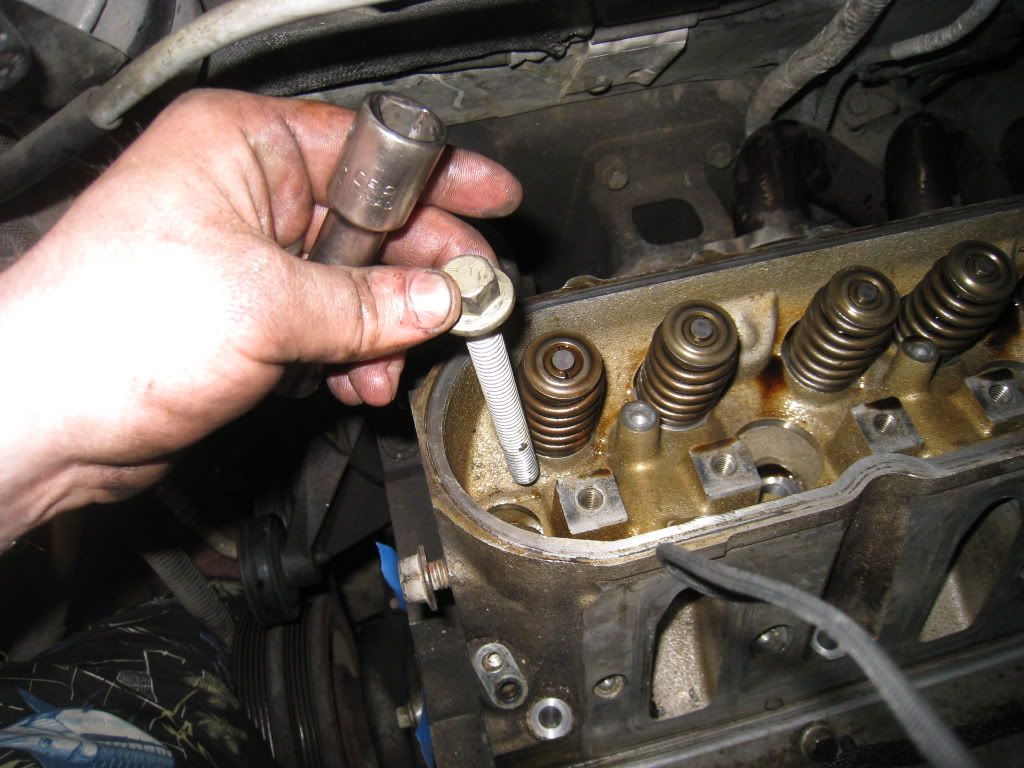
here is a shot of the short bolts used in the middle row edges of the head
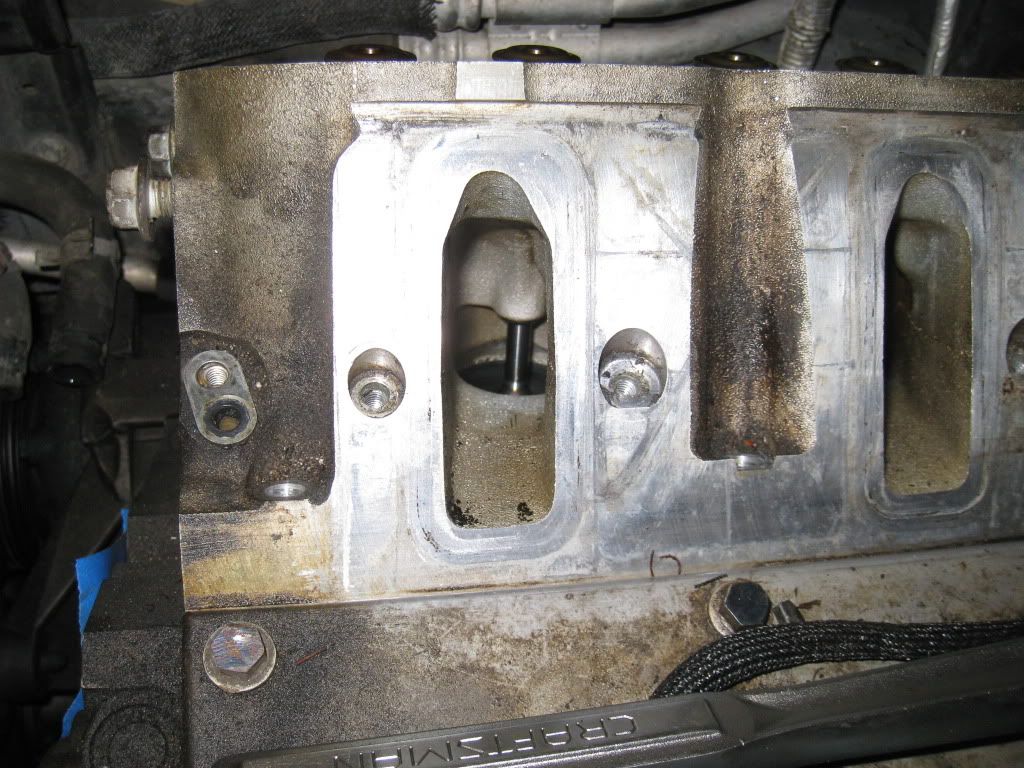
intake runner of my old heads, look fine so far, anybody want them?
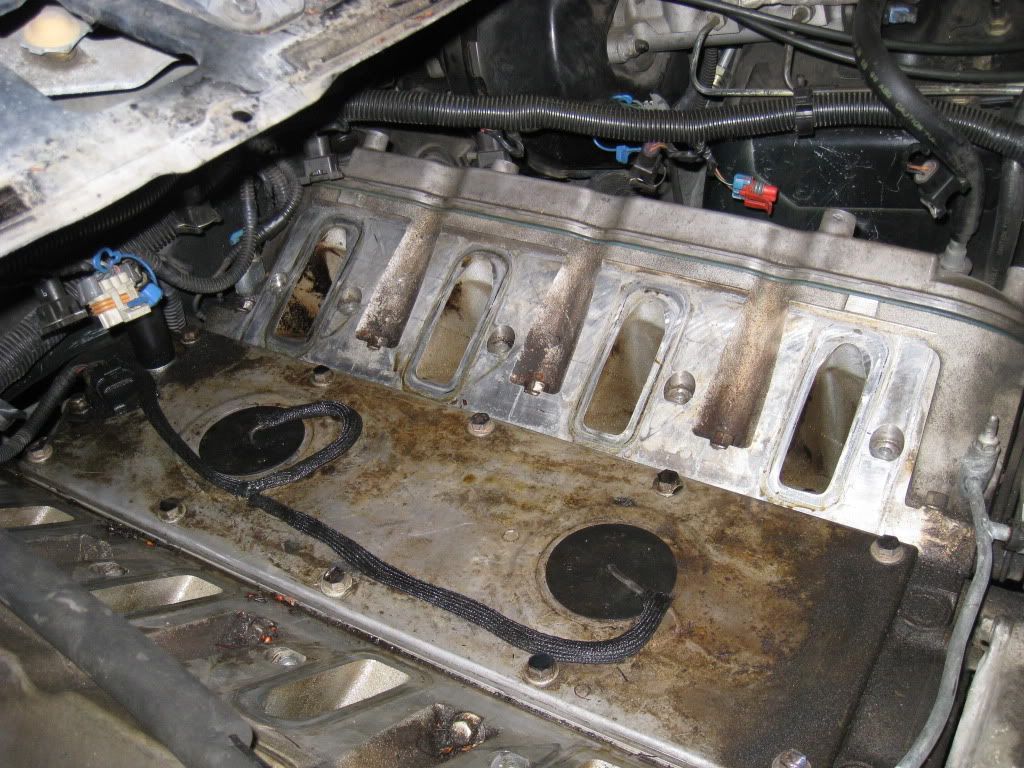
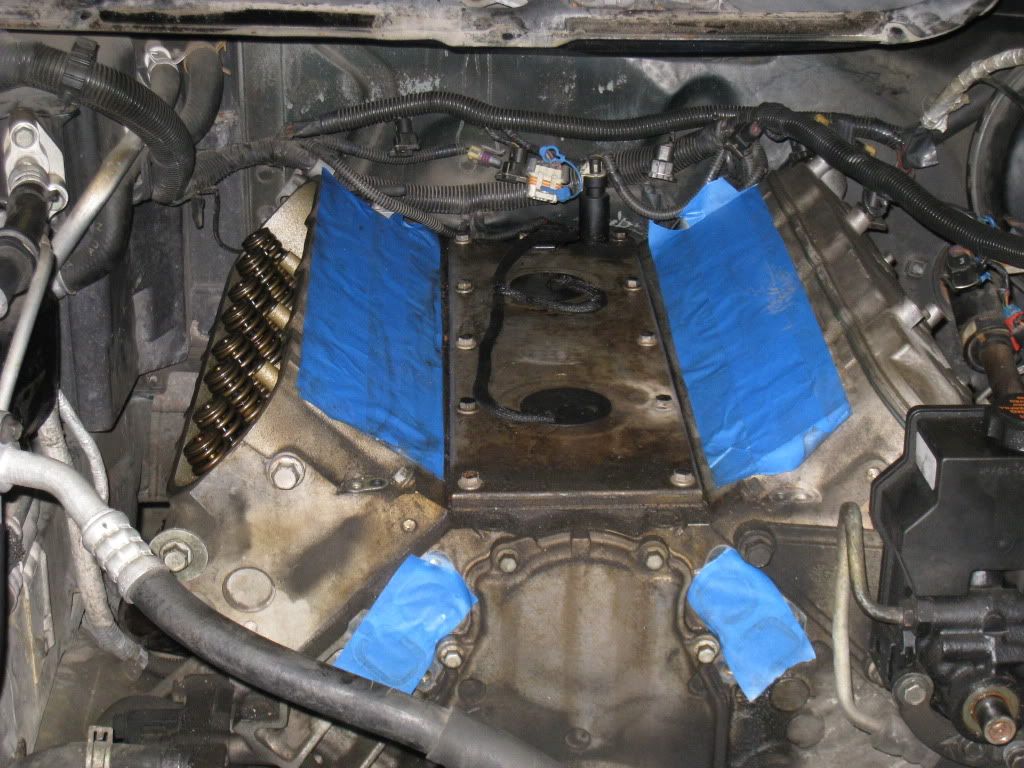
head removed!!!!!!!!!!!!!! looks good on the cumbustion chambers, no issues or tapped valves. this is a good thing!
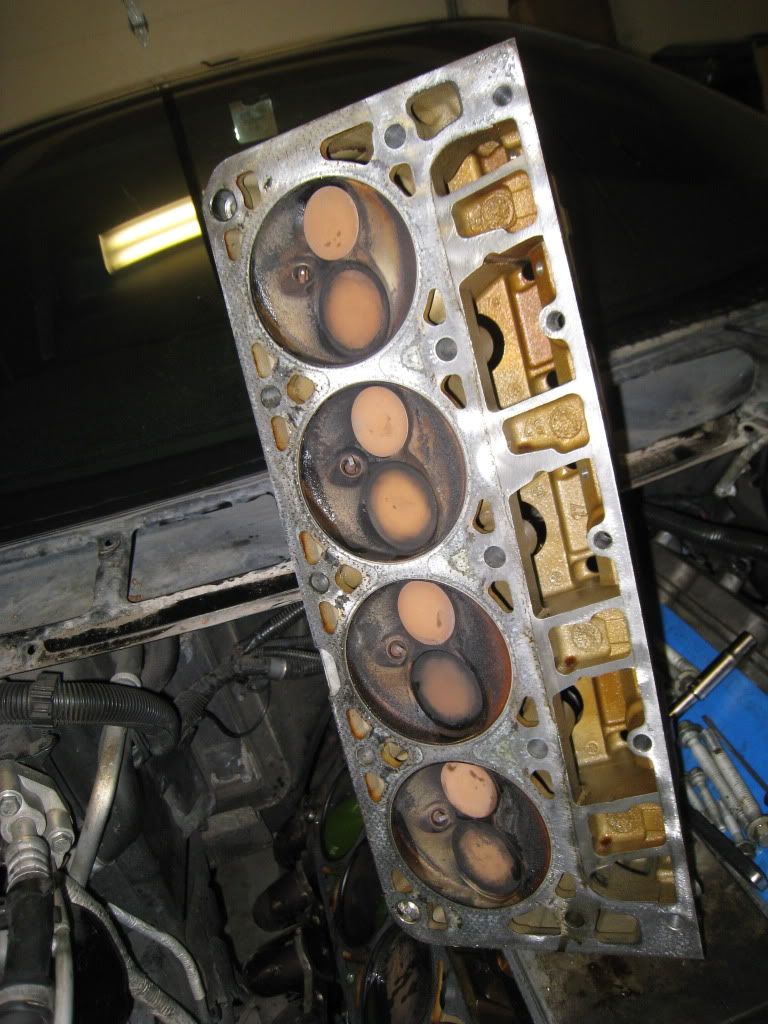
heads rockers and pushrods, all sorted out and ready to be packed up.
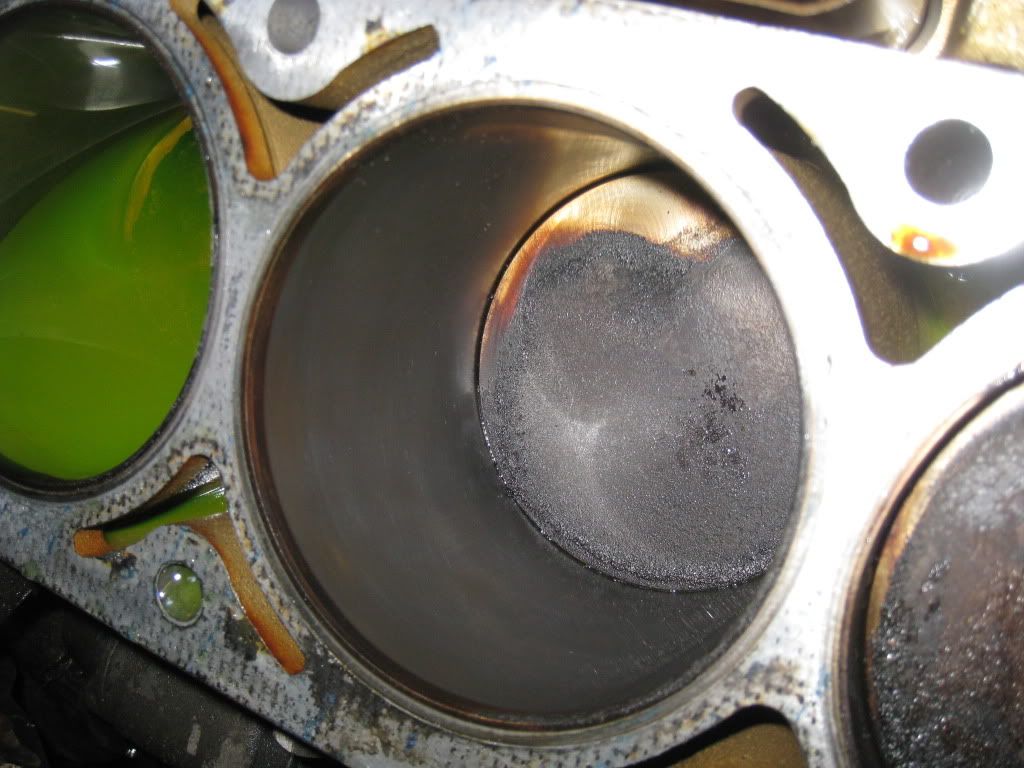
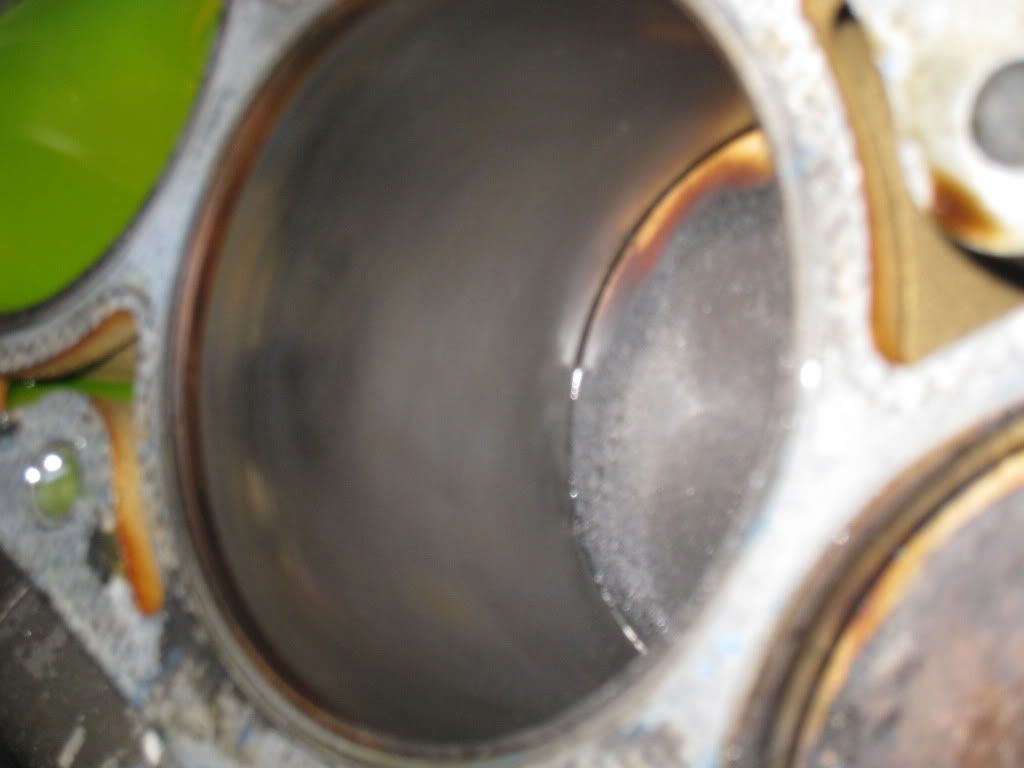
cylinders look dirty but good and the cylinder walls look really good, i am very happy. for a motor that has 130,000+ miles on it, this bottom end is in really good condition!
casting number, 1999 853 heads. not the best but not the worst. they are for sale, make me an offer. will clean them up.

so back to the buildhere is the valve cover, rockers, and pushrods removed. no issues here
got the passenger side header dropped back far enough to clear the motor mount for easy removal.
here is a shot of the short bolts used in the middle row edges of the head
intake runner of my old heads, look fine so far, anybody want them?
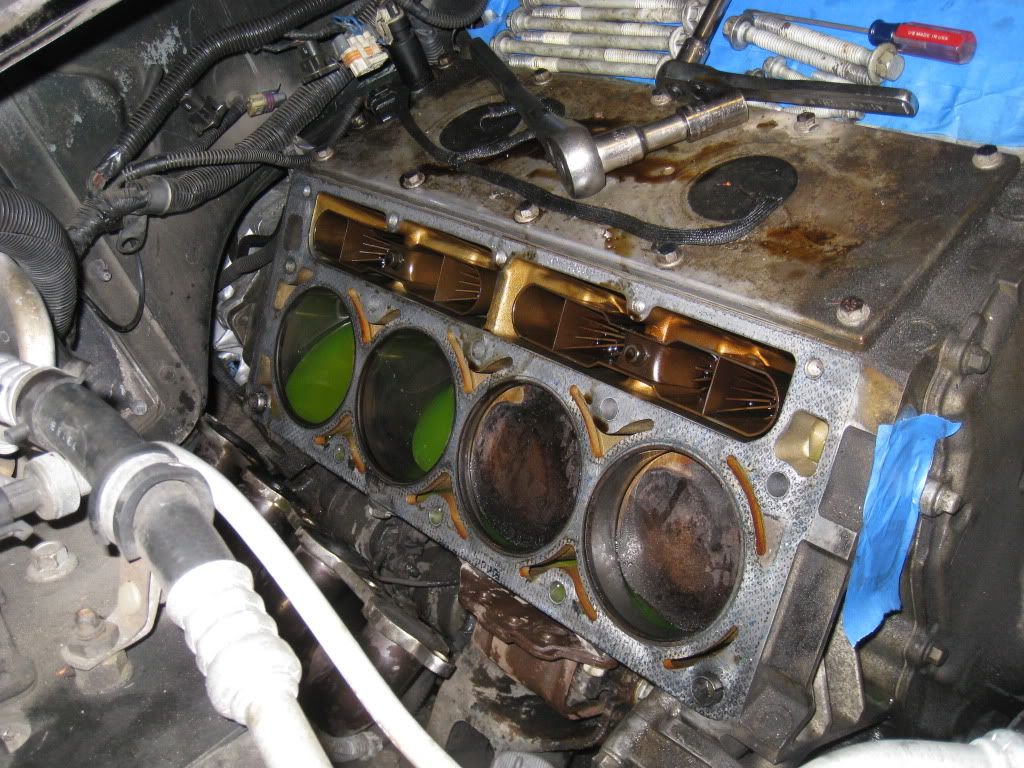
head removed!!!!!!!!!!!!!! looks good on the cumbustion chambers, no issues or tapped valves. this is a good thing!
heads rockers and pushrods, all sorted out and ready to be packed up.
cylinders look dirty but good and the cylinder walls look really good, i am very happy. for a motor that has 130,000+ miles on it, this bottom end is in really good condition!
casting number, 1999 853 heads. not the best but not the worst. they are for sale, make me an offer. will clean them up.
03-31-2011, 07:31 PM
#19
head came off in one piece, not graphite to my knowlage. the guy i bought the car from before said the heads were removed before and rebuilt and polished. well atleast i know one of the things he said was right.
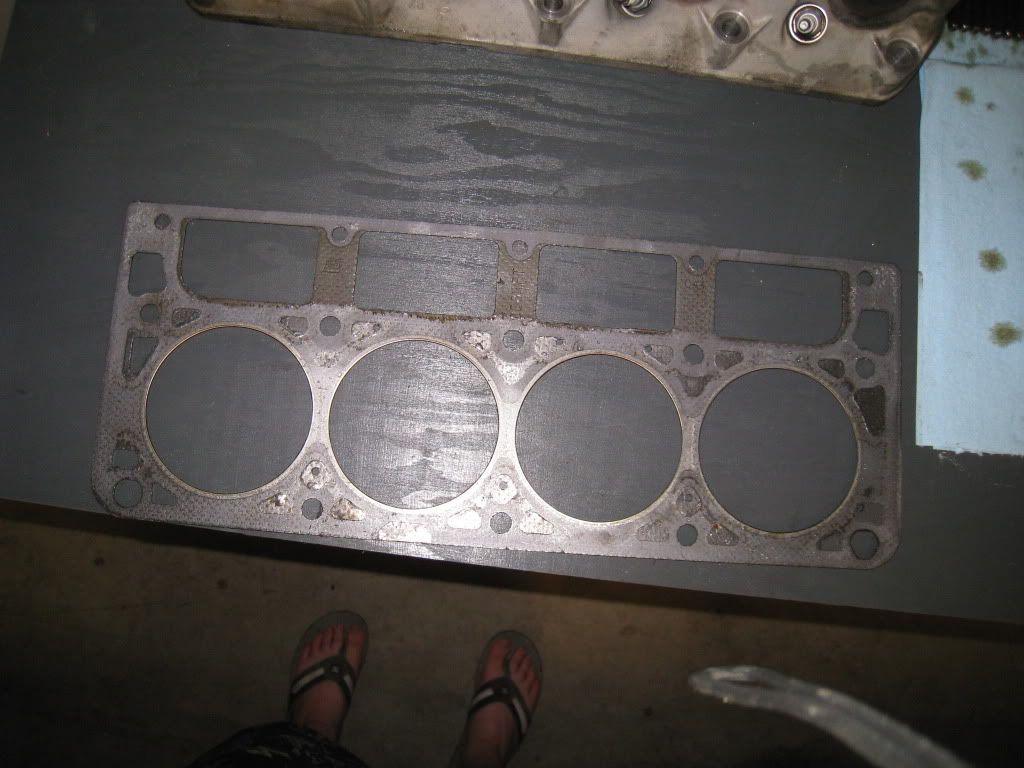
if you cant see it, it says felpro on the stamp
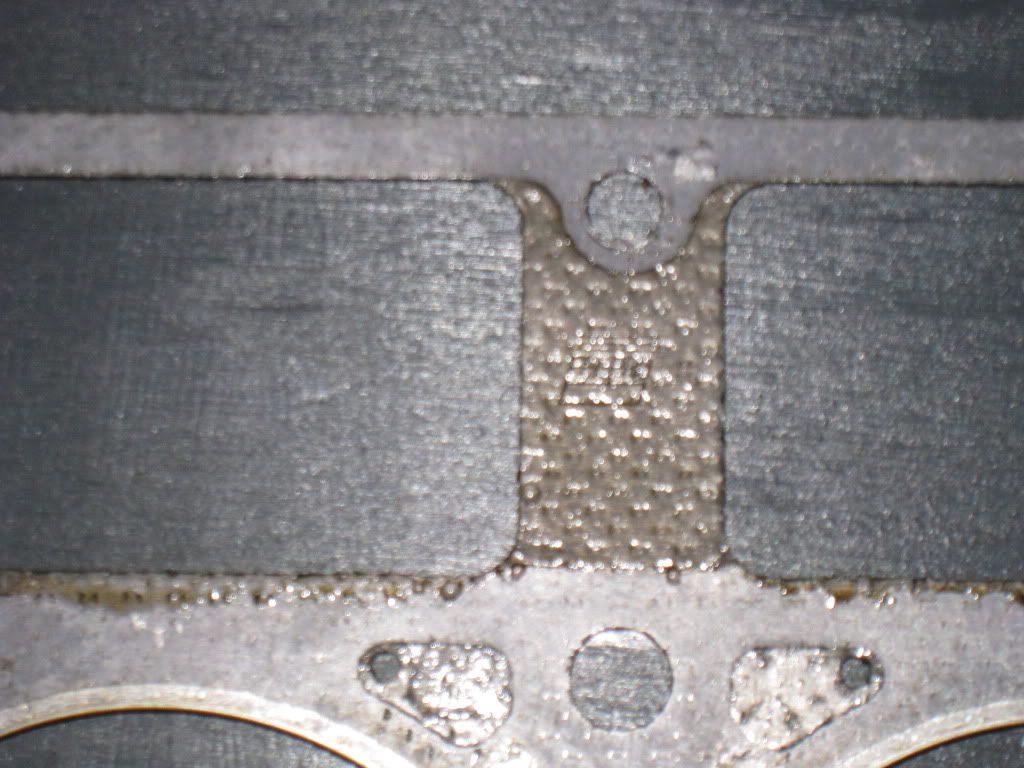
if you look closely you can still see the crosshatches in the cylinder walls!!! now this is good news. this means everything is in good working order, and to back it up the compression test went great. looking forward to putting it back together!
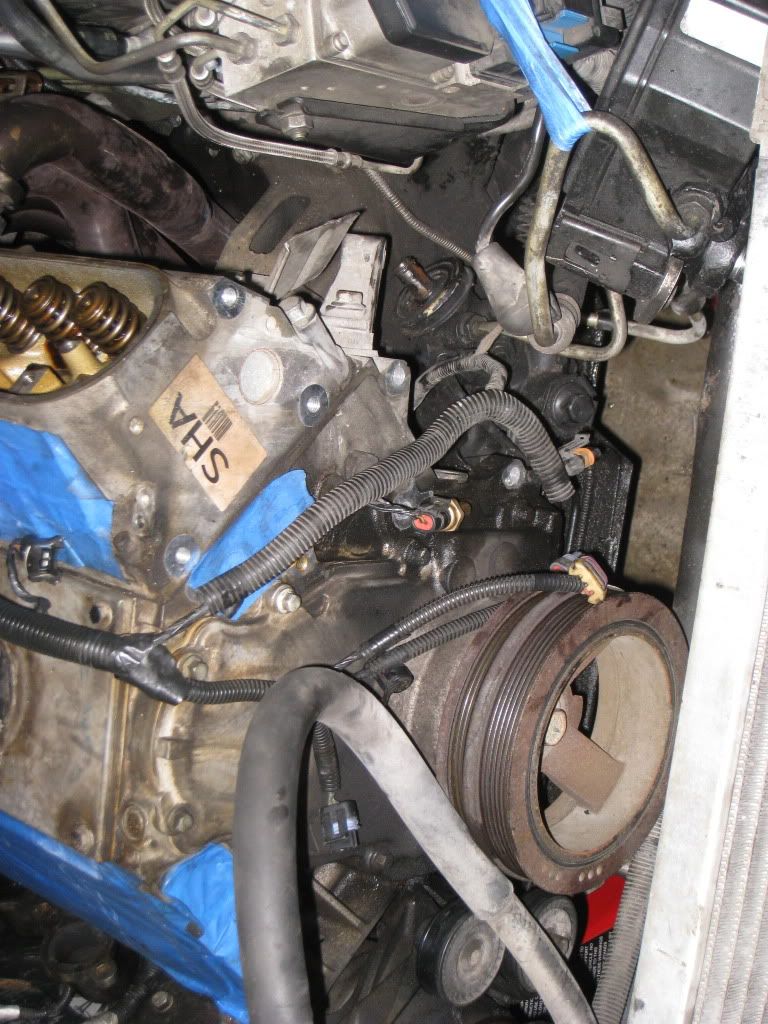
pic of passenger side head removed, water pump, and other accessories removed.
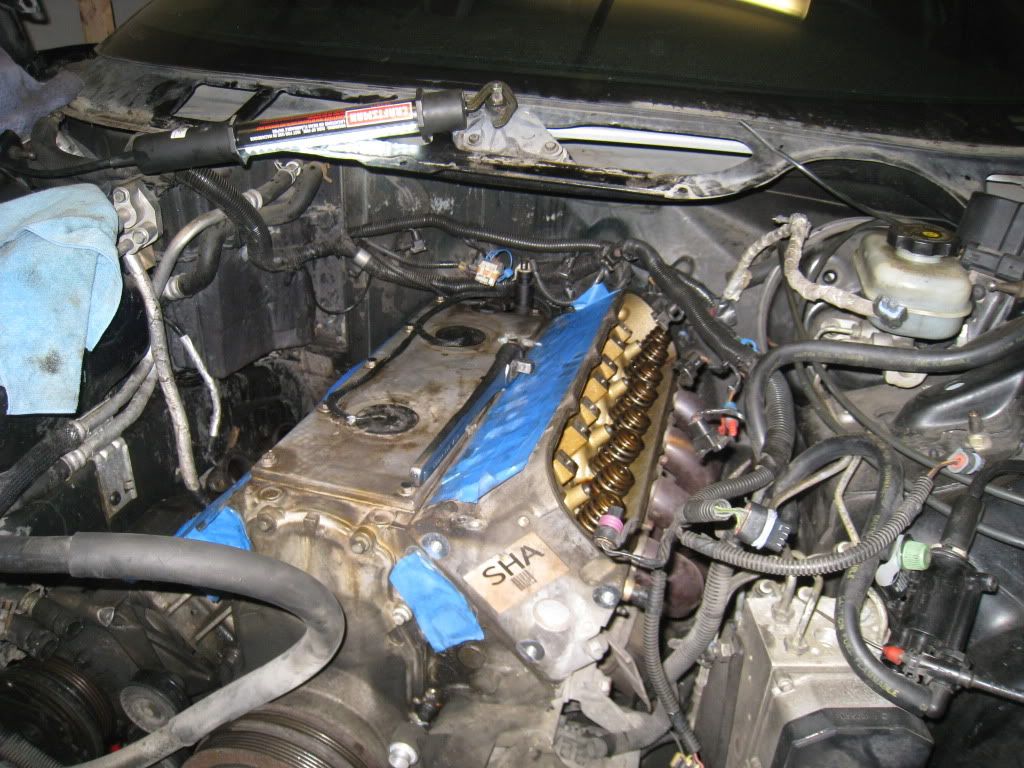
power steering set off to the side for later re-installation.
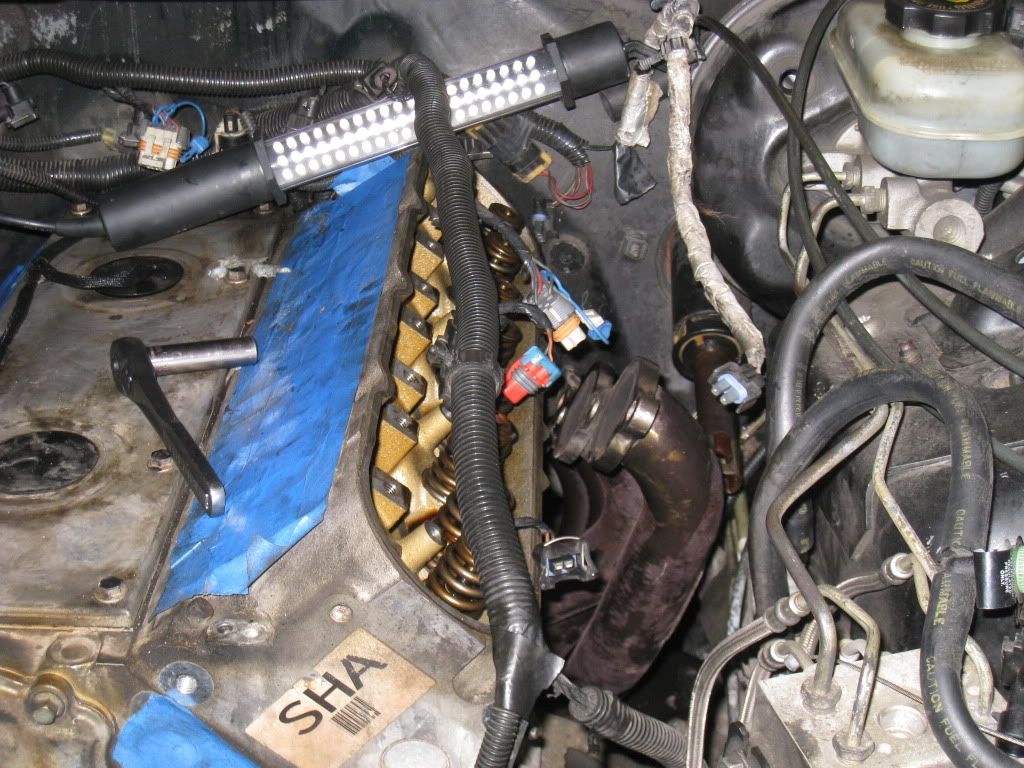
valve cover, rockers and pushrods pulled from drivers side. i did strip one of the bolt heads trying to pull one of the rockers off, but i have spare bolts (and rockers for that matter) so problem solved.
steering shaft removed so header could be dropped back for ease of access to the driver side motor mount
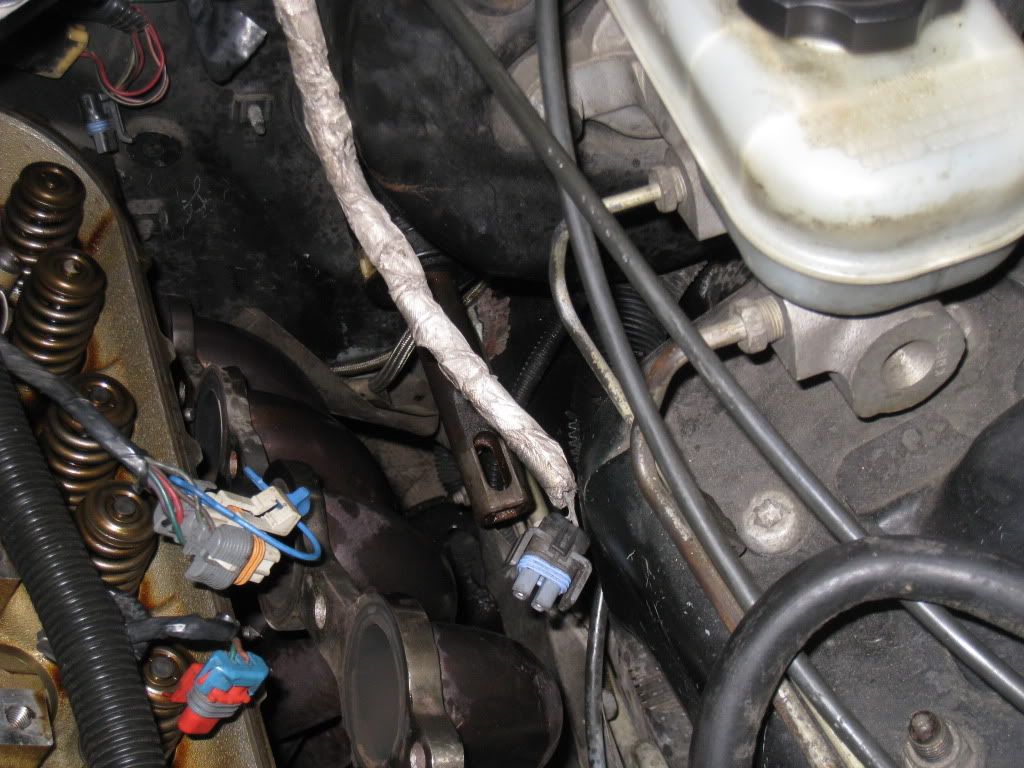
header removed, and dropped back as far as possible. not as much room as the passenger side, but it will do.
motor mount exposed and accessable with the header still in the car. not the best angle, but better then when the header is installed
and this is as far as i got yesterday, more to come after tonights session. good progress so far.
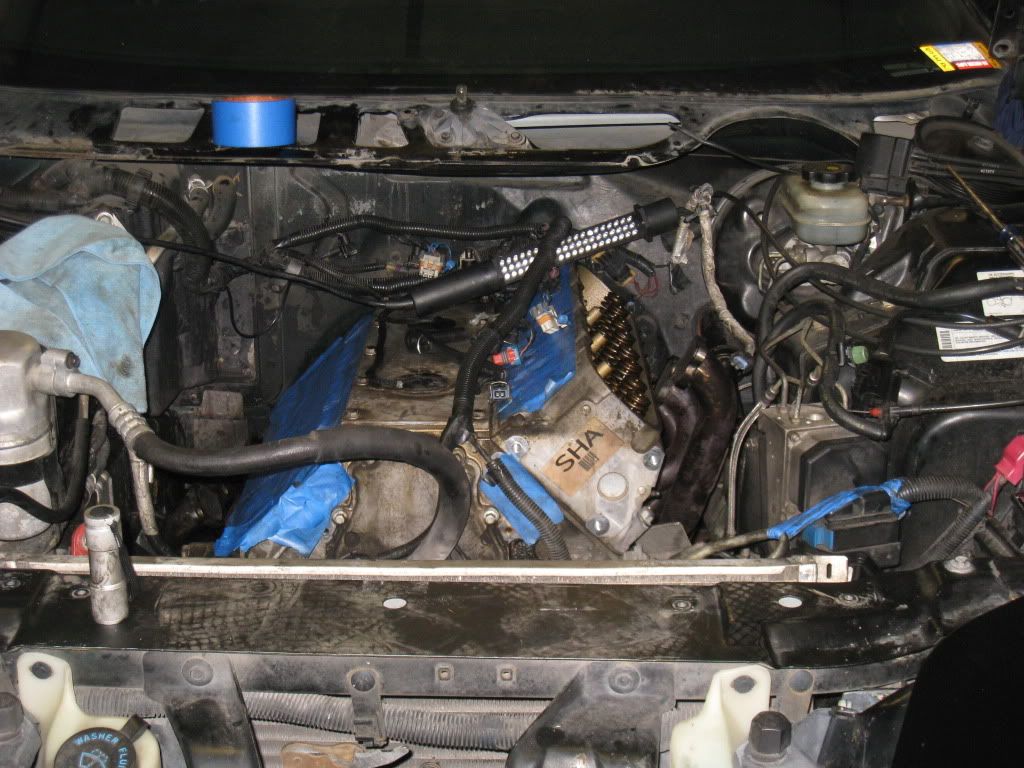
today i plan on removing the driver side head, pulling the motor mounts, drilling them out and replacing them with the poly's, then re-installing them. if time permits (and i am not to pissed of from installing the motor mounts) then i will pull the cam and timing chain, possibly the oil pump.
if you cant see it, it says felpro on the stamp
if you look closely you can still see the crosshatches in the cylinder walls!!! now this is good news. this means everything is in good working order, and to back it up the compression test went great. looking forward to putting it back together!
pic of passenger side head removed, water pump, and other accessories removed.
power steering set off to the side for later re-installation.
valve cover, rockers and pushrods pulled from drivers side. i did strip one of the bolt heads trying to pull one of the rockers off, but i have spare bolts (and rockers for that matter) so problem solved.
steering shaft removed so header could be dropped back for ease of access to the driver side motor mount
header removed, and dropped back as far as possible. not as much room as the passenger side, but it will do.
motor mount exposed and accessable with the header still in the car. not the best angle, but better then when the header is installed
and this is as far as i got yesterday, more to come after tonights session. good progress so far.
today i plan on removing the driver side head, pulling the motor mounts, drilling them out and replacing them with the poly's, then re-installing them. if time permits (and i am not to pissed of from installing the motor mounts) then i will pull the cam and timing chain, possibly the oil pump.
03-31-2011, 07:50 PM
#20
TECH Apprentice
iTrader: (22)

Join Date: Jun 2010
Location: Clewiston, FL 33440
Posts: 374
Likes: 0
Received 0 Likes
on
0 Posts
i just noticed the heads on mine are 853 also...i saved this page bro im doing the exact same thing come june when i get 2 months vacation lol...but right now im just getting the parts gathered like you