My T56 Conversion..
 08-12-2008, 09:59 PM
#1
MY T56 CONVERSION
Here is a thread of my work. I took all my posts that have pictures and info in them, and put them here in the beginning so they can be seen all at once.
I have about $3k invested into this swap.
Harness Wiring
First thing that was done was re-wiring the Harness for the T56 Transmission. I'm used the same Harness that I built to put the 408 LQ4/L92 Stroker Engine in my Car. The Harness was originally a 1999 Camaro LS1 Auto Harness.
**To modify a LT1 Harness it will be similar to these instructions..you will have to look up and see what wire is for the Reverse Lockout in the LT1 Connectors. The rest is the same.
To start, take the Harness and strip it down to where you have all the wiring from the PCM Connectors, Wheel Well Connectors, Under-Dash Connectors, and everything to the Auto Tranny Connector exposed. Go to the RED PCM Connector, take the wire that is in PCM RED #42, and re-pin this to PCM RED 44. Label this REVERSE LOCKOUT SIGNAL. Next go to the Auto Tranny Connector and trace the two Pink wires that are in it. One will go to the PCM, the other will go to the Wheel Well Connectors. Label the one that goes to the Wheel Well Connectors as TRANNY POWER, and remove the one that goes to the PCM. Once you have done this trace the two wires that you labeled REVERSE LOCKOUT SIGNAL & TRANNY POWER to the Auto Connector, clip them at the Connector, and set aside. Now take every other wire on the Auto Connector, follow it through the Harness, and remove them. Most of them will be in the PCM, carefully un-pin them and remove them.
Reverse Lights:
Start with an open Pin on the Harness Connectors that plug into each other under the Dash. Make sure that on both sides of the Connectors it's open. Wire that pin on both sides, and then wire it through the Harness and eventually to the Reverse Light Connector for the T56. It will splice into the Wire that's green(non power wire) on the Connector. It will help to have a Tranny to measure the length..try to use my pic to judge it, it's got a brown Connector. I placed it about 6" down from the branch of wiring in the Harness that goes to the Transmission, made it about 12" in length. This will make your Reverse Lights work properly.
Reverse Lockout:
Take the Reverse Lockout Connector and lay it next to the VSS Connector (Speed Sensor), the wiring is about the same length. Take the green wire(non-power wire) from the Connector and connect it to the REVERSE LOCKOUT SIGNAL WIRE that you left in the Harness. This will make the Reverse Lockout function like it's factory when the Car is tuned for it.
Skip Shift: I didn't bother with this because I removed it from the Transmission.
Power: If you have done everything by what I just said at this point, you should have the pink wire left. You are going to connect the pink wire to both of the pink wires on the Rev Lockout and Rev Light Connectors. Basically just butt-connect it to the wire Rev Lockout Connector, and then splice in the Rev Light Connector where it lines up on the Harness. This is the power for them 2 circuits.
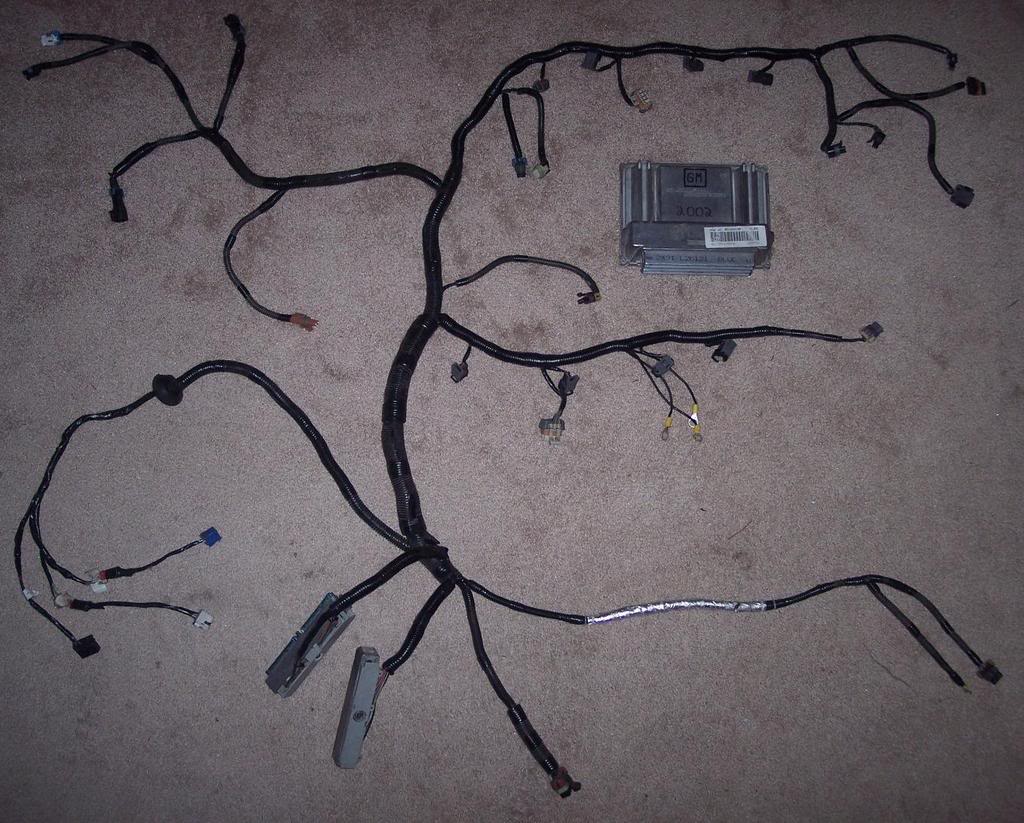
Basically at this point I removed all the Automatic Wiring and installed the Connectors for T56 Reverse Lockout, and T56 Reverse Lights. The VSS(Speed Sensor) stayed the same. Once everything is installed tape up all the wiring and loom it back up.
This is the Harness after I got done with it..
Interior Wiring
Basically with the Interior Wiring I removed all the Automatic Wiring and installed several things for the T56 Wiring. I wired the Reverse Lights, installed a Neutral Safety Switch for the T56, and I re-wired the Pedal Switches to dis-engage the Cruise Control as well.
Some of the wires in the Car will be power wires and they must be properly capped off if they are not removed.
Reverse Lights:
Take the Reverse Light wire off of the Auto Switch on the Shifter(Lime Green wire in the pic) and extend it over to the Harness Connectors on the Passenger Side. Connect it in on the same pin that you did on the Engine Harness side for the Reverse Lights.
Neutral Safety Switch:
I installed a Relay onto the Starter Wire coming from the Ignition Switch, I made it so it's activated with the Neutral Safety Switch on the Clutch Pedal. Basically when the Pedal is pushed in, the Relay activates and allows the Start Signal to go to the Starter and turn the Car on. I wired it to where the Relay is only energized with the Key in the START Position, not the RUN Position, that way the Relay doesn't energize everytime I push the Clutch in. I used the wires coming from the stock Auto Shifter and put the Relay inline.
Normally this would be controlled by the Starter Relay located behind the Glove Box(LT1 Car only), but I had to bypass that with the LS Swap, so I removed it.
Cruise Dis-engage Switch on Clutch Petal:
There are 2 Switches on the Brake Pedal in these cars..one of the Switches has 2 Connectors going to it, the other has 1. The Switch with the 2 Connectors is for the Brake Lights(3-Wire Connector closest to Pedals), and for the Convertor Lock/Unlock. The smaller single-Connector Switch is used for the Cruise Control dis-engage.
What I did was move the smaller Switch over to the Clutch Petal, then I cut the Convertor Switch Wiring and wired that switch into the Cruise Control Switch wiring. Now what used to be the Convertor Lock/Unlock is now the Cruise Disengage on the Brake Petal. Since the car is now a Standard, this opens up this option, and it works like it did from the factory. For it to work right, both Switch Connectors must be wired in series with each other on the Cruise Control Circuit.

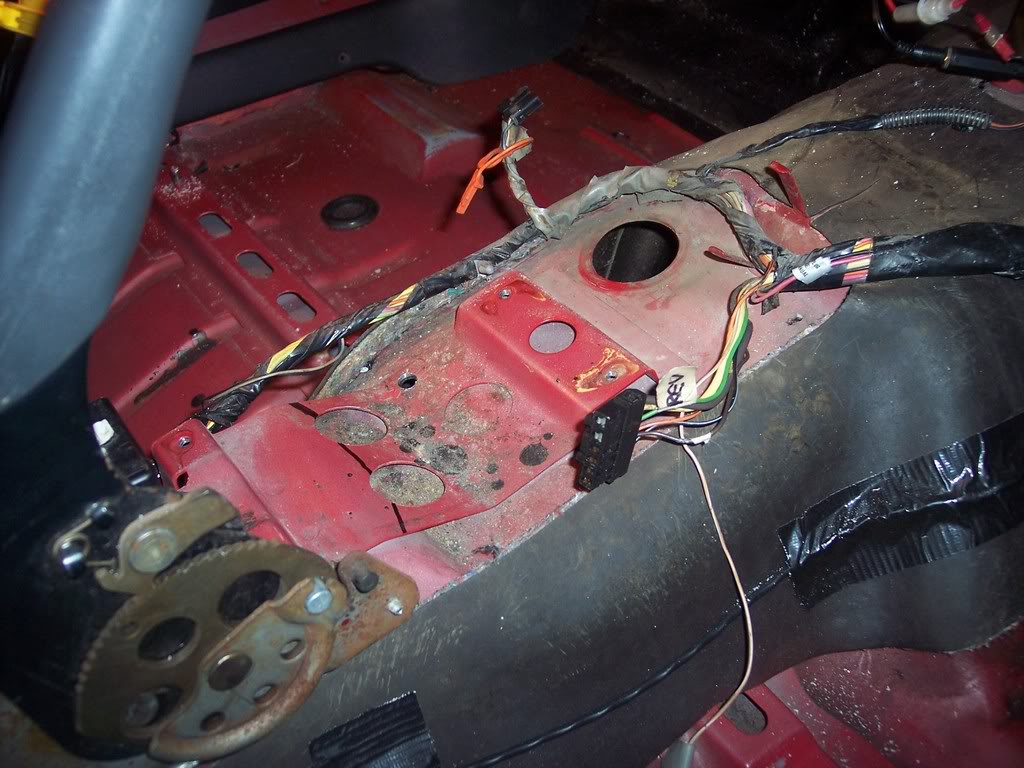
This is the Wiring that I did in the Interior..

Removed the Shifter and found the Reverse Wire, I ran that to the passenger's side into the Harness. It's the Lime Green Wire incase you guys can't see it.
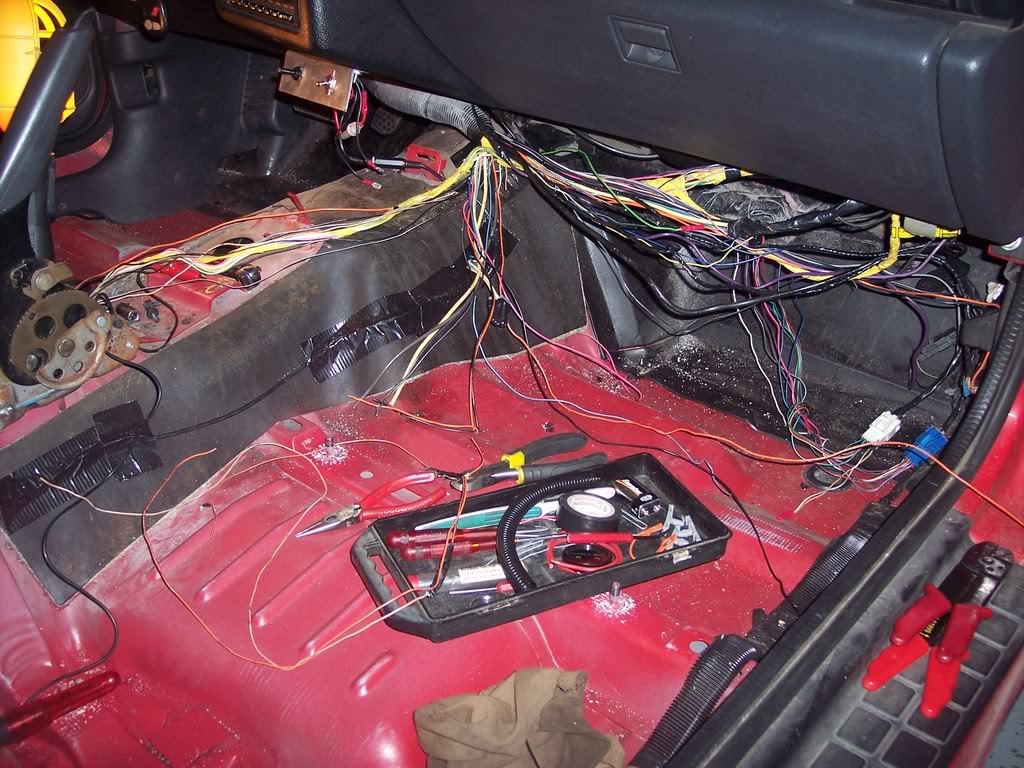
A big spider web of wiring that I had to sort through. I cut out the un-used ones.
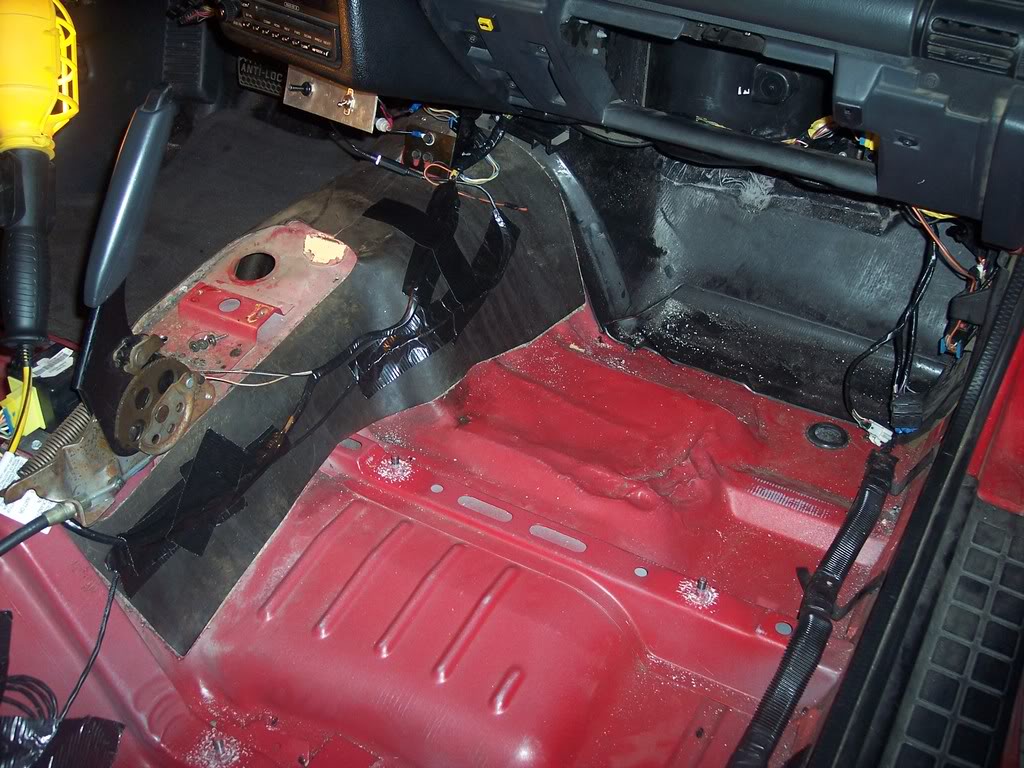
The wiring all done and laid into it's spot.
I wired in an Ignition Hot, Ground, and spliced off of the Tach wire for my Shift Light. I got those wires setup so all I had to do is mount the Light and connect it in.
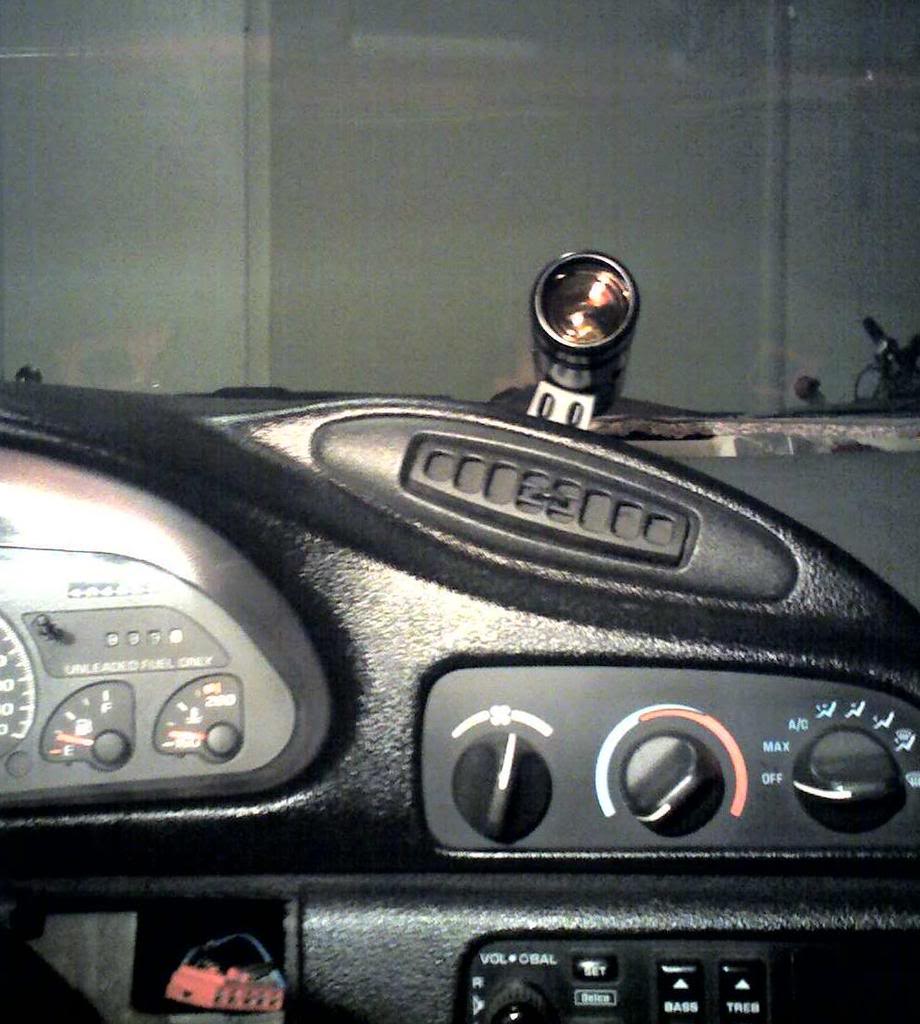
This is where I mounted it.
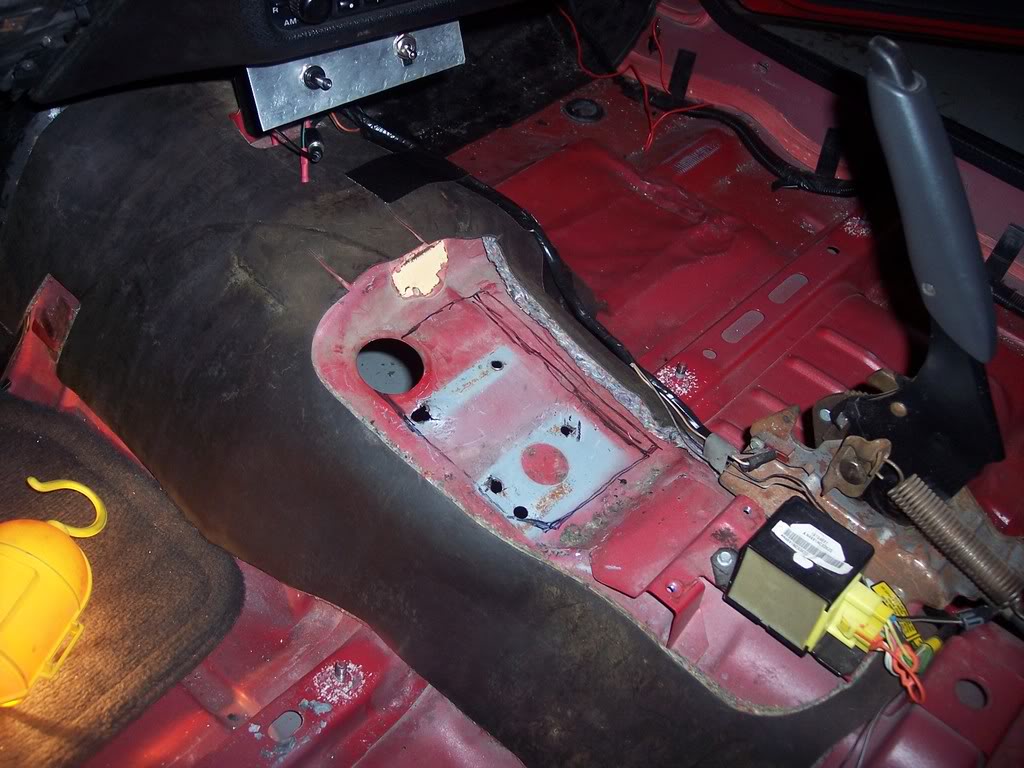
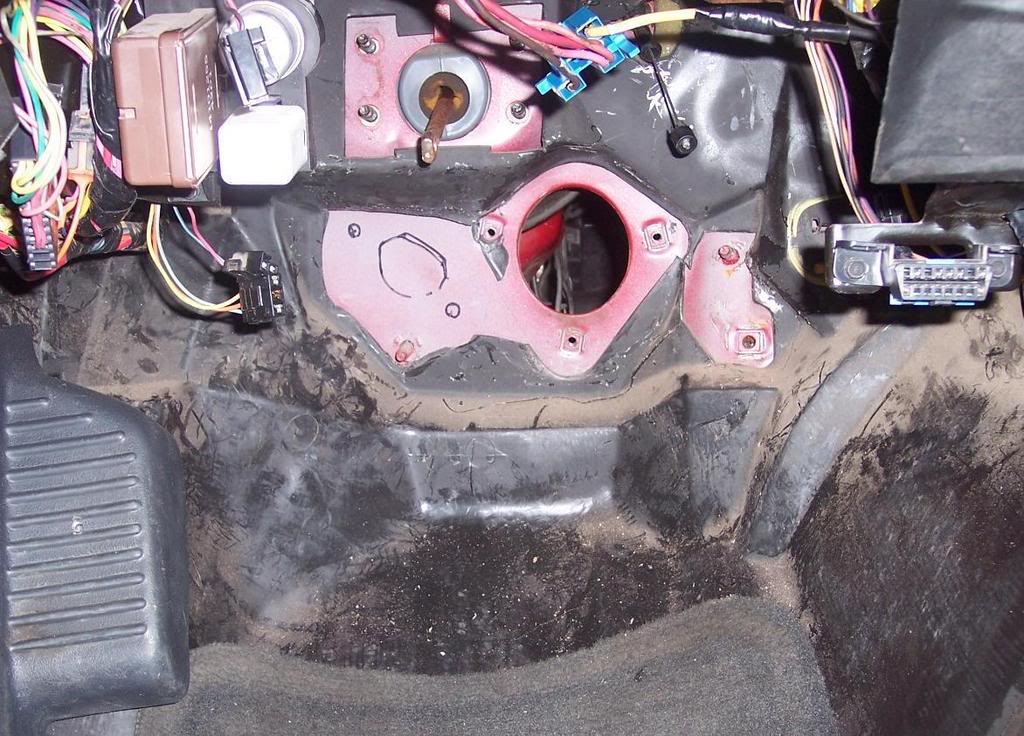
Here is the cut for the T56 Shifter..
This is marking off the cut for the Shifter Hole. I already cut and removed the piece of metal that the Auto Shifter bolts to..
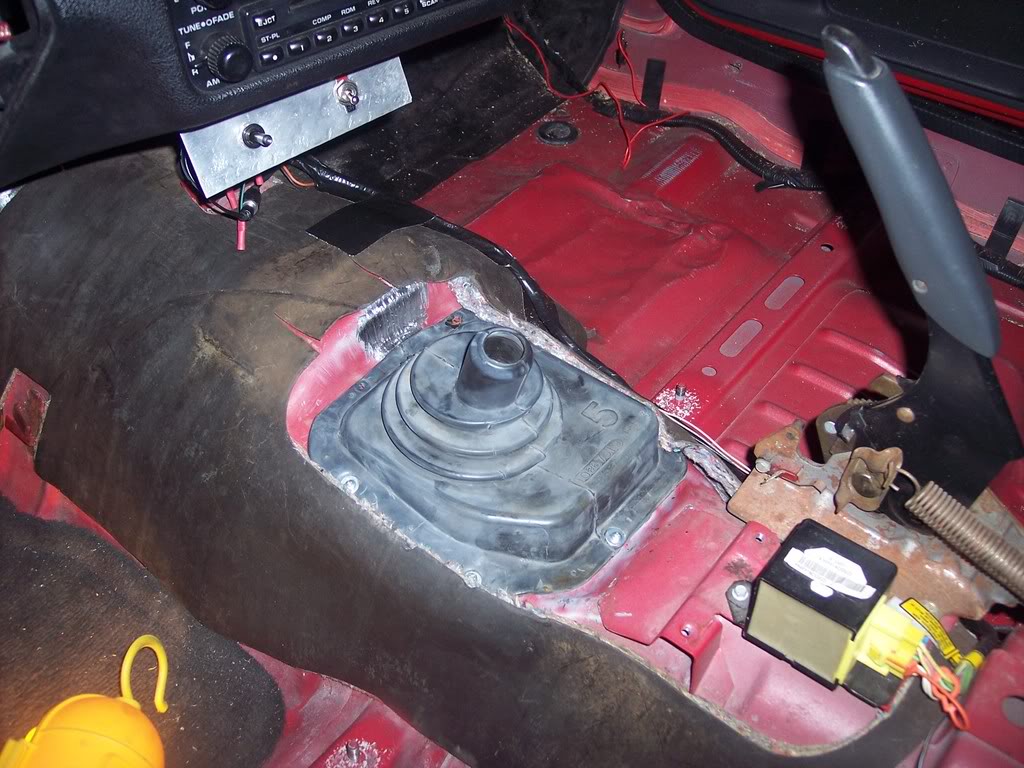
This is lining up a Shifter Boot I got just to test fit it after the hole was cut, and to make sure everything was good. I have the normal T56 one now, didn't have it at the time.
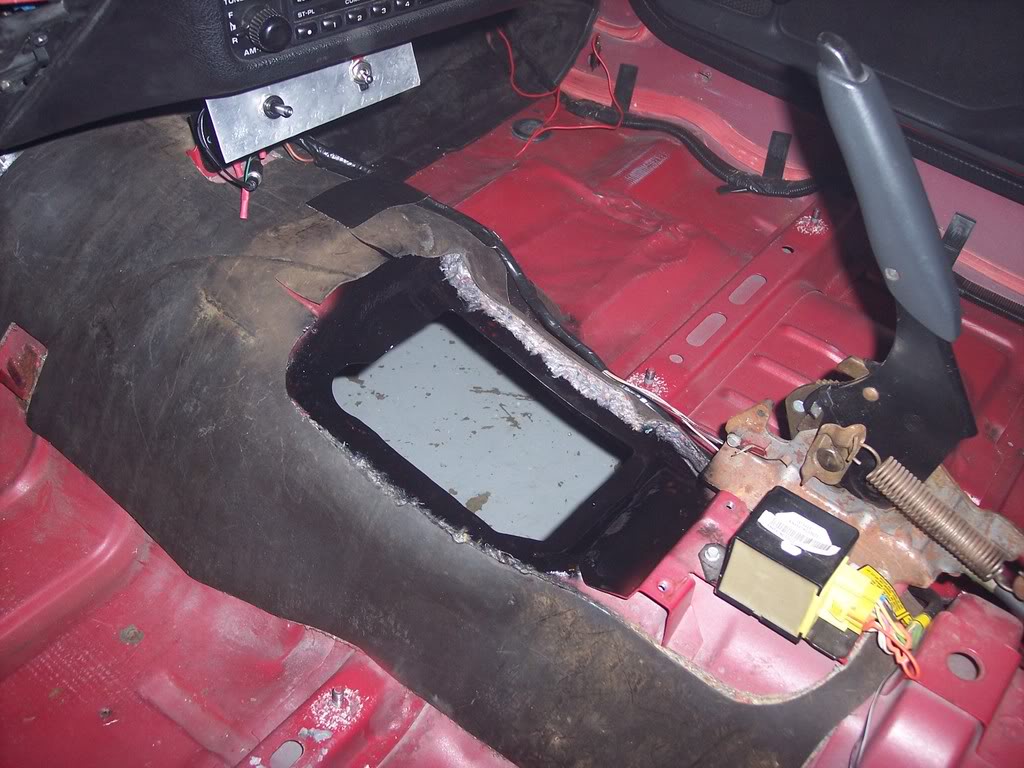
This is the hole finished up and painted to prevent rust..
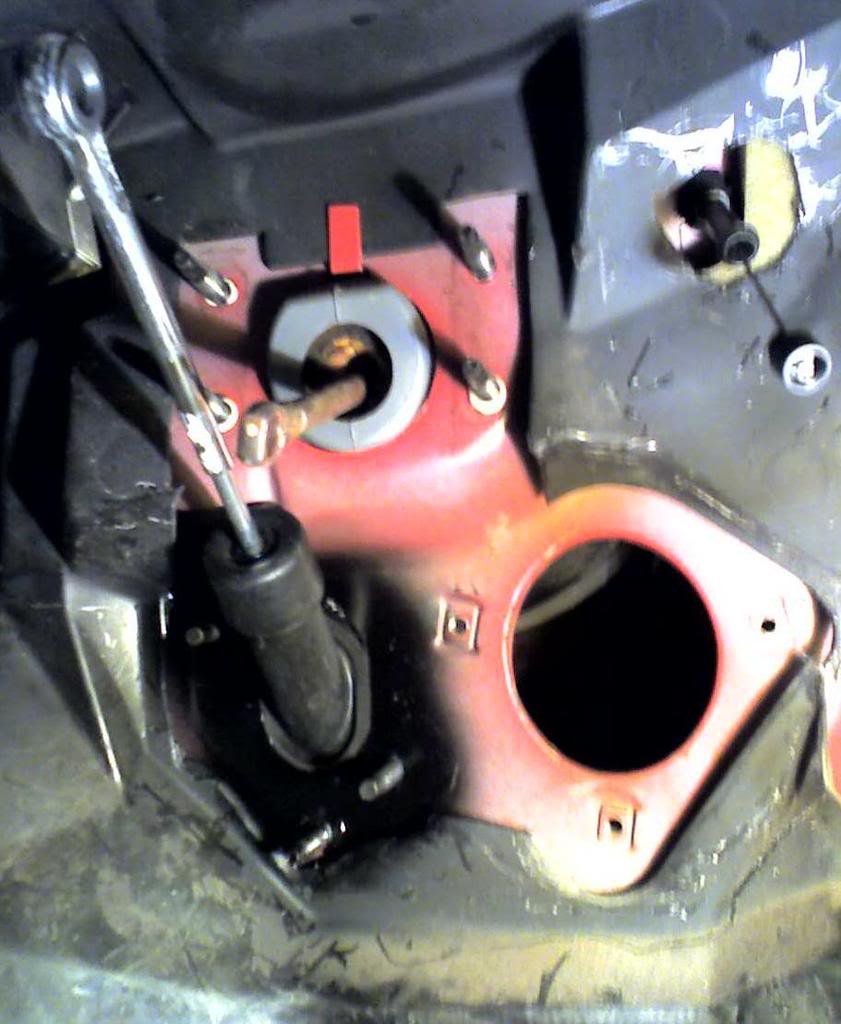
Here is the spot marked for the Slave Cylinder..
I took apart the Master Cylinder Assembly and seperated from it the line that goes to the Slave Cylinder. The reason I did this was to do the LS1 "Drill Mod", which gets rid of the factory restriction in the line.
Here is a before & after pic..
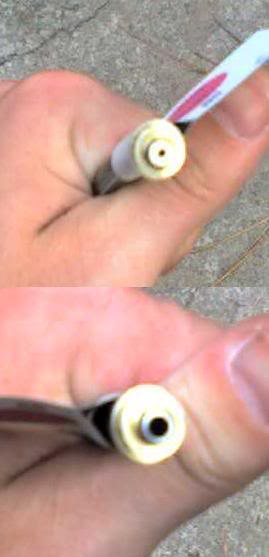
After that I re-assembled it and started the install of the Master Cylinder.
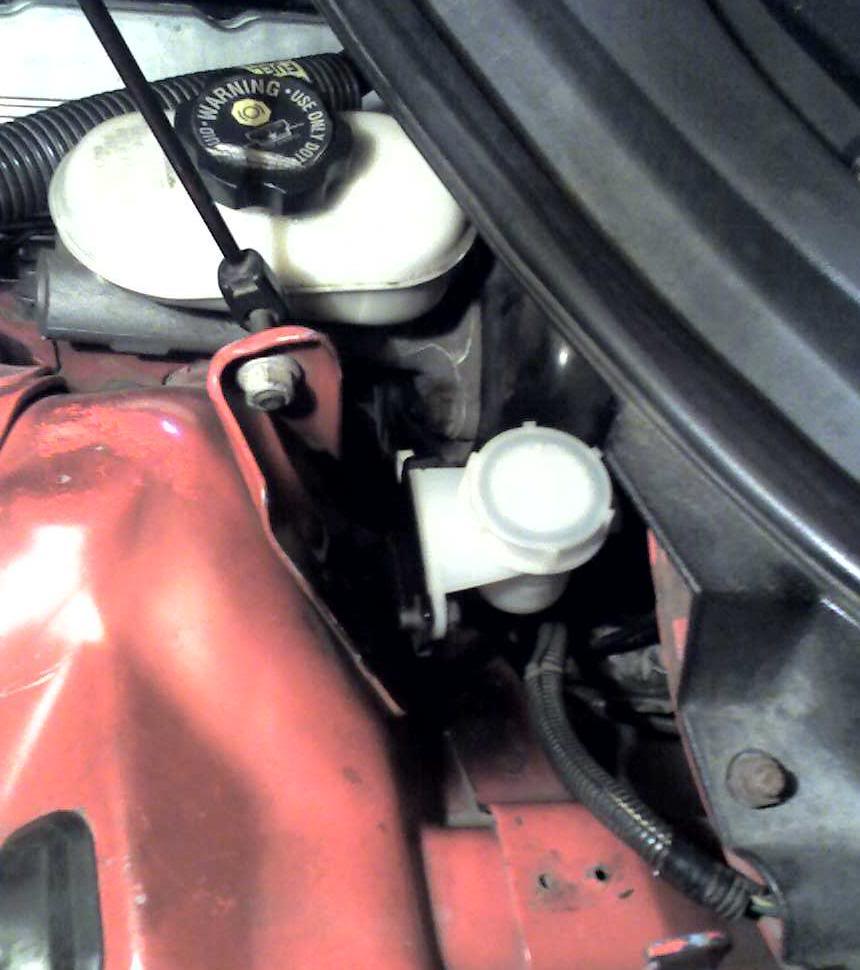
First thing I did was make the cut in the Fire Wall..then with a little work and moving around the Brake Booster, the Master Cylinder and the U-bolt went in..
After that was done, I lined everything up and put in the LS1 T56 Petals..

Once I got them all bolted in I installed the Fluid Resivoir..
And that is pretty much how the Car is sitting now, the only thing left is to install the Pilot Bushing, Clutch Kit & Flywheel, T56 Transmission, Shifter & ****. Then once it's driveable, I need to get it Tuned to adjust things for the T56 setup.

I have 3.89 Gears in it aswell..

Skip Shift wasn't wired in.
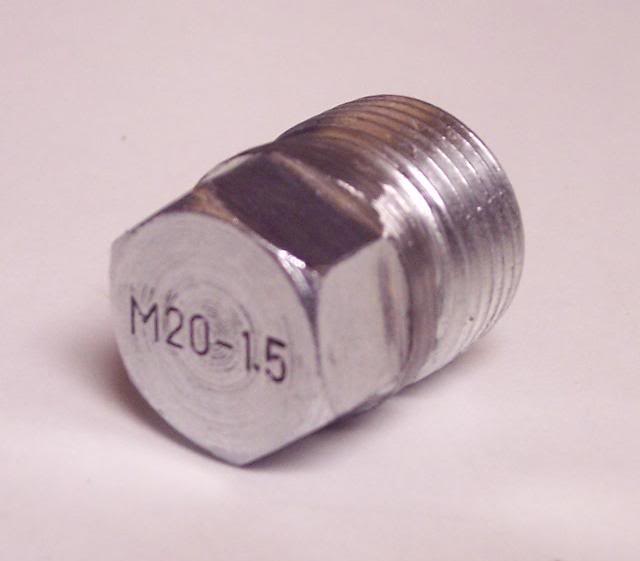
This is the Plug that I made to go in the place of the CAGS Solenoid on the T56 Transmission..
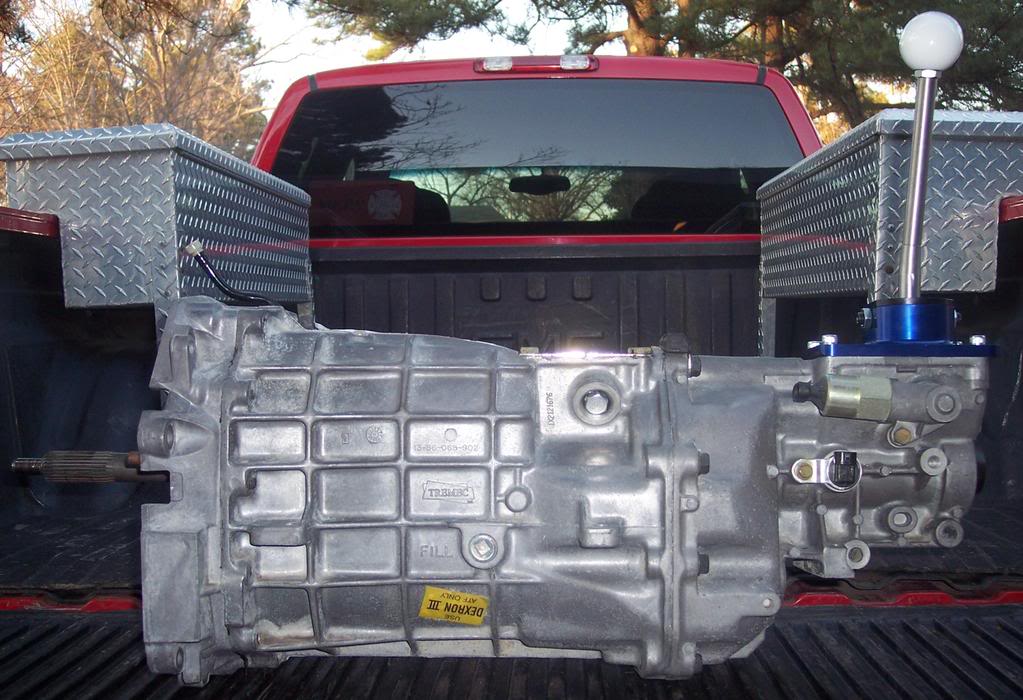
And here is the T56..
Last edited by the_merv; 06-26-2012 at 01:05 PM.
 08-12-2008, 10:18 PM
#2
TECH Fanatic
iTrader: (5)

Join Date: Mar 2004
Location: Melrose, MA
Posts: 1,196
Likes: 0
Received 0 Likes
on
0 Posts

Very clean merv, too bad all these nice cars coming togeather are too far away for me to see. But very nice, and those 3.89s are going to be real nice with the 402 and a 6 speed.


Trending Topics
08-12-2008, 11:39 PM
#8
TECH Fanatic
iTrader: (5)
Join Date: Mar 2004
Location: Melrose, MA
Posts: 1,196
Likes: 0
Received 0 Likes
on
0 Posts
Mine also, I really appreciate the service.
Someone has a quote I really like in there sig, cant remember who....
"America isnt at war, the Army/Navy/Air Force/Marines are at war. Your at home or at the mall. Tell all your liberal friends that, because I dont have any."
Someone has a quote I really like in there sig, cant remember who....
"America isnt at war, the Army/Navy/Air Force/Marines are at war. Your at home or at the mall. Tell all your liberal friends that, because I dont have any."
08-13-2008, 07:36 AM
#9
Thanks guys.
I'm Active Duty Air Force, my job is a Fire Fighter. It's in my Sig pic as well..lol
I'm going over to Iraq until the beginning of Feb, this will be my third tour. I was in Kir Kuk, Iraq sumer '04, and Baghdad International Air Port, summer '06.
It's just in the Garage bro.. as far as the skills.. it's just lining up wires and putting stuff together.
Attached is the diagram for the Pedal Switch re-wiring that I did.
Last edited by the_merv; 02-18-2010 at 10:36 PM.
08-13-2008, 08:45 AM
#14

Is all this really necessary? My mechanic has converted many A4 to M6 and never pulled the wiring nor did any splicing, Reverse lights work, the only thing that was wired was the reverse lock out, I had a switch on the console for the manual lock up for the converter so I wired it there. Just wondering because I have read people say that you need a complete harness from a 6 speed, Not so, even with the PCM, I just flashed it to a M6..
08-13-2008, 08:52 AM
#15
You don't need a M6 harness..I pretty much built one though..lol
I know what your talking about with your guy..that can be done as well. He just used the Reverse Light wire and the hot wire next to it and ran that to the T56 Connector, probably did it through where the Shifter comes through the Floor. Reverse Lockout can be done pretty much the same way.
I don't like wiring like that..I wanted it setup like the Factory.
Me personally I don't want to have to hit a switch to put it in Reverse, I want to be able to use that gear as it's designed from the factory. It wasn't that hard to do..
08-13-2008, 09:24 AM
#16
TECH Fanatic
iTrader: (5)
Join Date: Mar 2004
Location: Melrose, MA
Posts: 1,196
Likes: 0
Received 0 Likes
on
0 Posts
Merv is just **** like some of us, and it had to be done the perfect way 
Same way I would have done it, even if it dident ACTUALLY have to be done. Besides, its easier to find **** now and it looks clean as hell!
Same way I would have done it, even if it dident ACTUALLY have to be done. Besides, its easier to find **** now and it looks clean as hell!
08-13-2008, 09:44 AM
#17
TECH Enthusiast
iTrader: (16)

Join Date: Jan 2005
Location: Nebraska
Posts: 637
Likes: 0
Received 0 Likes
on
0 Posts
When I did my swap I didnt mess with any of the a4 wiring except for the nuetral safty switch but I already had the m6 harness and my reverse seems to work fine.
08-13-2008, 09:54 AM
#18
You don't need a M6 harness..I pretty much built one though..lol
I know what your talking about with your guy..that can be done as well. He just used the Reverse Light wire and the hot wire next to it and ran that to the T56 Connector, probably did it through where the Shifter comes through the Floor. Reverse Lockout can be done pretty much the same way.
I don't like wiring like that..I wanted it setup like the Factory.
Me personally I don't want to have to hit a switch to put it in Reverse, I want to be able to use that gear as it's designed from the factory. It wasn't that hard to do..
I know what your talking about with your guy..that can be done as well. He just used the Reverse Light wire and the hot wire next to it and ran that to the T56 Connector, probably did it through where the Shifter comes through the Floor. Reverse Lockout can be done pretty much the same way.
I don't like wiring like that..I wanted it setup like the Factory.
Me personally I don't want to have to hit a switch to put it in Reverse, I want to be able to use that gear as it's designed from the factory. It wasn't that hard to do..