Camaro Double Din Install: Pioneer AVH-P3200DVD (Completed Pics in Post #17)
 05-10-2010, 04:57 PM
#1
Staging Lane
Thread Starter
Join Date: Oct 2007
Location: Wichita Falls, TX
Posts: 52
Likes: 0
Received 0 Likes
on
0 Posts
*Pics of finished bezel in post #17*
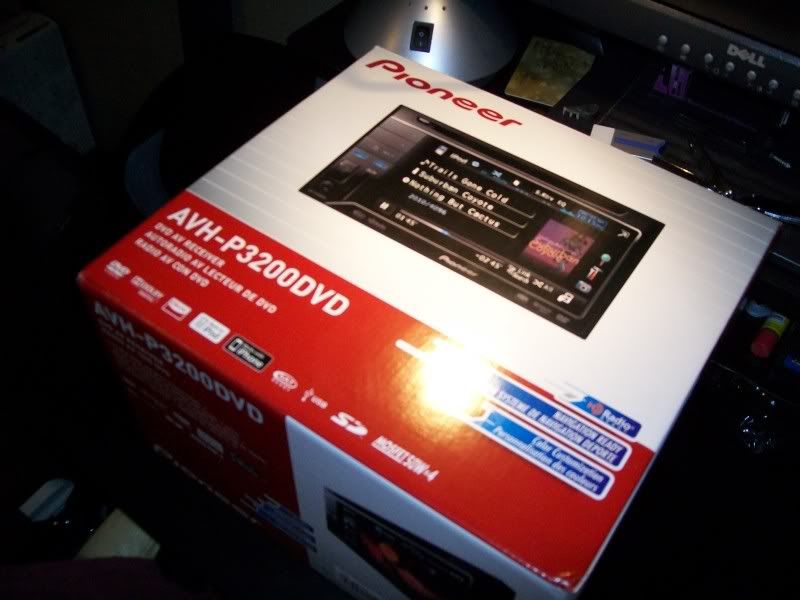
I installed a 2-din Pioneer AVH-P3200 in my car over the weekend. The only thing I had to do to make it fit was cut off the plastic tab in the back of the dash with a dremel, and bend the metal bracket back a little bit. That gave a lot more room to work with. I've finished all the wiring and installation, but the bezel is still a work in progress and I don't have any pics of it right now.
I'll get more pics with a better camera when I finish reshaping the bezel and everything is in place. Let me know what you think so far.
Last edited by wise690; 05-19-2010 at 07:55 PM.
 05-10-2010, 09:10 PM
#2

I like it so far! I'll hold off final judgement until you get the trim bezel taken care of though...I'd like to do this one day, but I don't want the "hack job" look to make it fit. I like the double DIN pieces that are available, but I'm not sure the paint matches perfectly in the pics, but then again, it may look good in person...
Post up pics when you get it done!
Post up pics when you get it done!
05-10-2010, 10:51 PM
#3
12 Second Club
iTrader: (47)

Join Date: Aug 2003
Location: NE OHIO
Posts: 390
Likes: 0
Received 0 Likes
on
0 Posts

i just got done with this exact project two weeks ago and it was a pain in the butt doing the bezel work but it turned out good and am happy with finished product ....
05-11-2010, 01:12 AM
#5
Staging Lane
Thread Starter
Join Date: Oct 2007
Location: Wichita Falls, TX
Posts: 52
Likes: 0
Received 0 Likes
on
0 Posts
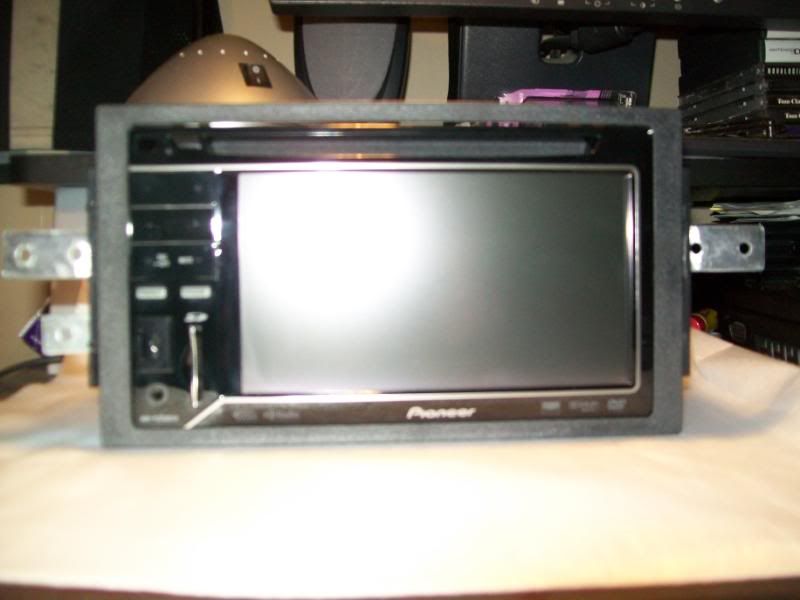
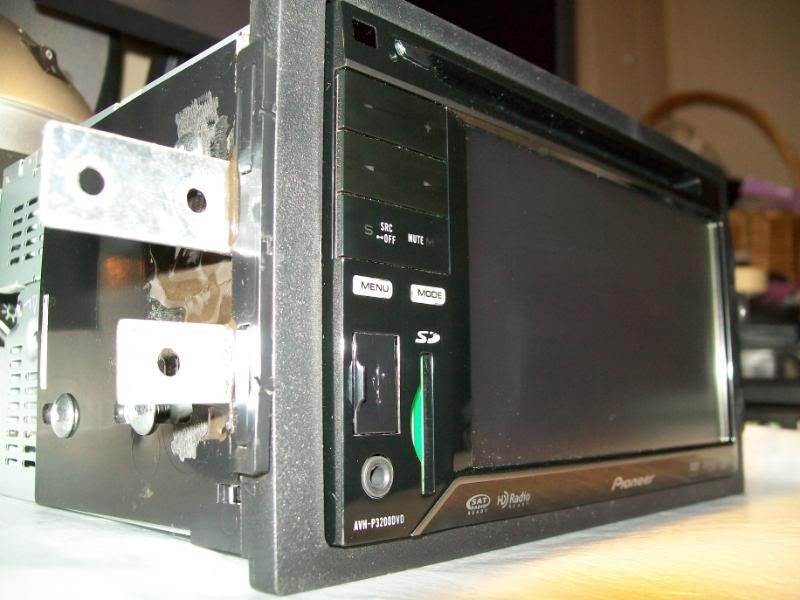
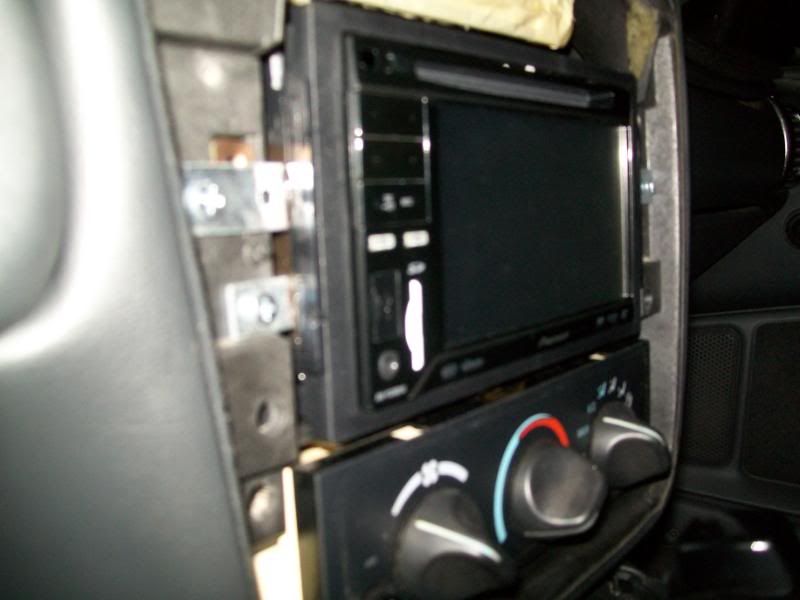
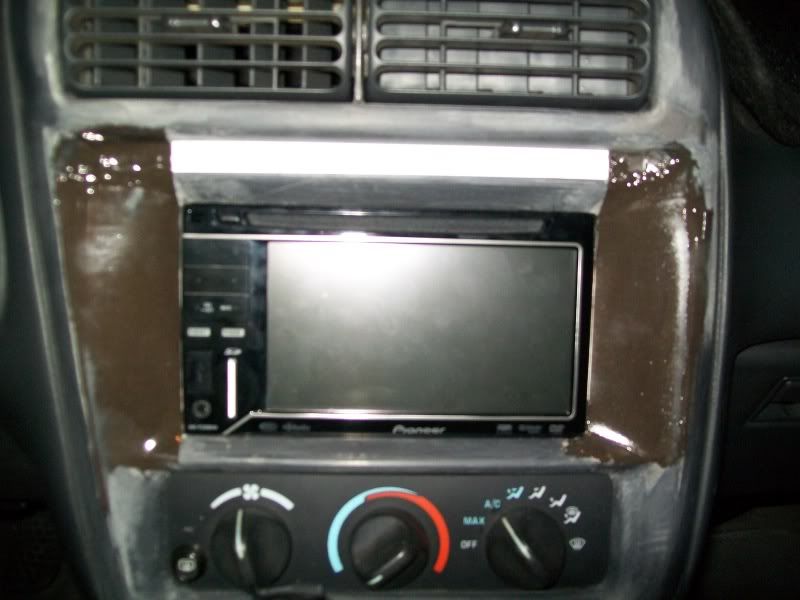
The black trim piece/radio mount I attached the brackets to will be covered up by the bezel as soon as I finish it. Firebird guys are lucky on the bezel work. This has got to be the most time-consuming part. Since GM had to screw us over with a 1.5 din opening, it's gonna take some work to make it look as little a hack job as possible. The head-unit installation was easy. There's actually quite a bit of room to work with so that was nice.
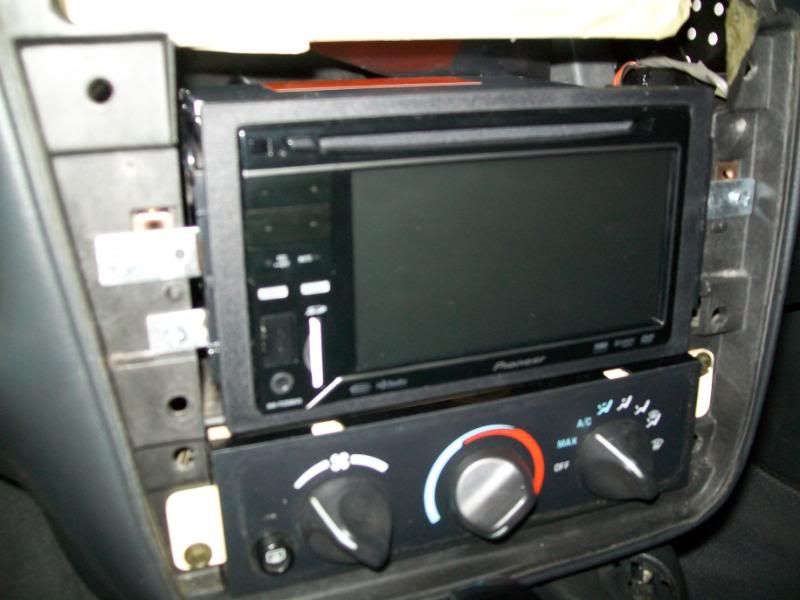
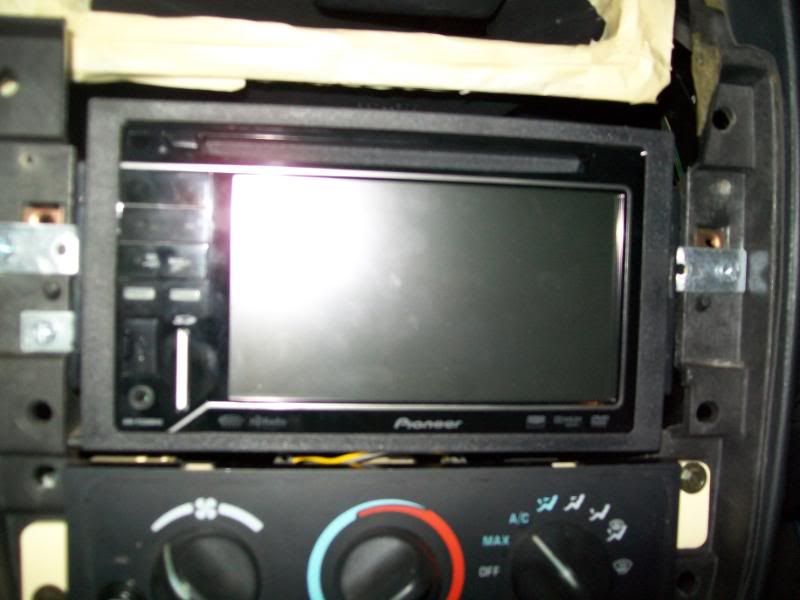
I mounted the unit just high enough in the dash to clear the bottom piece of the opening. I then cut out the top piece and moved it up about a half an inch, taking the place of the switch panel. The only switch I had was for my fog lights and I got rid of those when I got the car. I just put a piece of thin plastic about a half inch tall in place of the opening left. I did all of this because I didn't want to cut into the top/bottom pieces of the radio opening to keep a clean, oem-ish look, if that makes sense. Here's a quick cell phone pic. It's pretty nasty looking right now but I've got a lot sanding and maybe more filling to do in the next few days...
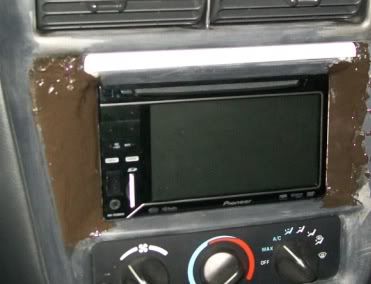

I've got the entire bezel piece sanded smooth with no texture left. Any paint suggestions would be appreciated. I'd like to keep it smooth and stay away from any textured paint. Right now I'm leaning towards gloss black. I'll have a few detailed pics of the bezel in primer at least by the end of the week if I'm not too busy.
Thanks for looking, more to come soon.
I mounted the unit just high enough in the dash to clear the bottom piece of the opening. I then cut out the top piece and moved it up about a half an inch, taking the place of the switch panel. The only switch I had was for my fog lights and I got rid of those when I got the car. I just put a piece of thin plastic about a half inch tall in place of the opening left. I did all of this because I didn't want to cut into the top/bottom pieces of the radio opening to keep a clean, oem-ish look, if that makes sense. Here's a quick cell phone pic. It's pretty nasty looking right now but I've got a lot sanding and maybe more filling to do in the next few days...
I've got the entire bezel piece sanded smooth with no texture left. Any paint suggestions would be appreciated. I'd like to keep it smooth and stay away from any textured paint. Right now I'm leaning towards gloss black. I'll have a few detailed pics of the bezel in primer at least by the end of the week if I'm not too busy.
Thanks for looking, more to come soon.
Last edited by wise690; 05-11-2010 at 02:34 AM. Reason: Spelling

 05-11-2010, 02:22 AM
#7
Staging Lane
Thread Starter
Join Date: Oct 2007
Location: Wichita Falls, TX
Posts: 52
Likes: 0
Received 0 Likes
on
0 Posts
Wow, that looks really good. Looks like it should have from the factory. I looked at the 6LE bezel on their site and would like to have bought one but after buying the head unit I didn't want to put too much more money into the install. Plus I've got a little bit of extra time on my hands so this gives me something to do. I'm getting excited to finish it up though.
Trending Topics
 good luck
05-11-2010, 01:06 PM
good luck
05-11-2010, 01:06 PM
#12
Staging Lane
Thread Starter
Join Date: Oct 2007
Location: Wichita Falls, TX
Posts: 52
Likes: 0
Received 0 Likes
on
0 Posts
Hadkin, I had your thread pulled up as well as a few others while I was trying to figure out what to do with the bezel. Thanks for posting it.
05-11-2010, 11:03 PM
#14
Copy & Paste Moderator
.jpg)
.jpg) 05-11-2010, 11:15 PM
05-11-2010, 11:15 PM
#15
Staging Lane
Thread Starter
Join Date: Oct 2007
Location: Wichita Falls, TX
Posts: 52
Likes: 0
Received 0 Likes
on
0 Posts
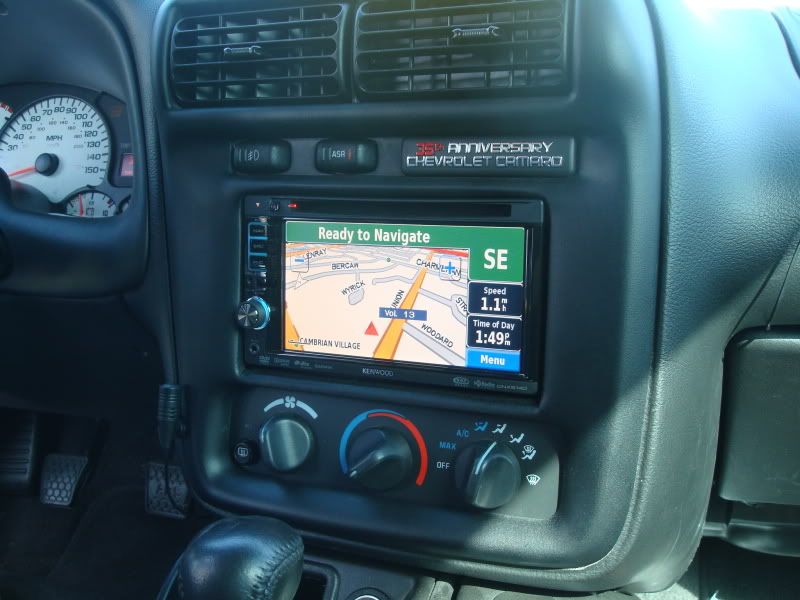
Fosnot, I think there are a few guides on the bird bezel floating around. It appears to be easier to work with from the pics; a lot less contour and curve than the Camaro bezel. I looked in my buddies '00 T/A when I first oredered this unit and it looked like it would be a much faster project to complete.
Edit: Just saw your post, VIP. Very clean install. I like the Kitt backgrounds as well; that's pretty cool.
I spent part of my weekend sanding down the driver/passenger side ac bezels, and of course the radio bezel. I spent a lot of time getting them all smooth with no texture. I decided to paint one of the ac bezels gloss black today and I hate it. Smooth, gloss black panels just stand out way too much against a grey interior, and don't look good at all. Made me think of rice. I'm going to sand it back down and follow the instructions in Hadkin's thread. I'll be picking up the textured paint at Wallyworld tomorrow and search for some grey bumper coating at O'rielly's. Hopefully I'll get to paint it this weekend and be done. For now, here is a quick update on the little bit I got done this evening.
Last edited by wise690; 05-11-2010 at 11:22 PM.
05-19-2010, 07:30 PM
#17
Staging Lane
Thread Starter
Join Date: Oct 2007
Location: Wichita Falls, TX
Posts: 52
Likes: 0
Received 0 Likes
on
0 Posts
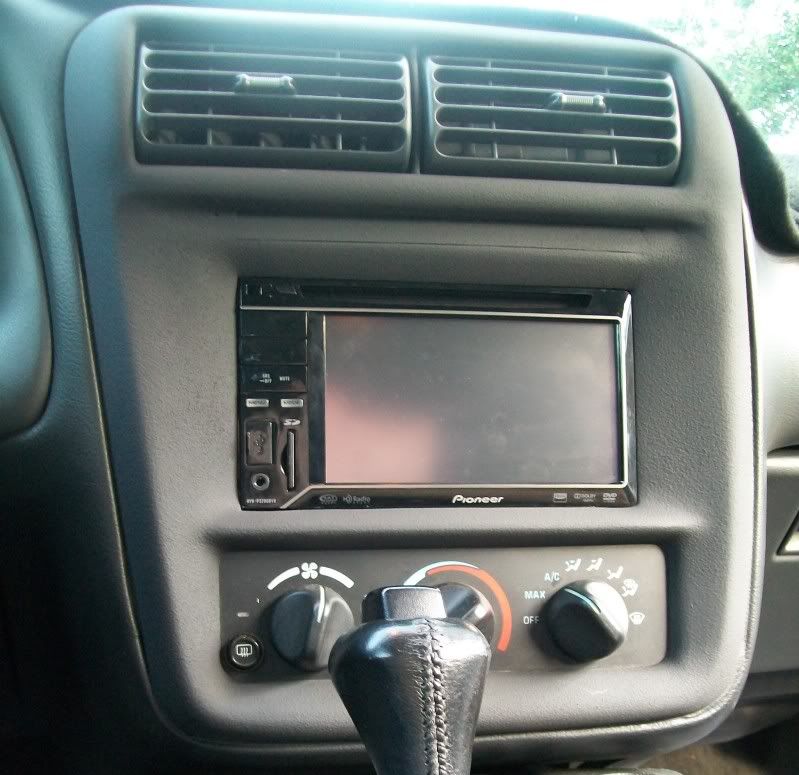
It's been a few days since I've updates, sorry for the delay. I finished the bezel on Sunday. We've had crazy weather and my internet has been acting up or not working everytime I've tried to post.
The first pics are of the bezel painted with Rustoleum textured paint, and then Duplicolor charcoal trim paint. Once it dried, the paint didn't match the rest of the dash very well and came out to glossy for my taste.
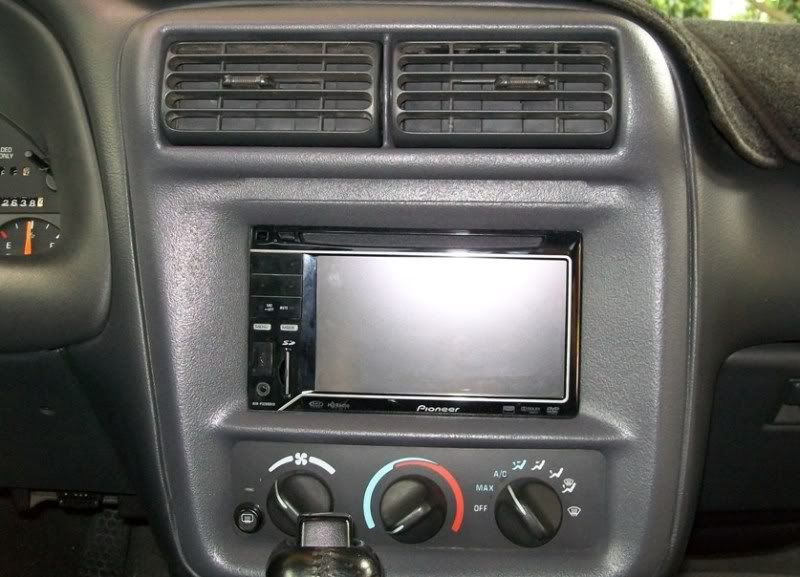
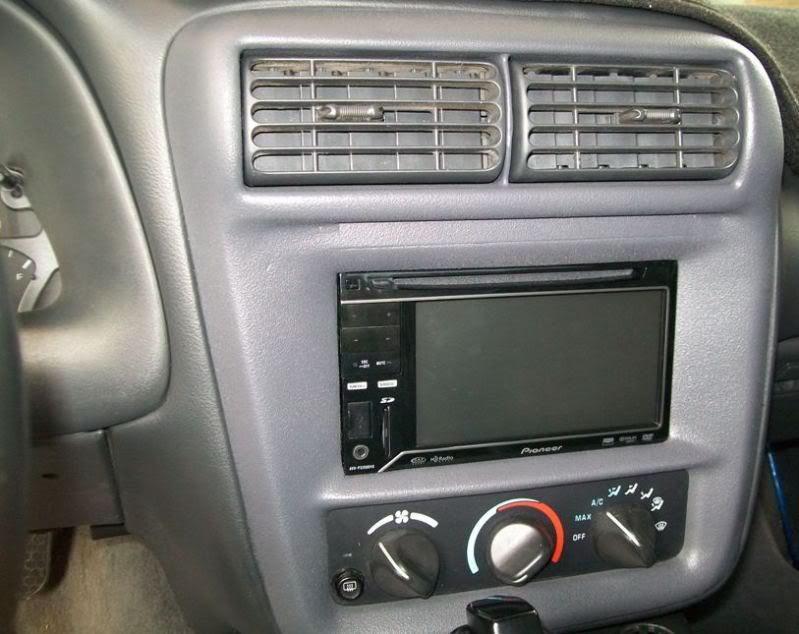
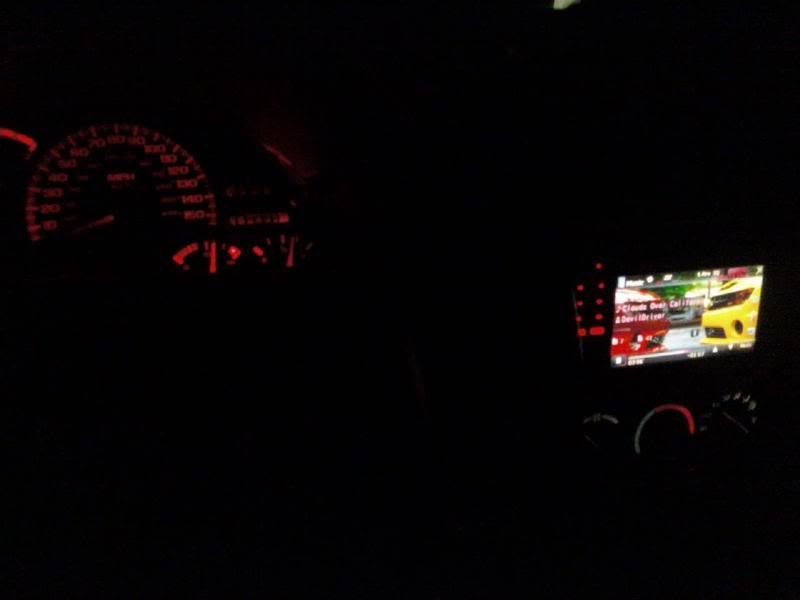
I pulled it off and sprayed cheapo flat black over it instead. The result from this was awesome. Didn't come out too dark black, but instead just enough to match the rest of the dash perfectly. These pics were taken today, with the flash on my camera turned off. Let me know what you think, and thanks for looking.
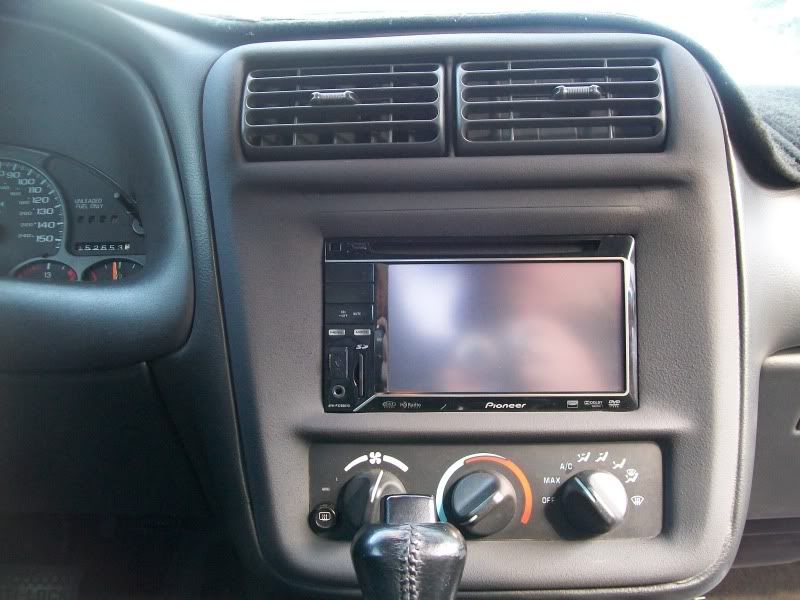
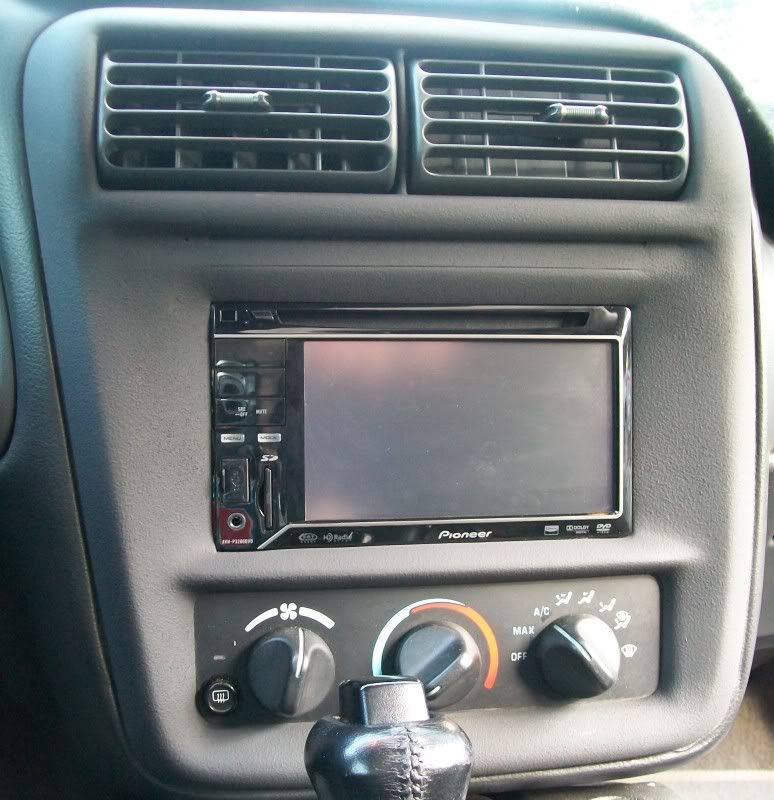
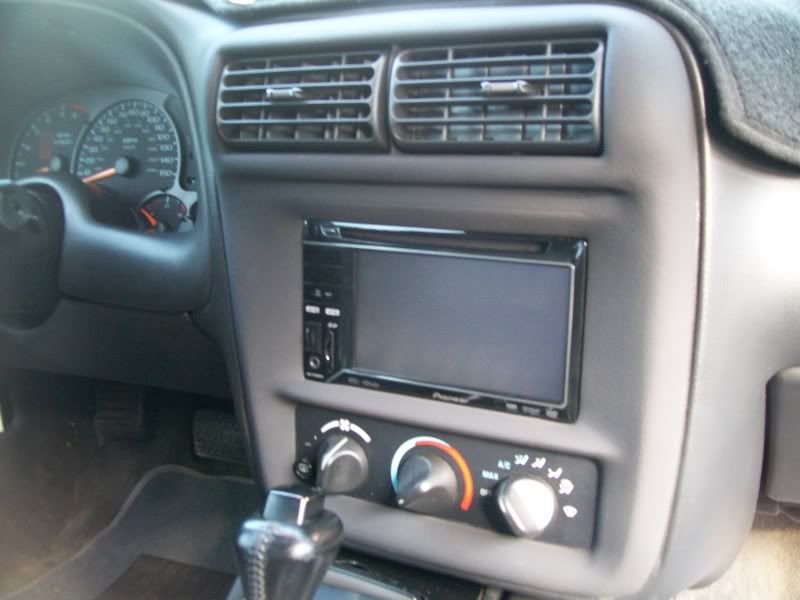
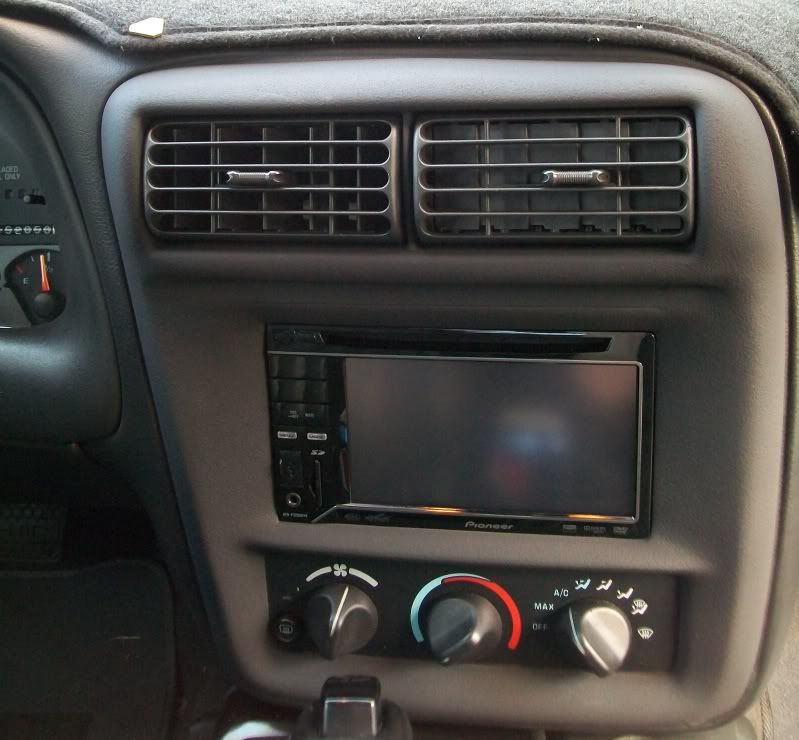
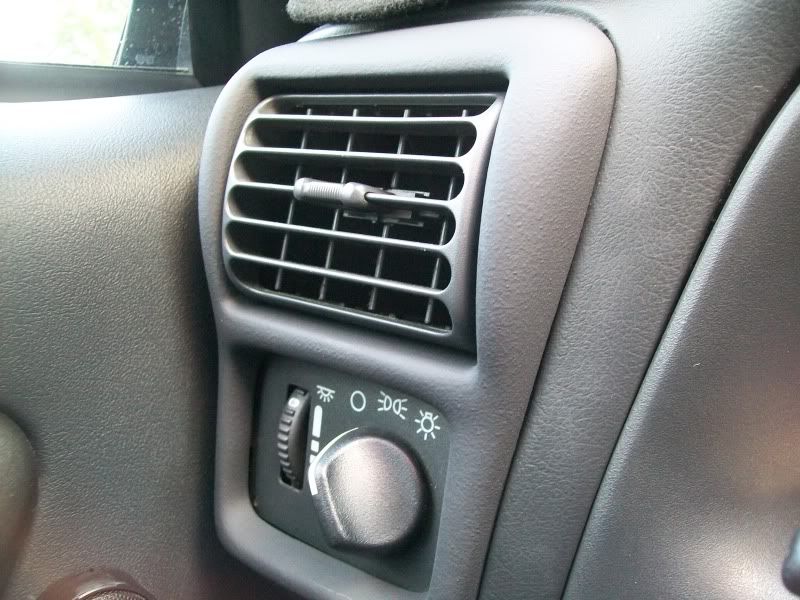
Also painted the driver/passenger side ac bezels. Just a quick pic to show how well the paint matched.
The first pics are of the bezel painted with Rustoleum textured paint, and then Duplicolor charcoal trim paint. Once it dried, the paint didn't match the rest of the dash very well and came out to glossy for my taste.
I pulled it off and sprayed cheapo flat black over it instead. The result from this was awesome. Didn't come out too dark black, but instead just enough to match the rest of the dash perfectly. These pics were taken today, with the flash on my camera turned off. Let me know what you think, and thanks for looking.
Also painted the driver/passenger side ac bezels. Just a quick pic to show how well the paint matched.
