Camaro and Firebird: How to Install CTS-V Brakes
Swapping out your stock brakes for those off a Cadillac CTS-V is a popular way to seriously upgrade your braking power. Here's how to make the change on your Camaro or Firebird.
This article applies to the Camaro and Firebird (1993-2002).
Big brakes are a must when you are adding big horsepower, but making the investment in more stopping power generally also means spending big bucks. The best brake upgrade kits on the market cost thousands of dollars, which is out of reach for the average shadetree mechanic looking to upgrade their Camaro or Firebird. The solution is simple: grab a set of brakes from the Cadillac CTS-V or Corvette Z06, both of which present a big upgrade on stock brakes. The CTS-V's, in particular, are Brembo units that feature four pistons per caliper and represent a fantastic as well as inexpensive way to add some "whoa" to your "go." Here's how to complete a CTS-V brake swap on your Camaro or Firebird.

Materials Needed
- (2) 2004-2007 CTS-V brake calipers ($200-$300 via eBay or GM)
- (2) 2006+ Corvette Z06 brake rotors ($240 from GM)
- Custom length brake hoses ($75 from Flynbye Performance)
- Copper brake hose washers
- (8) grade 8 M12 or 1/2" washers
- Brake fluid
- Ratchet and standard socket set
- Torque wrench
- 12mm and 7/16" line wrenches
- Jack and jack stands
- Wheel spacers (if using stock 56mm offset wheels, otherwise you must use 41mm or less offset wheels)
- Wire brush
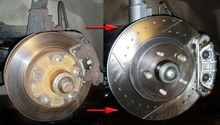
Step 1 – Remove the old brakes
Lift the front of the car and place it on jack stands. Remove the front wheels. Remove the two bolts holding the calipers in place and slide them off the rotors, using a bungee cord or piece of rope to suspend them out of the way. Pry the rotors off, using a rubber mallet if needed to free them up if they are rusty and stubborn. If you are using wheel spacers, you will also need to remove the wheel studs at this time. These can be very difficult to remove, so soak them in penetrating fluid before taking a hammer to the studs. Install the new studs by inserting them into the rear of the hubs. To pull them into place, install a couple of M12 washers and thread on an M12 grade 8 nut, then tighten just until the stud touches the hub.
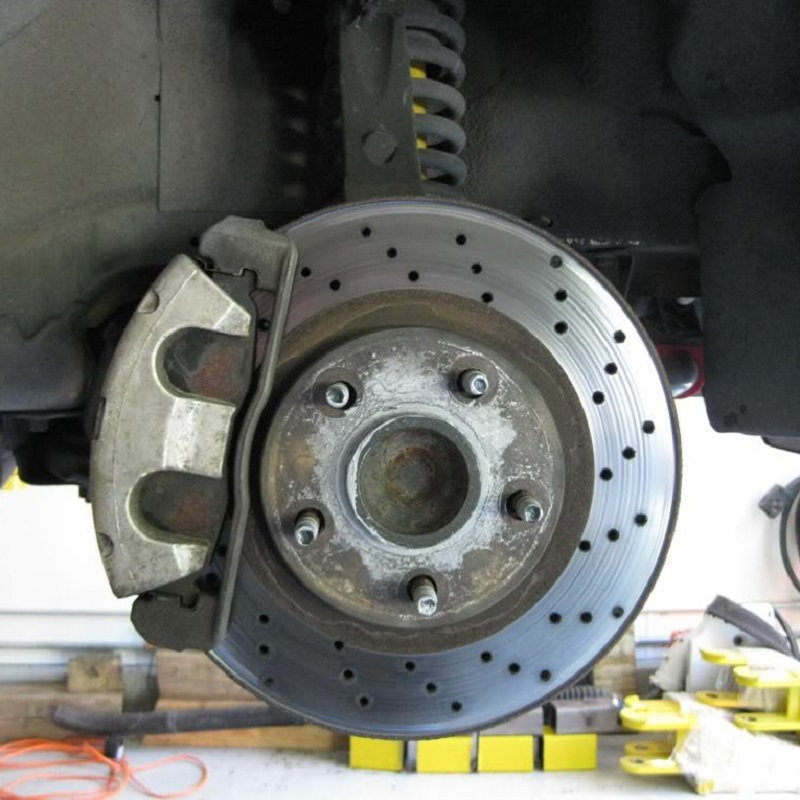
Figure 1. Remove the old brake calipers and rotors. 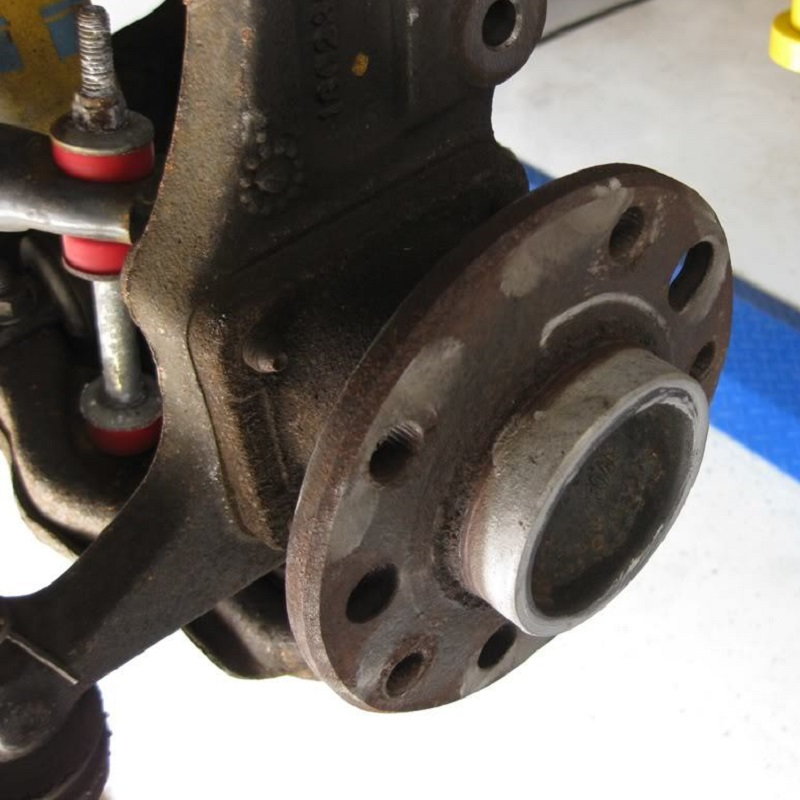
Figure 2. If using spacers, remove the old wheel studs. 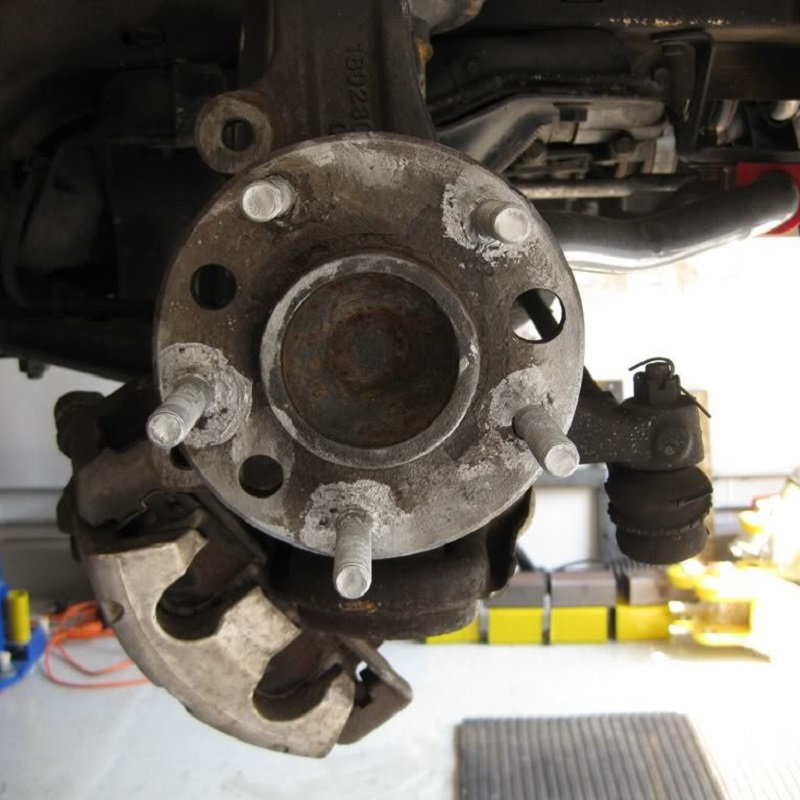
Figure 3. Install the new wheel studs.
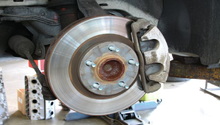
Step 2 – Install the new brakes
Use a wire brush to remove any rust from the surface of the hubs, as any surface rust can cause alignment issues. Put some anti-seize on the hub's center and the wheel studs, then install the new rotors. Set the new calipers in place and use two M12 washers on each bolt so that the new caliper is spaced properly on the new rotor. Check the wheel to caliper clearance by sliding the wheel on the studs, looking to see if there is some space between the spokes of the wheel and the calipers. If there isn't, you will need wheel spacers.
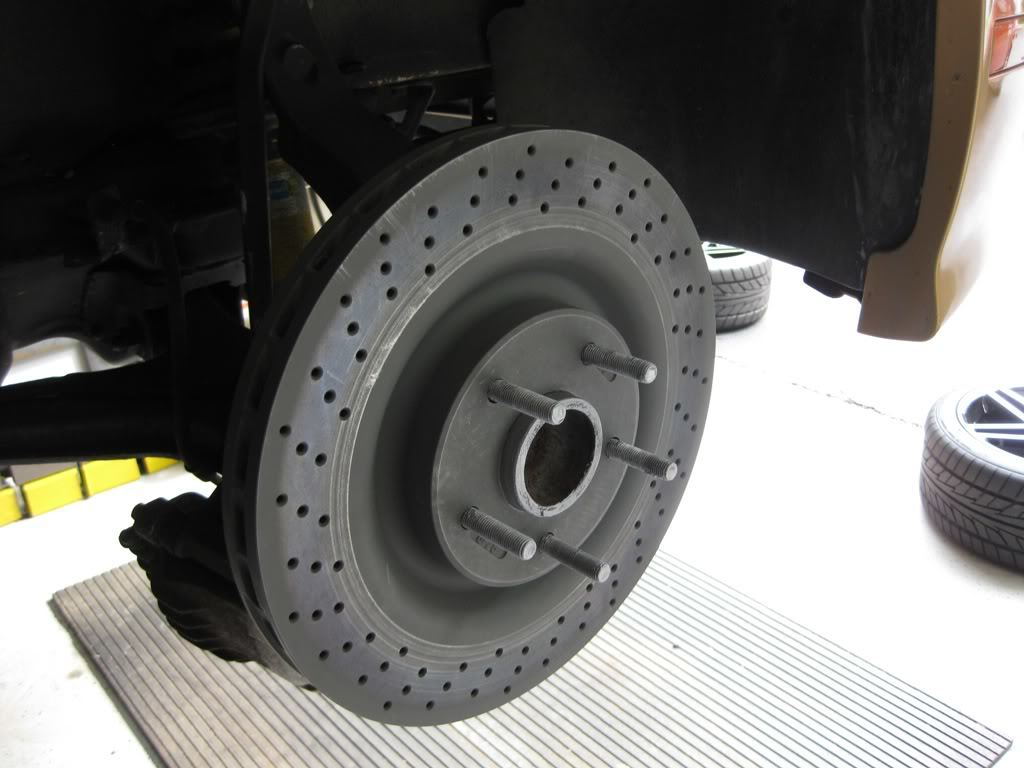
Figure 4. Install the new rotors. 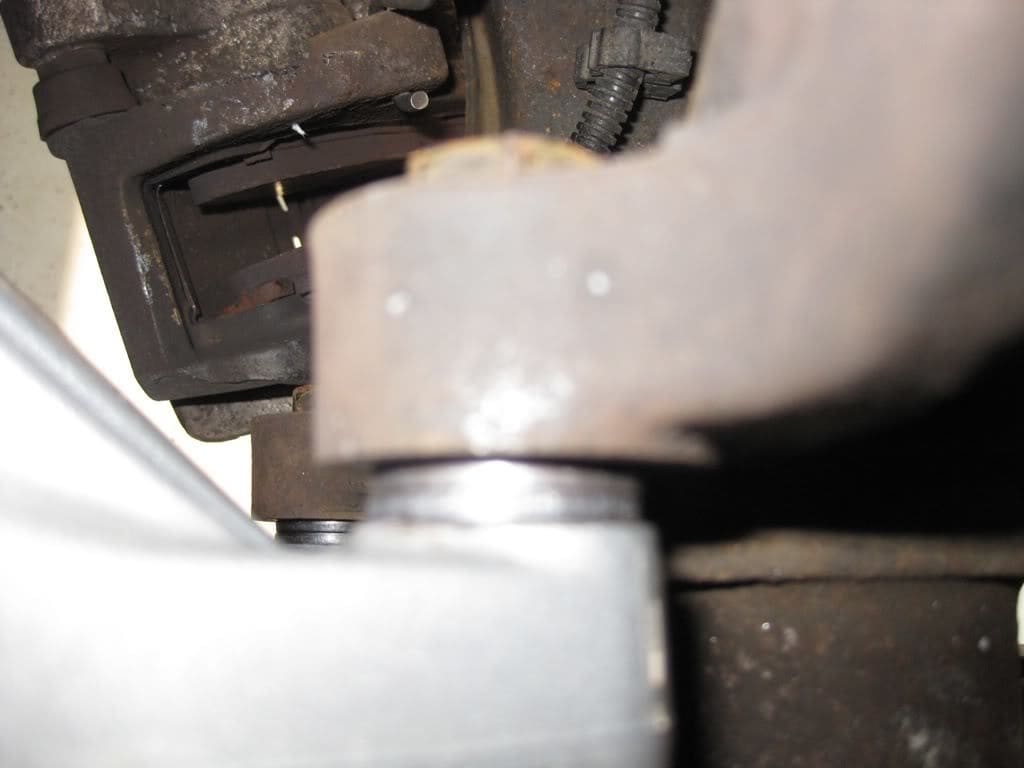
Figure 5. Install the new calipers with spacers for proper clearance.
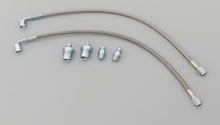
Step 3 – Install new brake lines
Place a drain pan underneath the brake hose fittings. Soak the hard line to brake hose fittings with some penetrating fluid, then break them loose using a 12mm line wrench. Remove the clip that holds the hose and the bracket together using a flat head screwdriver. Pull the old line and caliper out of the car. Install the new lines with one copper washer on each side of the eyelet on each line. Next, install the chassis side of each line and tighten, then thread the line into the adapter fitting and tighten.
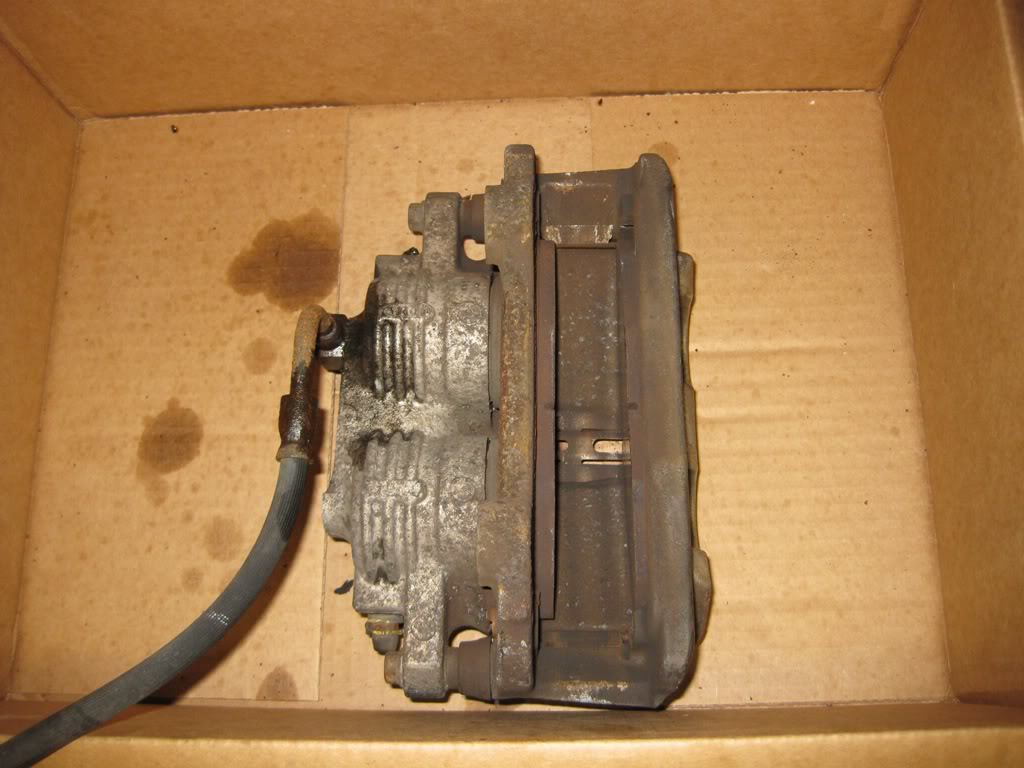
Figure 6. Remove the old brake calipers and lines. 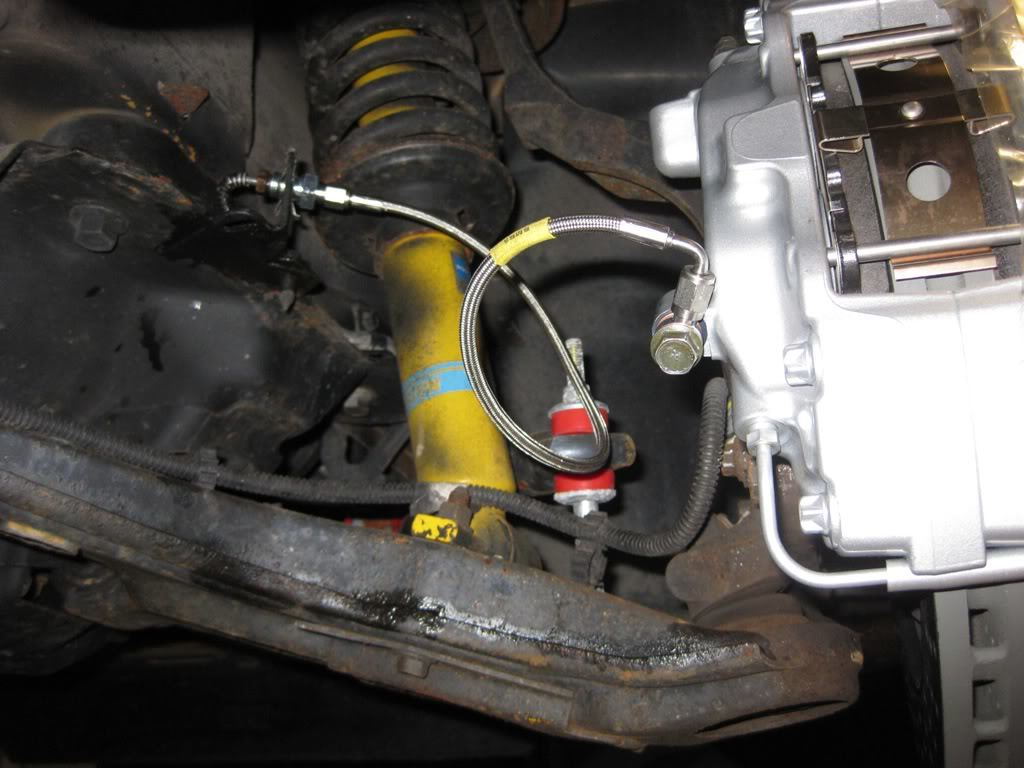
Figure 7. Install the new brake lines.
Step 4 – Bleed the brakes
To bleed the brakes, you can either purchase and use a brake bleeder kit or have a friend help you. When bleeding brakes, always start at the caliper furthest away from the master cylinder, and work your way towards it. For the 4th Gen F-Body, this means going in the following order: passenger-rear, driver-rear, passenger-front, driver-front. Be sure and keep the master cylinder topped off with fresh fluid in between each line, and make sure there is no air in the system before closing the bleeder valves.
(Related Article: How to Replace Brake Fluid - LS1Tech.com)
Step 5 – Wrapping up
With the brakes bled, test the brake pedal and ensure it is firm. From there, bolt the wheels back up, lower the car down, then take a cautious test drive around the block to ensure the pedal remains firm and that there is ample stopping power. If everything checks out, you are done.
Related Discussions
- CTS-V Brake Install with Pics - LS1Tech.com
- Using CTV-V Calipers and Rotors with 17 Inch Wheels - LS1Tech.com
- CTS-V Brake Conversion Question - LS1Tech.com