Camaro and Firebird: How to Install Engine Start Button
It is easy if you are up to a little challenge.
This article applies to the Chevrolet Camaro (1990-2015).
Push button start is used on some of the coolest vehicles made. What started with luxury and exotic models, has trickled down to nearly every modern car. You can add one in your Camaro as long as you are comfortable with wiring. You can use a button like on a modern car, or go for a switch like NASCAR cars use. You will still needs to use the ignition key to unlock the steering and such, but only the button will start the engine. Now we are talking about electrical wiring so the job needs to be done right to prevent anything from burning up, but it is not that difficult. Read along and see what you think.

Materials Needed
- Start button (S2000)
- Assorted color wire
- Start button pigtail
- 5-pin automotive relay with wiring pigtail
- Wiring cutters/strippers
- File
- Light up circuit tester
Warning
Disconnect the battery before doing anything else. YOU DO NOT WANT A WIRING FIRE! It will ruin your day, at least.
Step 1 – Identify ignition wiring
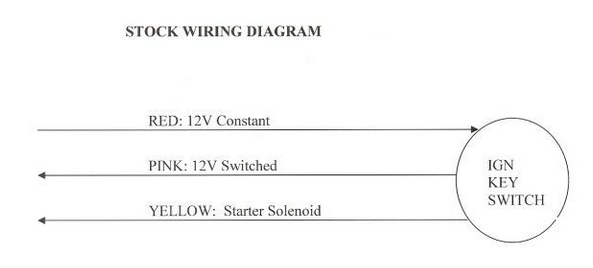
Remove the plastic panel under the steering column. The wires from the ignition switch will be under it. Look for the red wire to pick up constant power from. Using your circuit tester, make sure the red wire you choose has power all of the time. Find the pink wire, and test if it has power only when the ignition key is turned on. You will also be looking for the yellow wire that goes to the starter.
Pro Tip
Always use appropriate size wire to make it easy on yourself and others by using different colors. Sloppy wiring can really go bad fast.
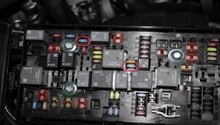
Step 2 – Wire relay
Splice a 14 gauge wire from the red wire to pin #87 of the relay. Cut the yellow wire and connect the end that goes to the engine compartment to pin #30 of the relay. Tape the other end of the yellow wire to prevent shorting. Run a ground wire to terminal #85. Your new start button (or toggle) will hook to terminal #86, and on the other end taps into the pink wire, to provide switched power to the new switch.
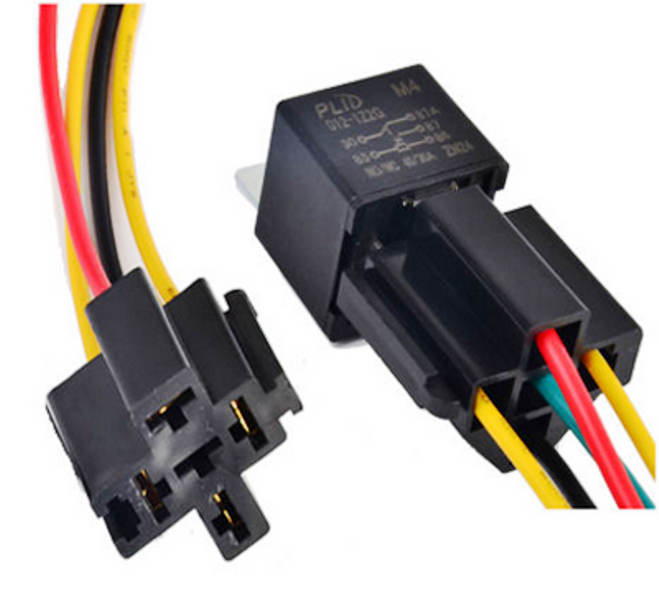
Figure 2. Relay with pigtail. 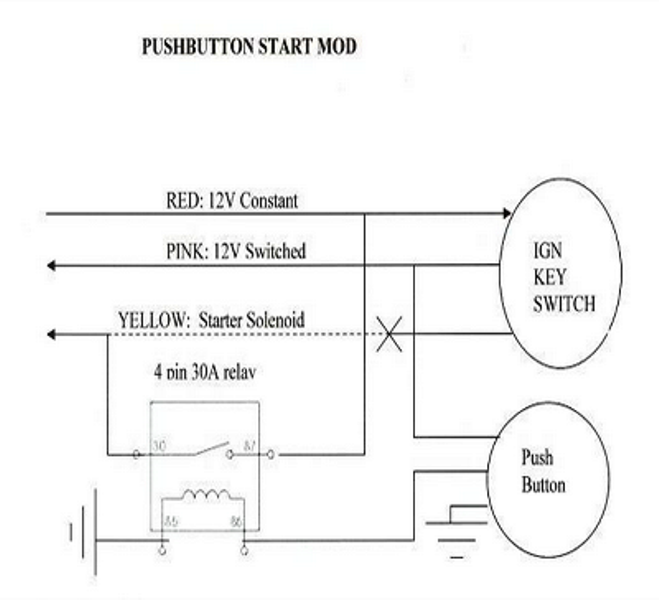
Figure 3. Modified start button wiring.
Pro Tip
Crimp-on connectors are fine, but if you want the best, solder all connections.
Step 3 – Wire start button
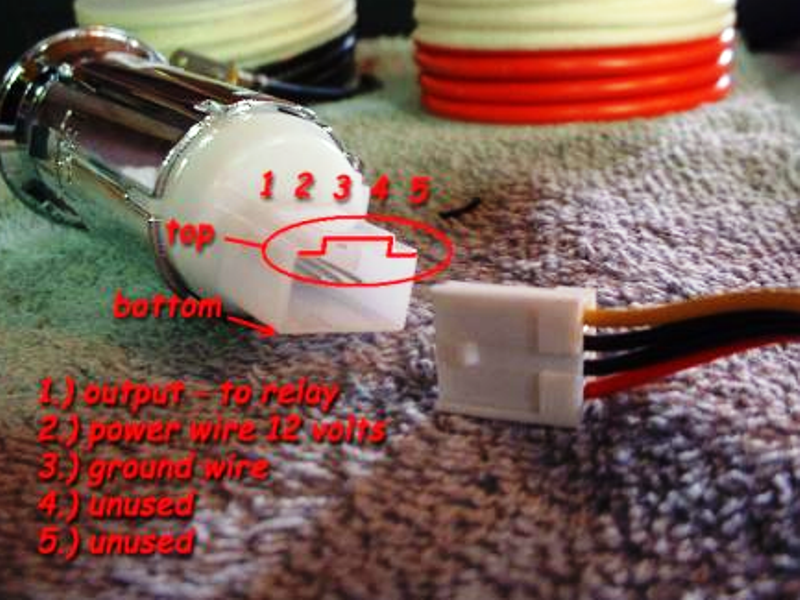
You will not use every pin on the S2000 start button; Figure 4 shows how to wire it. Splice your wires from the relay to the start button pigtail as follows:
- The wire from pin #86 goes to terminal #1.
- The pink switched power wire goes to terminal #2.
- A ground wire to terminal #3.
Pro Tip
A computer floppy drive connector you have laying around may fit the switch, too.
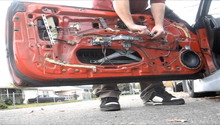
Step 4 – Install start button
A lot of people choose to install the start button where the current cigarette lighter is. It looks very smart and fits in almost perfectly. You have to remove the lighter and then enlarge the hole so the button fits. Use a file or sandpaper rolled into a tube. The nice thing is the new switch has a collar that can hide a lot of sins.
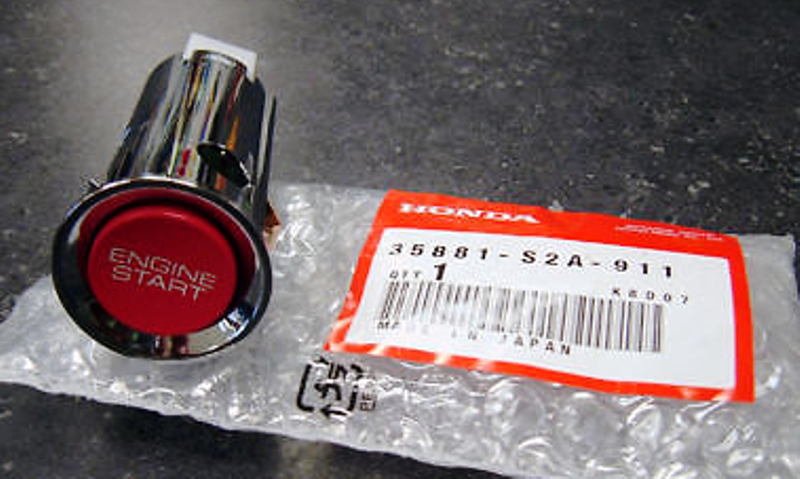
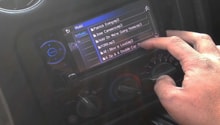
Figure 5. S2000 start button. 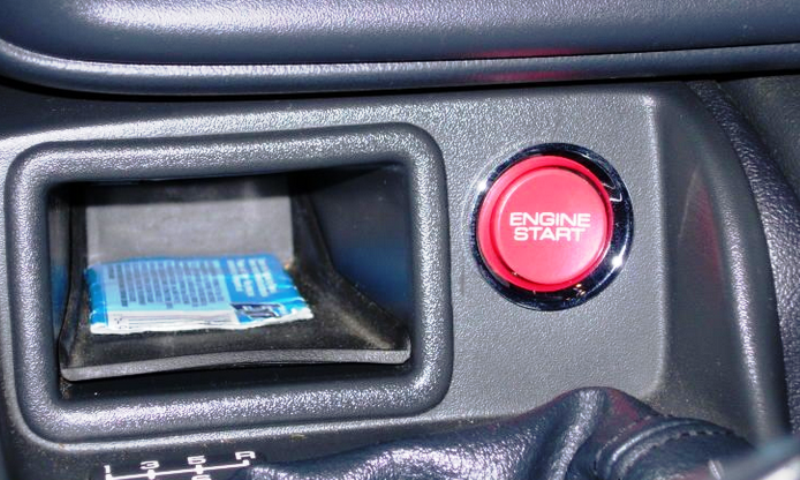
Figure 6. Start button installed.
Before you install the button into the hole, connect the pigtail. At this point, reconnect the battery and test the new switch out, since it will be easier to track any wiring issues down before it is in the dash. The new button just snaps in, but be very sure that the hole is not too tight, so it will work correctly. If the hole is too small, the button can stick and your starter can be stuck engaged. Push the new start button into the dash, tape and wire tie the wires so they are safe and out of the way, and you are done. Congratulations!
Step 5 – Variations on switches
If you prefer the NASCAR toggle switch look, that is fine too; you can use any momentary on switch.

Figure 7. Overhead switch. 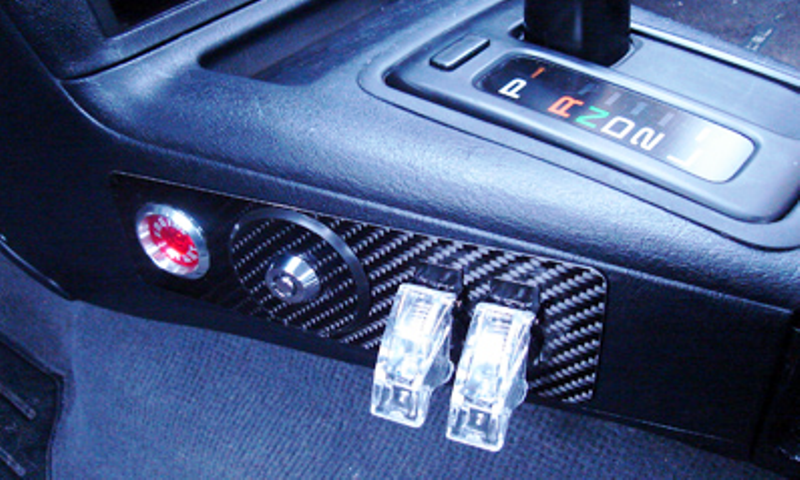
Figure 8. Switch on console.
Related Discussions
- Install Engine Start Button - LS1Tech.com
- Push Button Start Install - LS1Tech.com
- Push Button Start Wiring - LS1Tech.com
- Push Button Engine Start Mod How - LS1Tech.com