Camaro 2010-Present: How to Change Cabin Air Filter
Don't throw money at a maintenance job that you can do all on your own for just the cost of parts.
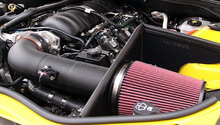
This article applies to the Chevrolet Camaro (2010-present).
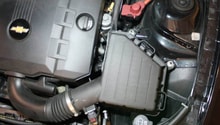
The cabin air filter in your (2010-present) Chevrolet Camaro is responsible for trapping unwanted pollutants that would otherwise enter and pass through your heating, ventilation and air conditioning (HVAC) system. The filter needs to be changed regularly, say every 15,000 miles, to ensure optimum performance. To access your cabin air filter, you'll first need to pop the hood of your car. The rest is as easy as 1-2-3! Keep reading to learn the simple instructions that will save you on labor costs and allow you to complete the job in under 15 minutes.

Material Needed
- Replacement cabin air filter
Step 1 – Pull away weatherstripping
- With the engine of your Camaro turned off and the hood of your car popped open, go ahead and pull the weatherstripping along the passenger side cowling away from your vehicle.
- It's safe to use your hands. No special tools are required. Simply lift it up and away from your vehicle.
- Once the weatherstripping is out of the way, go ahead and grab your screwdriver.
- Use it to remove the three holding clips that hold the cowling in place.
- You'll need to remove the pin as well as the base.
- Set them aside while you work, but be careful not to lose them!

Step 2 – Remove the cowling
- Using your hands, gently pull up on the cowling to unclip and remove it from your Camaro.
- No special tools are needed. Just apply a little pressure as you pull up and away from your vehicle.
- Take care to ease the cowling out of tight corners and crevices without breaking it.
- It won't just pull straight up. You'll need to manage the removal with your hands.

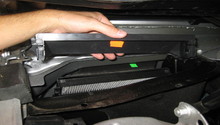
Step 3 – Remove the filter
- To access your cabin air filter, you'll first need to unhook both sides of the housing unit that contains it.
- Unhook the clips to remove the housing cover.
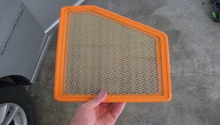
- Remove your old air filter by sliding it out of the housing unit.
- The filter should slide right out without the need for any added pressure.
- Using the indicator arrow on your cabin air filter, go ahead and slide your new air filter into place.
- Put the housing cover, cowling and weatherstripping back into place on your vehicle, and then lower the hood of your Camaro.
- Don't forget to re-install the clips you removed in Step 2 so you can re-secure the cowling to your car.
- You are done!

Feature Video: Cabin Filter Replacement
Related Site
- Change Your Cabin Filter - Camaro5.com