Camaro and Firebird: How to Change Your Oil
Engine oil will become contaminated with dust and dirt, metal particles, and combustion by-products as mileage accumulates. Combined with oil additive breakdown, the engine oil will eventually suffer from elevated levels of contaminants and oxidation that will not allow it to adequately protect the engine components, thus requiring an oil change.
This article applies to the Chevrolet Camaro and Pontiac Firebird (1993-2002).
Engine oils are filled with various additive packages to help protect your engine from wear and tear. Unfortunately, oil begins to breakdown over time and mileage from the processes of combustion and contamination, and must be changed at a fairly regular maintenance interval to continue to preserve the life of your engine. While there are no longer huge savings to be had by changing the oil yourself versus taking your car to the local quick lube station, most feel that by performing their own maintenance they are able to more closely monitor the vehicle and ensure the job has been done right. Additionally, changing you own oil allows you to be in control of the quality of oil and filter that is used versus the cut rate offerings by an auto shop. This article will outline the procedure for replacing the engine oil and filter for the 1993 to 2002 Chevrolet Camaro/Pontiac Firebird.

Materials Needed
- Floor jack and jack stands/car ramps/ 2x4 blocks
- Catch pan
- Metric wrench or socket set
- Ratchet
- Filter wrench or large pliers (optional)
- Funnel
- Shop rags
- Nitrile gloves
- 4-6 quarts of engine oil
- Oil filter
Note
This procedure is best completed with a slightly warm engine. Warm engine oil has an easier time draining from the crankcase than oil that is cold. Additionally, warm oil has a tendency to better collect any deposits trapped in tight crevices that would otherwise be left in place if the oil were to be drained cold.
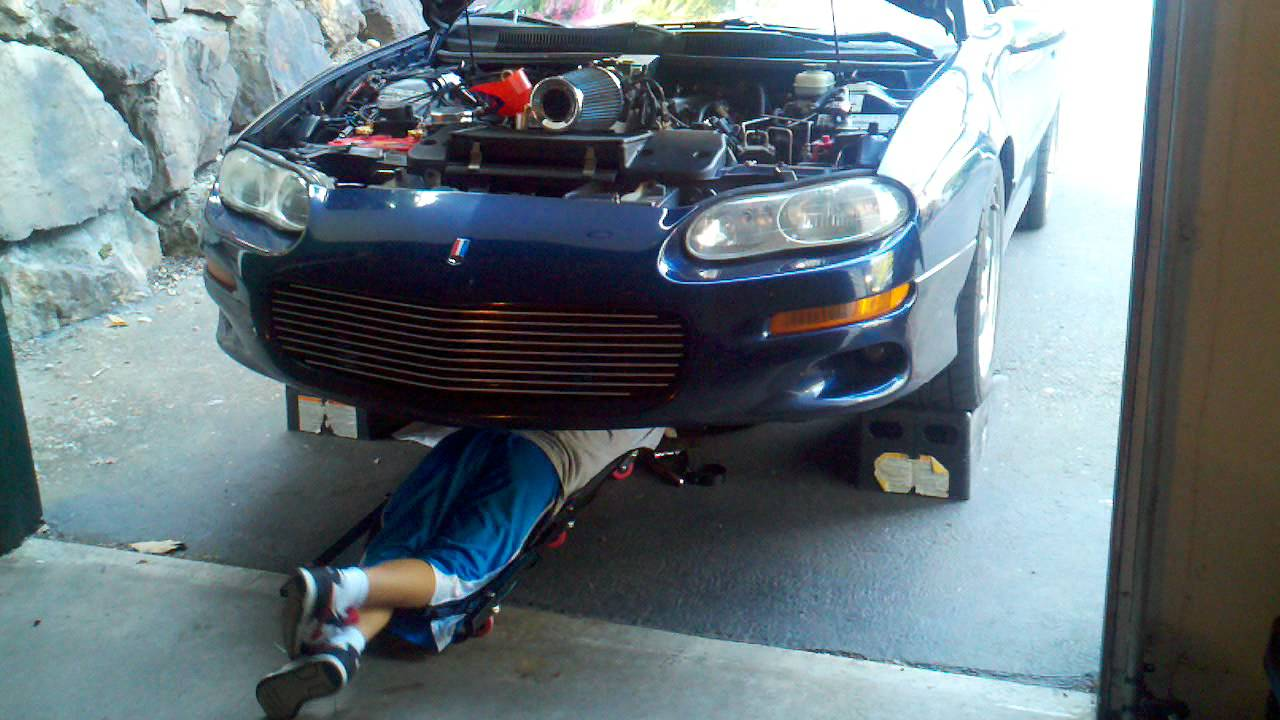
Step 1 – Lift vehicle
In order to access the oil pan drain bolt, lift the front of the vehicle and support it with jack stands. Similarly, the car can be driven up onto a set of 2x4's or ramps to gain the necessary ground clearance. For additional information on lifting the vehicle, see How to Jack Up Your Car.
Step 2 – Drain engine oil
With the front of the vehicle lifted, you can now begin draining the engine oil.
- Open the hood and remove the engine oil filler cap. This will allow the oil to better flow out of the pan once the drain bolt has been removed.

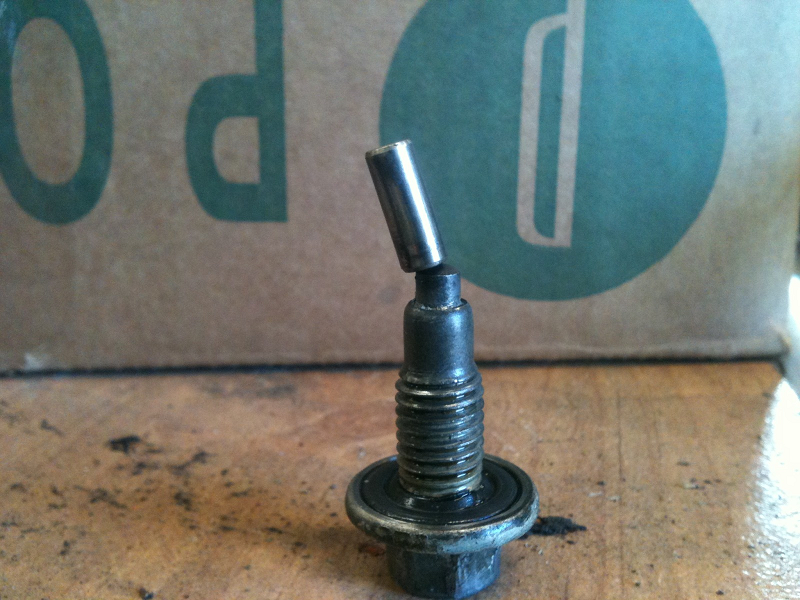
- Position your oil catch pan underneath the engine oil pan and remove the drain bolt.

- Clean the drain bolt of any small metallic particles while the oil continues to drain.
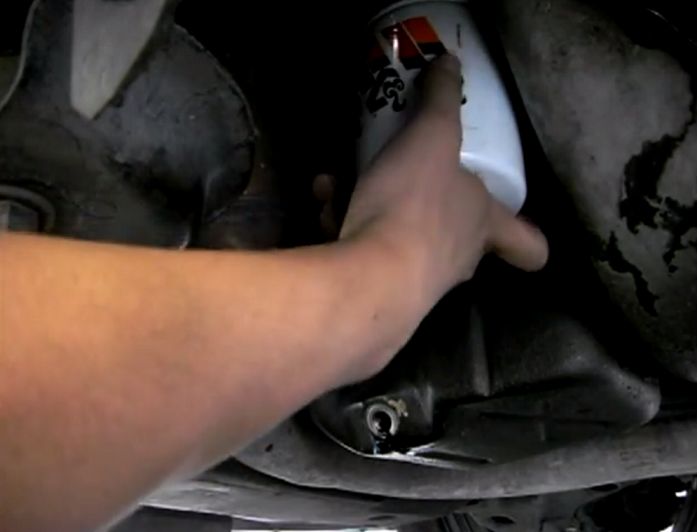
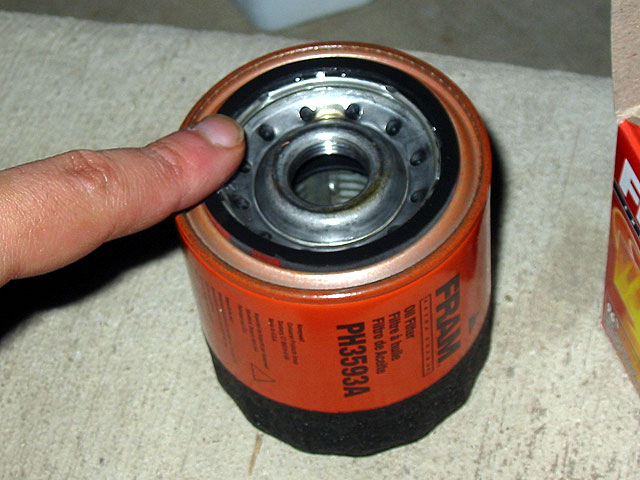
Step 3 – Replace oil filter
After the majority of the oil has drained and has slowed to drip, slide the oil catch pan under the oil filter while still catching the drip from the engine oil pan.
- Remove the oil filter by turning it counter-clockwise. In some instances a filter wrench may be necessary to loosen the filter. As it is loosened, oil will slowly emerge from the base of the filter, so be sure your catch pan is properly positioned. Once the filter has been removed, place it upside down in the catch pan.
- Lightly oil the filter sealing ring with fresh engine oil before installing it to the filter housing. The service manual indicates that the filter should be tightened to 22 ft/lbs, but securely tightening the filter by hand will typically achieve this figure and prevent damage to the filter housing threads often caused by over-tightening. Some individuals prefer to fill the oil filter completely with engine oil before installation to supply the engine with immediate oil pressure upon startup, but this is completely optional.
Pro Tip
Many individuals refit the oil pan drain plug before removing the oil filter; however, this often leaves a portion of used oil in the engine. Removing the filter with the drain bolt removed often relieves pressure and allows an additional amount of oil to drain from the crankcase.
Step 4 – Fill with fresh oil
- Install the oil pan drain bolt and torque to 18 ft/lbs.
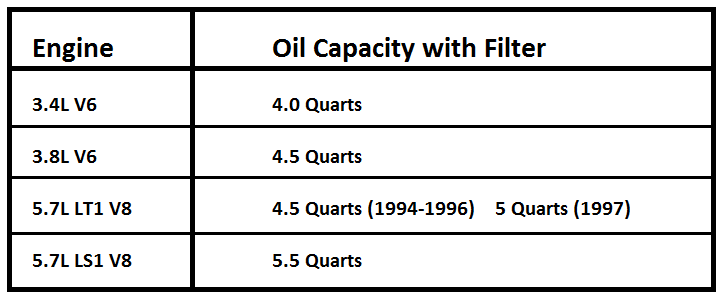
- Fill the engine with the required amount of engine oil for your application as outline below. When finished, install the filler cap.
- With the engine full of oil, start the vehicle. Monitor the oil pressure gauge to ensure oil pressure is quickly achieved after the engine is running.
- Check for any oil leaks before lowering the car off of jack stands/ramps/or blocks.
- Shut the car off and allow it to sit for 5-10 minutes before checking the oil level. Top off with oil as necessary.
Step 5 – Reset oil service indicator
The fourth generation cars are equipped with an Oil Life Monitor that will need to be reset after the oil change has been completed. Use one of the following methods to reset the oil service indicator message.
- Turn the key to the ON position without starting the car. Hold the trip reset button for approximately 12 seconds until the oil service light begins to flash. At this point the indicator has been reset and the key can be turned off.
- The oil service light can also be reset by turning the key to the ON position and slowly depressing the gas pedal three times. The oil service light will also begin to flash, which indicates that it has been reset.
Featured Video: How to Reset Oil Service Indicator Light
Related Discussions
- Best Motor Oil for LS1 - LS1Tech.com
- How Often Do You Change Your Oil? - LS1Tech.com
- What Oil is Best for Cammed LS1- LS1Tech.com