Camaro and Firebird: How to Install Mechanical Oil Pressure Gauge
A mechanical oil pressure gauge will be more accurate than the factory gauge. Here's how you install one.
This article applies to the Chevrolet Camaro and Pontiac Firebird (1990-2002).
The oil pressure gauge is important for telling you the condition of your oil lines, but over time, the factory gauge can become inaccurate. The good news is you can install an aftermarket oil pressure gauge without having to remove or replace the old gauge. However, you'll want to be extra careful when messing with your oil lines. The instructions below will tell you how it's done.

Materials Needed
- Oil pressure gauge kit
- Open ended wrench set
- Ratchet with 10mm socket
- Drill
- 7/16" or 21/64" drill bit
- 1/4" or 1/8" NPT pipe tap
- 1/4" male x 1/8" female reducing bushing
- Extra nylon tubing, fittings and wires
- Jack and jack stands
This article will be focusing on mechanical gauges, but the installation for electrical gauges is similar.
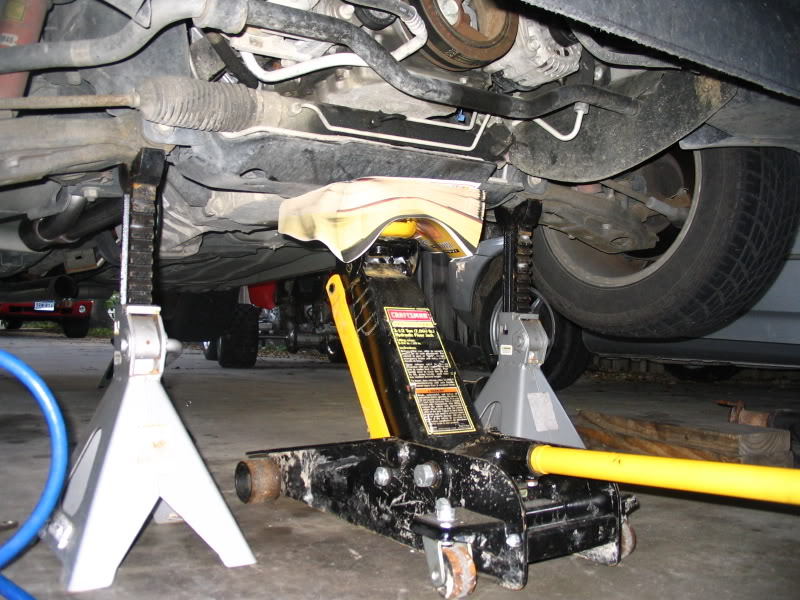
Step 1 – Disconnect battery and lift the car
Disconnect the negative (black) terminal on the battery. Then lift the car with a jack and set it on jack stands.
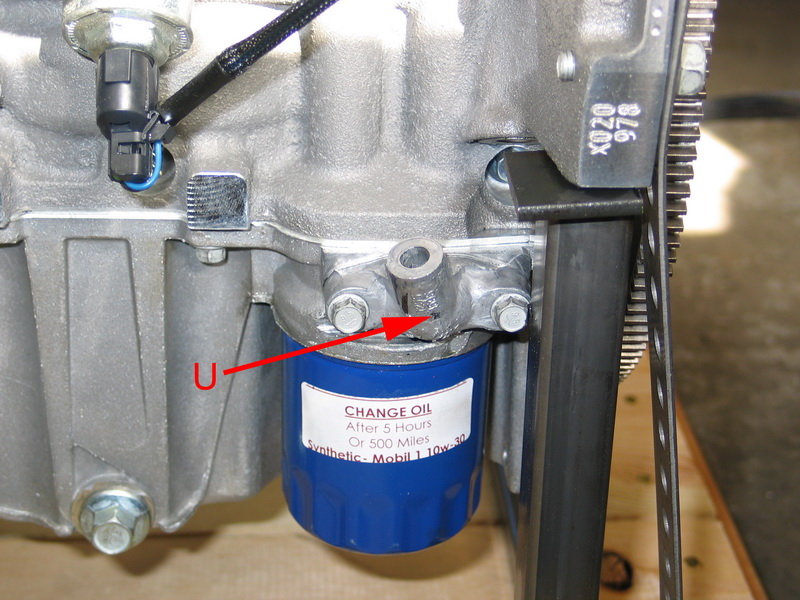
Step 2 – Remove oil filter adapter back plate
Get under your car and look for the cylindrical oil filter. Above the oil filter you should see a metal back plate sticking out from the engine. It'll have what looks like a spout sticking up from it. It's held by a pair of 10mm bolts. Remove these bolts, and then remove the back plate. Keep the gasket for reuse later. Don't worry about oil spilling out. A little will drip out, but the rest will be held back by gravity.
Step 3 – Drill and tap the back plate
On some models the spout part of the back plate is already drilled out, and on others it won't be. What you'll need to do is drill out that spout and tap it so that the adapters from your kit will fit. If the spout has been pre-drilled, then it needs to be drilled again. Drill out the hole with a 7/16" drill bit. The inside should be smoothed out. Then attach the 1/4" NPT tap to the drill. Tap the hole you just smoothed out to thread the inside. If the spout hasn't been pre-drilled, then use a 21/64" drill bit to drill it out and a 1/8" NPT tap to thread the hole.
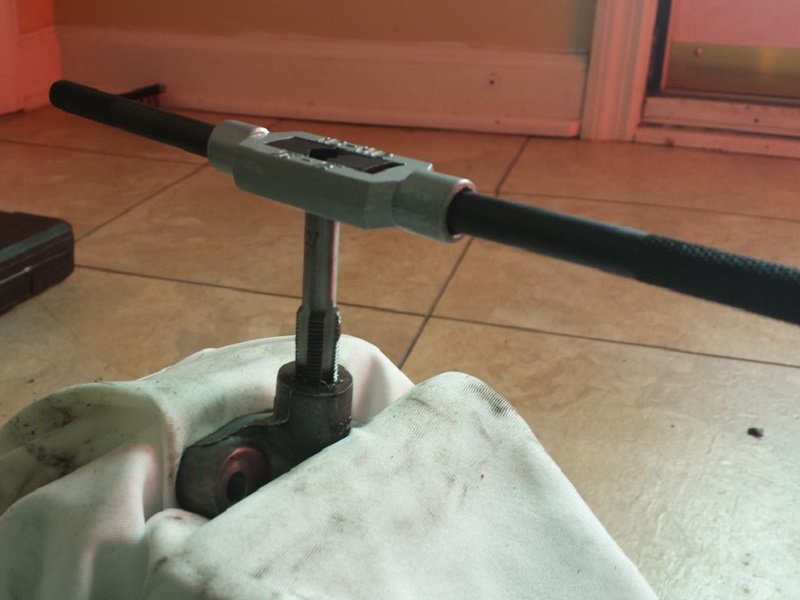
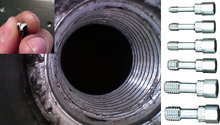
Figure 3. Tap the back plate. 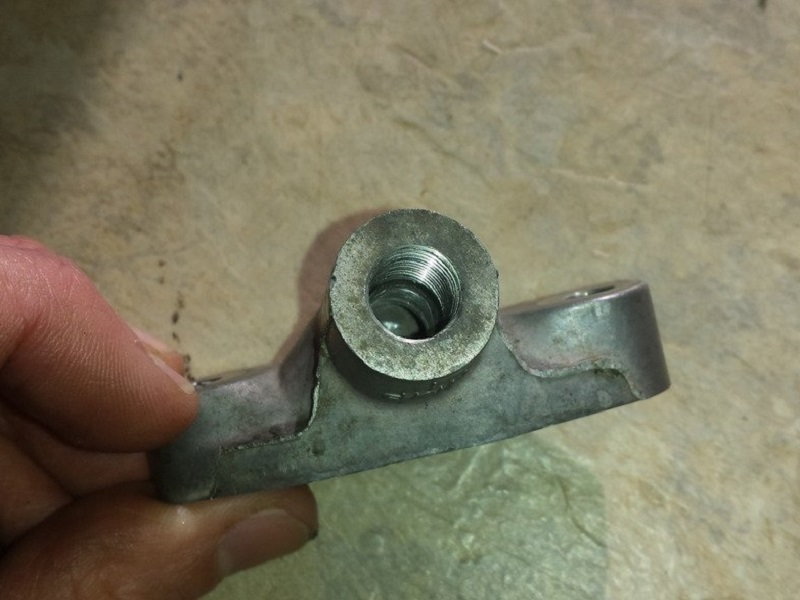
Figure 4. Resulting thread from taping.
Step 4 – Reinstall back plate
If you used the 1/4" tap on the back plate, insert the 1/4" male to 1/8" female reducing bushing into the spout you just threaded. Now take your modified back plate back to the engine. Fit it over the gasket. Line up the holes for the bolts and thread them in by hand. Make sure it goes in correctly and is properly seated with the gasket. Then, tighten down the bolts.
Step 5 – Connect and route nylon piping
Attach the fittings to the end of the nylon piping. Then screw the fitting into the bushing in the back plate. Route the rest of the nylon piping to where you'll be installing the oil pressure gauge. If you're installing it inside the car, you'll need to install a grommet to the firewall and route the nylon piping through that. If you need more nylon piping, you'll need to attach additional fittings to either end of the piping.
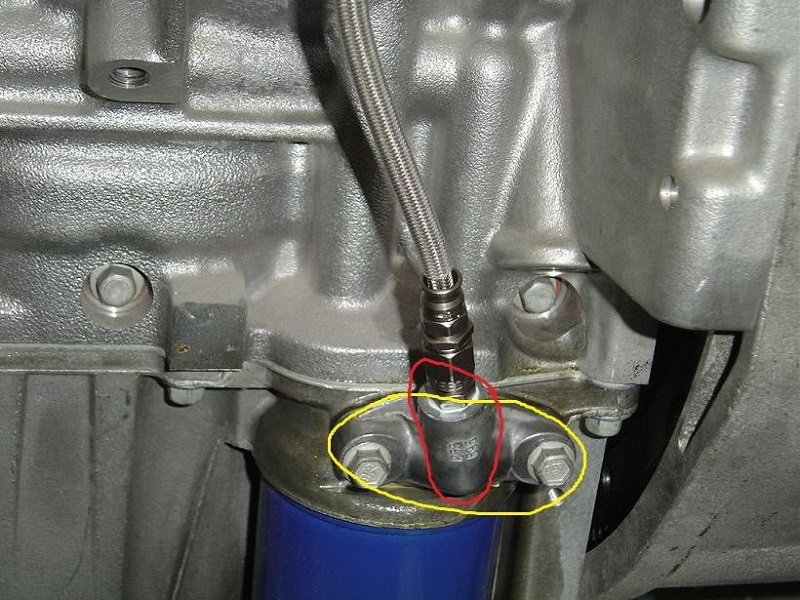
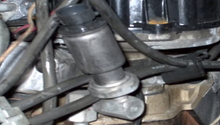
Figure 5. Connect your nylon oil line to the back plate. 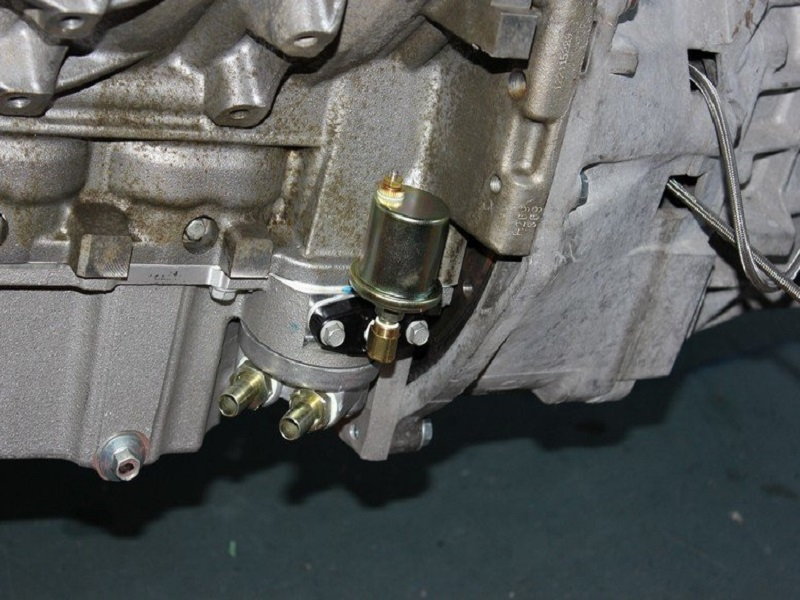
Figure 6. This is an oil pressure sending unit used with electrical oil pressure gauges.
Pro Tip
If you're installing an electrical gauge instead of a mechanical gauge, you follow the same steps, but instead of nylon piping, you fit an oil pressure sending unit to the back plate and connect it and the gauge with electrical wires.
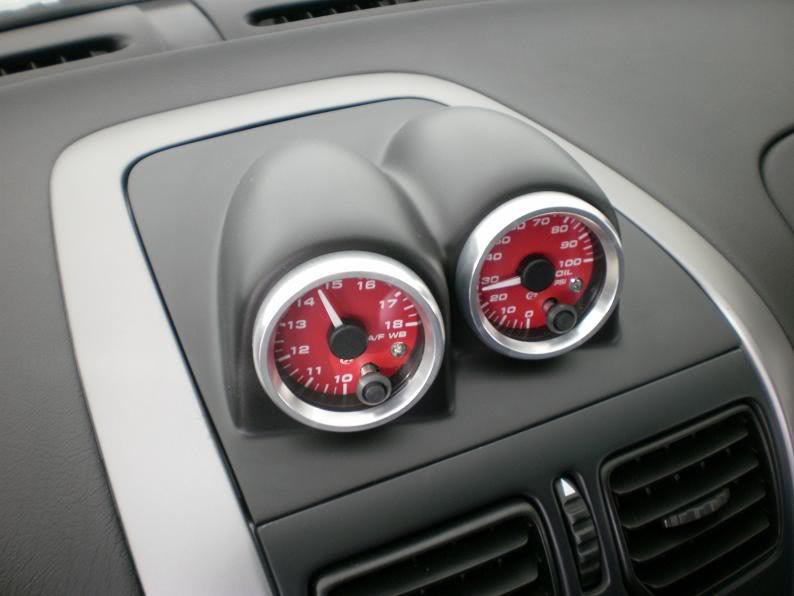
Step 6 – Install the oil pressure gauge
By now you should have some idea of where you're going to install the oil pressure gauge. You could install it into one of the dash panels or on the a-pillar, or you don't have to install it into a panel at all and sit it on top of the dash. Just remember you'll need to route the piping to it, and oil will be going through that piping. So make sure that the fittings are extra tight. Connect your nylon piping to the oil pressure gauge. Lower the car and reconnect the battery. Start the engine and watch as the pressure gauge moves. You now have a working mechanical oil pressure gauge. Be sure to double check for any leaks in the piping or the back plate before you finish.
Featured Video: How to Install Oil Pressure Gauge
Related Discussions
- How to Install a Mechanical Oil Pressure Gauge - LS1Tech.com
- 2004 GTO LS1 Oil Pressure Gauge Install Conflict - LS1Tech.com
- Oil Pressure Gauge Write Up - LS1Tech.com