How to Replace Your Brake Lines Gen 5 Camaro
Often overlooked, brake lines can experience breakage and collapse from wear and tear and should be checked often for safety. Read on to learn how to replace the brake line in your Chevrolet Camaro.


Jack Up the Car
The brake system in the Chevrolet Camaro is a pressurized system, which means any small leak can allow air to go into it, which would alter it. Once air enters the system, your brake pedal feel will completely change, and your brakes won't perform as well. Before we get into the process of how to replace the brake line, make sure you do your inspection to determine the bad brake line. Use your flashlight to detect the worn line. You will need to bleed the brake system after replacing the brake line.
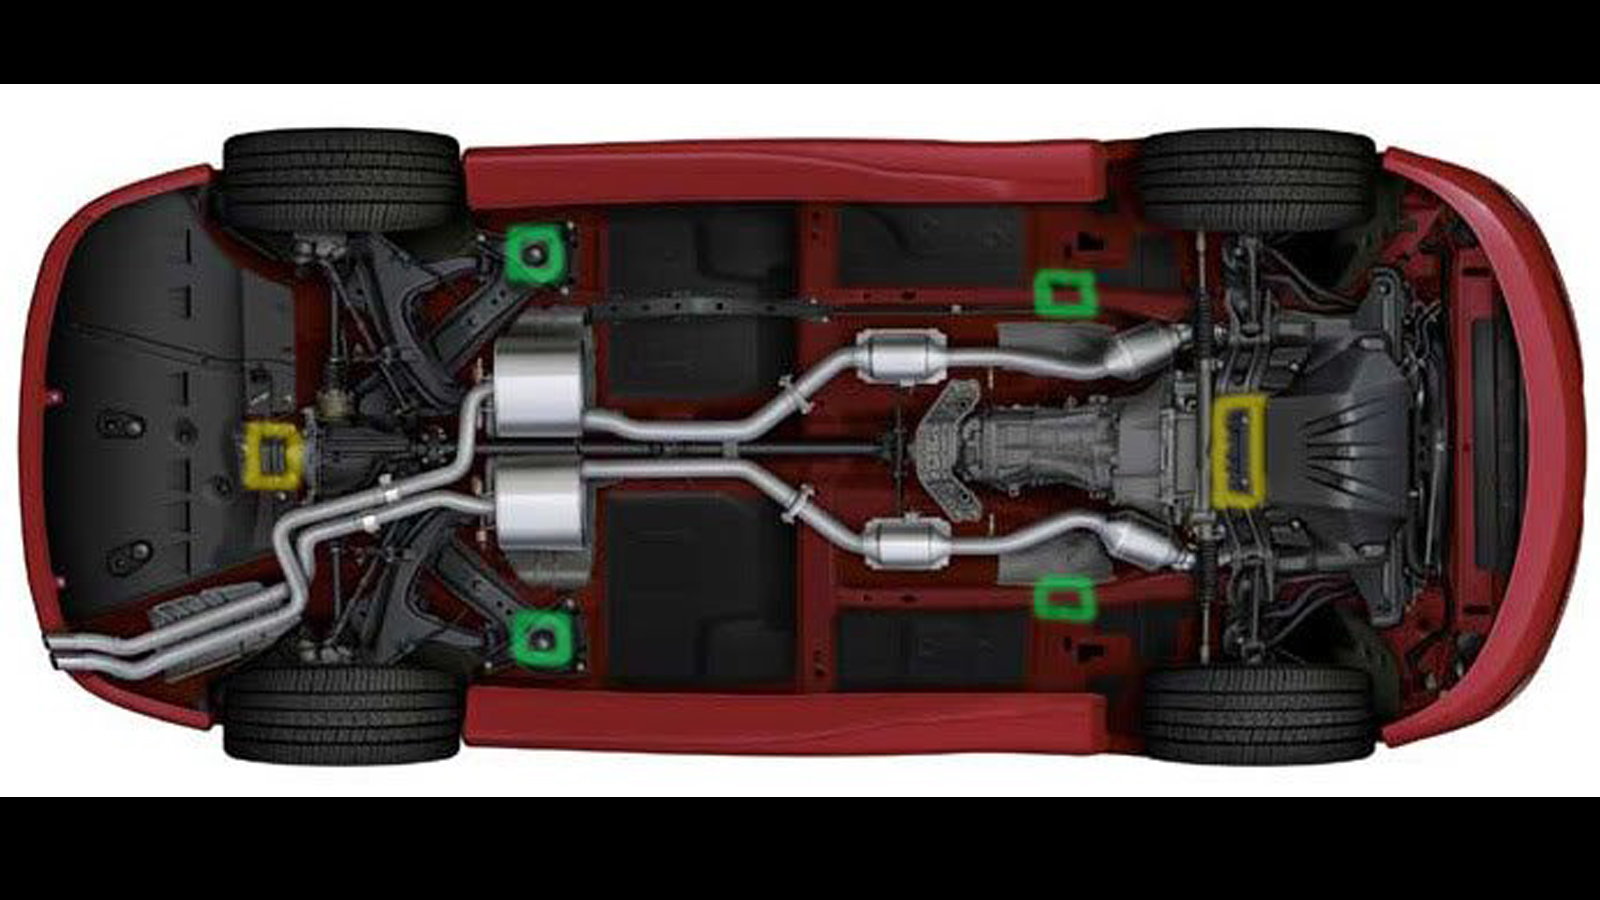
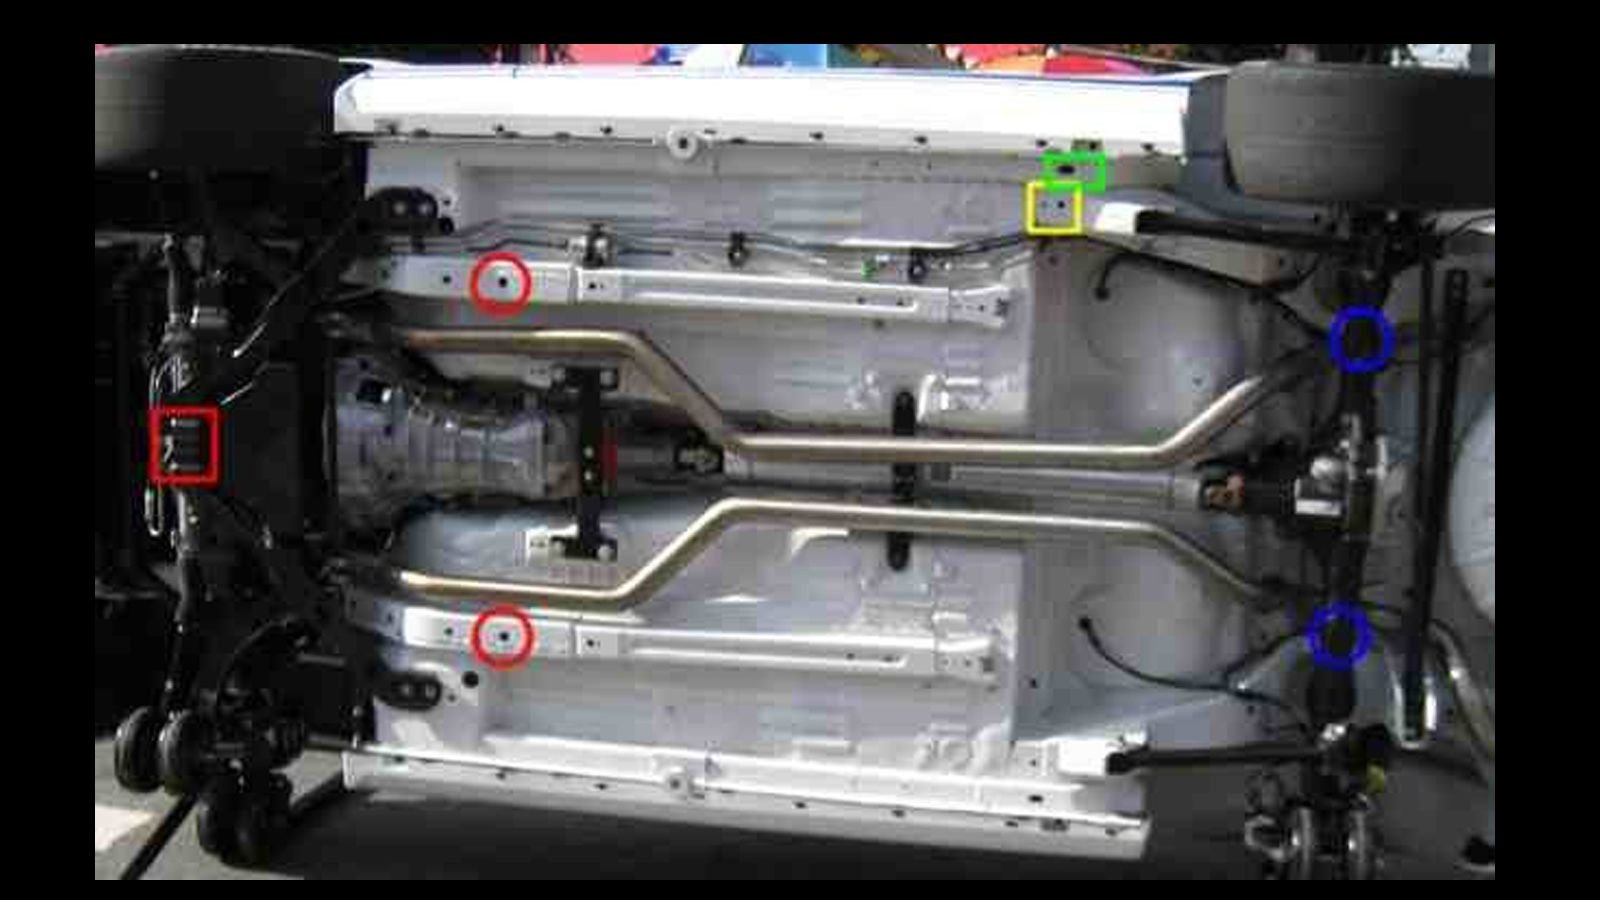
If you're raising up the front end, use the engine's k-member for the approved jacking point. If you're raising up the rear, use the rear differential as the approved point to jack it up. Place the jack on one of these positions, then pump it until the car is high enough for the jack stands to slide under.
>>Join the conversation about Replacing Your Brake Lines right here in the LS1 Tech Forum!
Place the Jack Stands
If you're raising up the front, place the jack stands on the lower control arm or the frame. Be sure to use two jack stands properly and lock the desired height in place. If you're raising up the rear, place a jack stand on each side of the rear axle. Once you place the jack stands in place, slowly lower the car until it rests on them.
>>Join the conversation about Replacing Your Brake Lines right here in the LS1 Tech Forum!
To remove or not to remove...
If you feel the need to remove the wheels, loosen the lug nuts before raising the car, then remove the wheels. Make sure you put the lug nuts in a pan or other sort of container so that they don't mysteriously get away from you.
>>Join the conversation about Replacing Your Brake Lines right here in the LS1 Tech Forum!
Replace the brake line
Get ready for some spillage, then remove the brake line. You can remove the nut using your wrench, and have your new line ready, so you don't let it spill too much. Install the new line in place, then tighten the nuts on both sides of the line connections. Make sure to route the new brake line the same way the old one was routed, using the same clamps.
>>Join the conversation about Replacing Your Brake Lines right here in the LS1 Tech Forum!
Bleed the brakes
Anytime you remove the brake line, you will need to bleed the system from any air. The bleeding sequence is starting from the passenger's rear caliper, then the passenger's caliper, moving to the driver's rear caliper, and ending with the driver's caliper. Locate the bleeder screw on each caliper, then connect the clear hose to it. Connect the other end of the hose to an empty bottle. Ask a helper to pump the brake pedal a few times, then keep it pressed. Loosen the bleeder screw, and watch the fluid coming out. Once you stop seeing bubbles, tighten the screw first, then ask the helper to let go of the brake pedal. Repeat the process for the rest of the calipers, but be sure to top off the master cylinder between each caliper. If the fluid level gets too low, you will need to start all over.
>>Join the conversation about Replacing Your Brake Lines right here in the LS1 Tech Forum!
For help with service of your car, check out the how-to section of LS1Tech.com