Camaro and Firebird: DIY Poor Man's Wheel Alignment
Alignments can be expensive, especially if you are constantly modifying your front end or suspension. You can save a lot of money by learning how to do your own alignment.
This article applies to the Chevy Camaro and Pontiac Firebird (1993-2002).
The Firebird and the Camaro are two cars that are very prone to giving their owners the mod bug. These cars are not so complex, and many folks have found that they can do a bunch of work on them in their own garage. When you have the confidence to work on these cars, you might find yourself spending a lot of time reworking the front end, trying to get just that right setup you have been looking for. With each of these jobs, it is important to get the proper alignment in order to optimize handling, and save your tires from excessive wear. Taking your car to a shop to have it aligned every time you work on it can become very costly, so aligning your car yourself is a very worthwhile thing to learn. If you are mechanically inclined and know your way around a set of tools, by all means, follow this guide and get started.

Materials Needed
- 2 tape measures
- Digital level
- About 15' of clear plastic tubing with a 1/4" diameter
- 2" of wood shims and 2 turn plates to put under your front tires
- A helper to hold the tape measure for measuring the toe
- Two pieces of metal the length of your tire size for camber, but you can get by without this equipment
- Hydraulic floor jack
- Jack stands
- Ramps
Before you start this DIY, you need to know some basics about aligning your vehicle. This guide will show you how to adjust camber and toe because those affect tire wear. Caster seldom needs adjusting, and rarely gets disturbed in normal mods.
- Camber adjusts the angle of your tires contact patch in relation to the ground, when viewing your wheels straight on. A wheel tilted in at the top toward the fender well has negative camber.
- Toe is the amount that a tire is pointed away from parallel if you visualize it from the top. Positive toe (toe in) means that the tires are pointed towards each other, while negative toe (toe out) means the front of the tires point away from each other. Excessive toe contributes the most toward tire wear.
Step 1 – Lift the car and make sure it is level
This is the trickiest and most important step, but it is critical that you have a level car on a level surface and that your suspension is settled.
- Drive your car up onto the ramps.
- Use the hydraulic floor jack to lift the rear and make sure it is level with the front.
- If all four tires are the same size, use a laser level measuring off the center of the wheels.
- If the rear wheels are larger, measure from the bottom of the four tires.
- Place the rear on jack stands.
- Bounce on the front of the car gently to get the suspension loosened and settled.
- Lift the front up again slightly and place your turn plates under the front tires and release the jack.
- Two heavy duty garbage bags with grease between them make easy disposable turn plates.
- Make sure you have equal tire pressure in both the front tires.
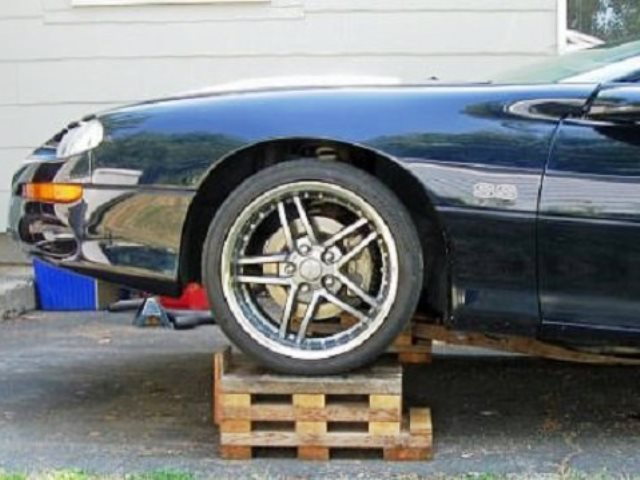
Figure 1. Drive your car up on ramps. 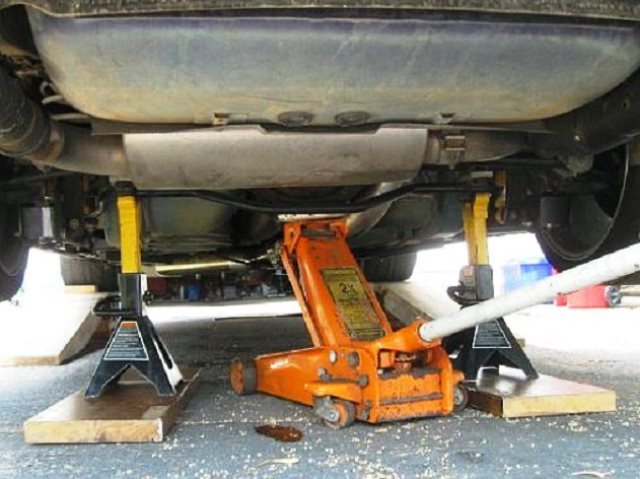
Figure 2. Jack up the rear end and place on jack stands level with the front. 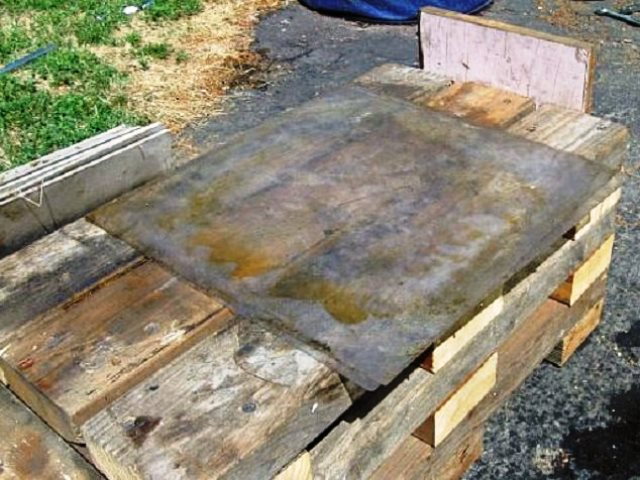
Figure 3. Lift the front end up enough to place your turn plates down under the front tires. 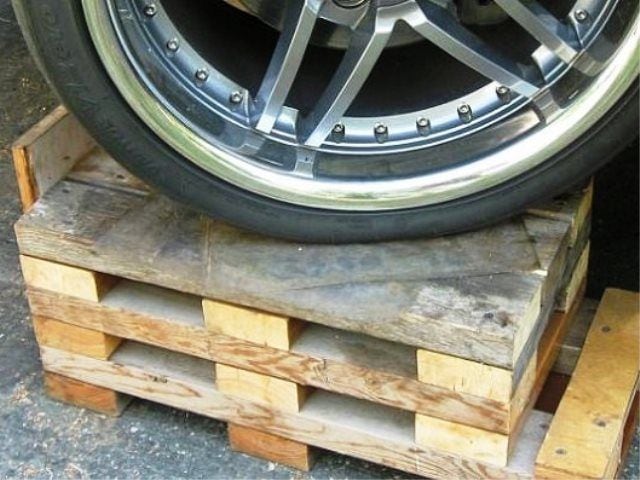
Figure 4. Bounce the front and turn the wheels to settle the suspension, then lower the tires onto the turn plates.
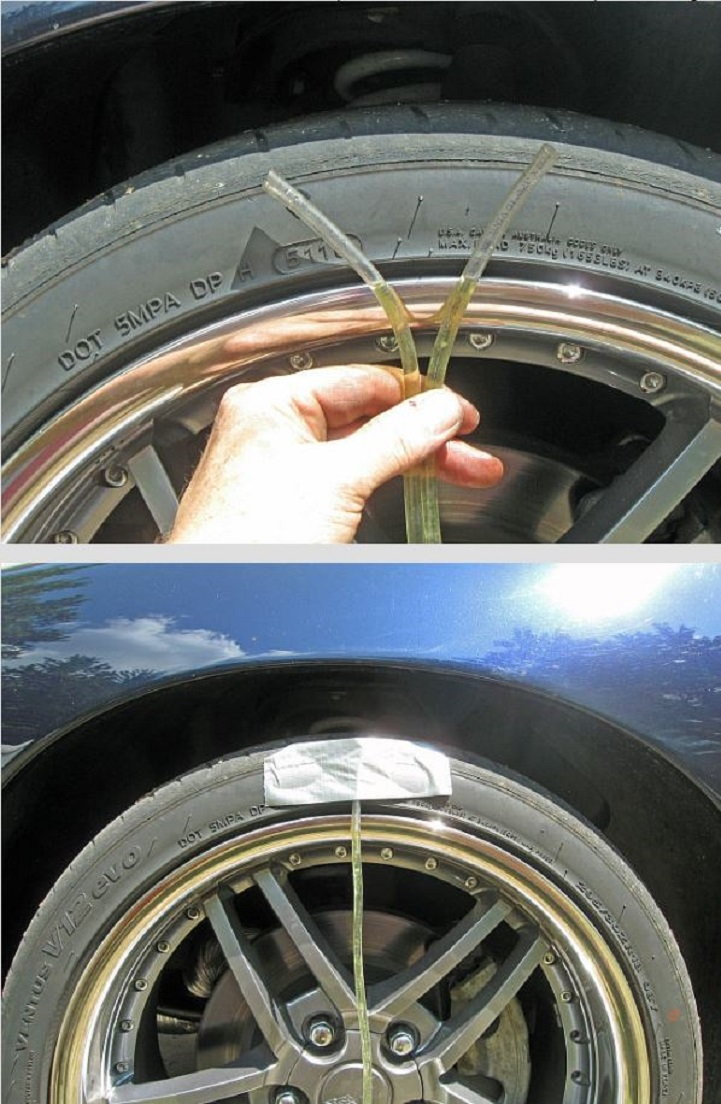
Step 2 – Create a water level to make sure the car is perfectly level
Use your plastic tubing and fill it with a liquid, such as water or anti-freeze, so it is easy to see. About 13 to 14 feet should be filled with the liquid, but not the entire tubing.
- Hold up both ends of the tubing to the lip of your rims at the very top, and tape one end of the tube in place right there.
- Go around to the other side of the car and tape the other end of the tubing in the same exact place on the other front tire.
- Let the water settle and check the level. Add some shims to either side until the water is equal on both sides.
- Repeat this process on the rear of the car from side to side and shim up your jack stands on either side until it is level.
- If we were worried about caster, or if you are going to mess with caster adjustments, you would do the same from each side front to back.
- Once you have done the rear, go back and double check the front and make sure it is still level.
Step 3 – Paint your adjusters
Use a light colored spray paint that will let you see where your alignment was originally, before you start making adjustments.
Step 4 – Adjust camber first
Adjusting your toe should always be last, and camber always first. Caster should come before toe, but we aren't messing with the caster here.
- Take a measurement of your current camber by placing your square steel rod over both the top and bottom of your rims.
- Stick your magnetized digital level on the rod.
- Record the reading.
- Repeat for the other side.
- Loosen the adjuster bolts on both sides.
- If you need to add negative camber, you will use a pry bar to pull out the control arm.
- If you need to add positive camber, you will simply jack up the car on the K-member and gravity (possibly with a little help from you) will push the control arm back in.
- Make absolutely sure that both sides have the exact same reading, or your car will pull to one side or the other.
- Once you are certain you have the camber where you want it, tighten and snug the adjuster bolts, but just snug. Do not over-tighten.
- Check the water level on the front tires again just to make sure nothing has slipped.
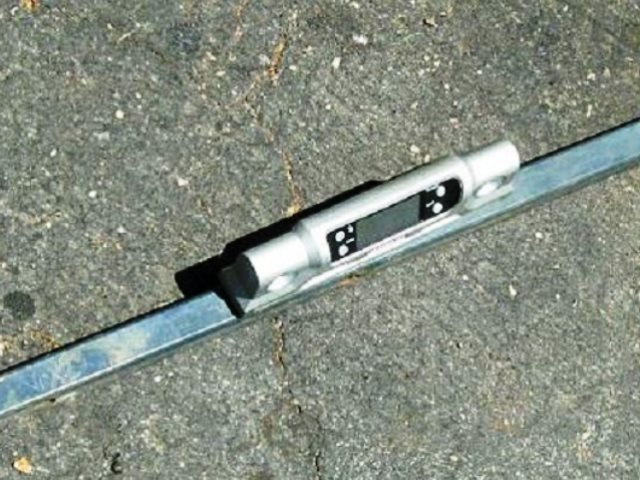
Figure 7. Homemade camber measuring device. 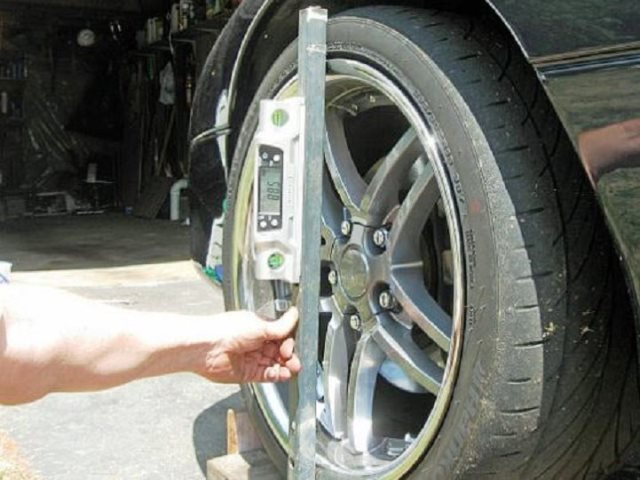
Figure 8. Camber measuring device in action.
Step 5 – Adjust your toe
Since we are not worried about caster in this guide, we move on to make the proper toe adjustments. If you have a helper, you will be measuring the toe from center of tread to center of tread on the front of the front tire and the rear side of the front tire. Be sure that you both are reading from dead center tread. These instructions are written using a homemade device that will allow you to measure your toe without the need for a helper.
- Install your toe brackets or measuring device onto your front wheels on both sides now.
- Make sure your steering wheel is pointed dead center
- Make a macro adjustment just by sight to get the toe pointed close.
- Place your tape measures through your brackets.
- Double check that the steering wheel is still dead center.
- Make sure your tie rod ends are fully extended to the spindle.
- Start making your micro adjustments for the toe by turning the adjusters.
- If your toe is off by 1/4 turned IN, you would then turn both adjusters out by about 3/4 of a turn to get a toe to 0.
- Make very small adjustments at a time and with each adjustment, then go back to check that your wheels are straight and your steering wheel is still pointed dead center.
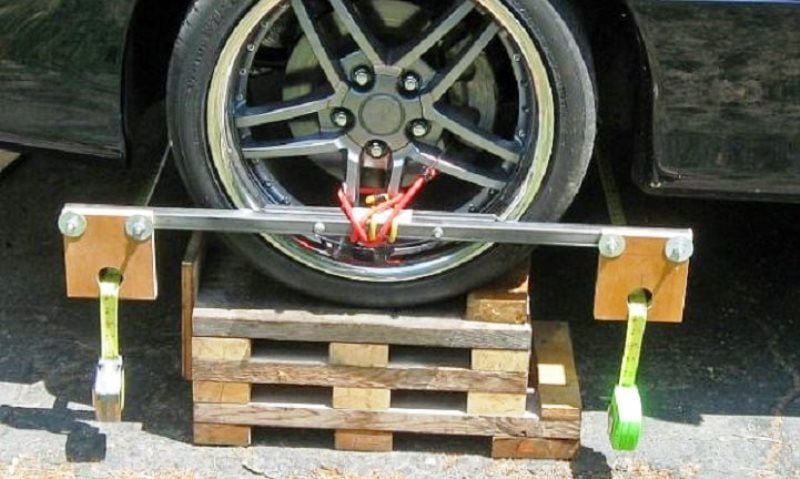
Figure 9. Homemade toe adjustment brackets. 
Figure 10. Measuring the toe using the brackets.
Step 6 – Double check your work and take a test ride
You will be a very happy camper if you double check your work before taking her out. Verifying your work is much better than doing re-work. Take a break if you need one and come back to do this last step with a fresh pair of eyes.
- Completely tighten down the control arm adjuster bolts.
- Raise and lower the car to let it bounce on the ramps.
- Crank on the steering wheel to the left and right to get the suspension settled.
- Make sure your steering wheel is straight.
- Take a macro look again at the toe and make sure your wheels are pointing true and straight.
- Take a micro look at the measuring tape either at the front or the rear tape, you don't need to compare the two.
- If your toe is off, just make your small adjustments again until it is straight.
- Take her out for a test drive and if your steering wheel isn't perfectly straight when you are driving straight, bring her back up the ramps and adjust again. (You need not jack up the rear.)
- Incorrect toe alignment is the number one killer of tire tread and life, so it's important to really check your work.
- If you are happy with your work, take that $75 you would have spent on a pro shop to do this job and put it towards that next mod you undoubtedly are looking at.

Related Discussions and Site
- DIY Poor Man's Wheel Alignment - LS1Tech.com
- Front End Alignment - LS1Tech.com
- Front End Alignment for an 02 Trans Am, Is There a Special Kit for Camber? - LS1Tech.com
- Alignment Specs - LS1Tech.com
- Wheel Alignment Explained - YoSpeed.com