Camaro and Firebird: How to Install Lowering Springs
Lowering springs are a simple modification that can greatly improve the handling and stance of the 4th gen F-body cars. With a few basic tools and some minor mechanical knowledge, dropping your car can be quickly completed in an afternoon.
This article applies to the Chevrolet Camaro and Pontiac Firebird (1993-2002).
In stock form, the ride height of the 4th generation F-body cars can seem too tall for some people, though it does deliver a nice ride. And, while not everyone would agree that an aesthetic improvement can be made by installing a set of lowering springs, no one can argue about the handling improvements. There are a handful of companies that offer coil springs with a higher spring rate, but a lower free height, to alter the stance of the vehicle to your liking. As with most cars, one can expect a minor loss in ride quality when installing stiffer, lower springs; however, most lowering springs are compatible with all of your stock suspension components and can be installed at home by most people. This article will outline how to do it.

Materials Needed
- Floor jack and jack stands
- Metric wrench and socket set
- 3/8" and 1/2" drive ratchets
- Ball joint separating tool
- Coil spring compressor tool
- Hammer
- Bungee cord
- Medium strength Threadlocker (blue)
Step 1 – Front shock removal
The 4th generation F-body cars use a modified version of a double wishbone front suspension, with a non-adjustable coil over spring/shock unit, that is often mistakenly called a strut. The 3rd generation cars did use a strut type front suspension, which is where much of the confusion comes from. You will need to compress the springs to change them, but removing the shock/spring unit should not affect your front end alignment much, if at all.
- Using a floor jack, lift the front of the vehicle and support it with jack stands. See How to Jack Up Your Car for additional information.
- Remove the front wheels.
- Disconnect the sway bar from the end links.
- Remove the brake caliper/caliper bracket and hang it with a bungee chord to prevent it from tugging on the brake line.
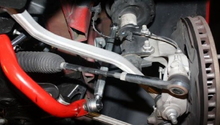
- Remove the cotter pin (5) from the upper ball joint nut (4) and loosen the nut. Use a ball joint separator tool to free the ball joint (2) and disconnect the upper control arm (1) from the steering knuckle (6). Do not attempt to hammer the ball joint free, unless the nut is loosely installed to protect the top threads.
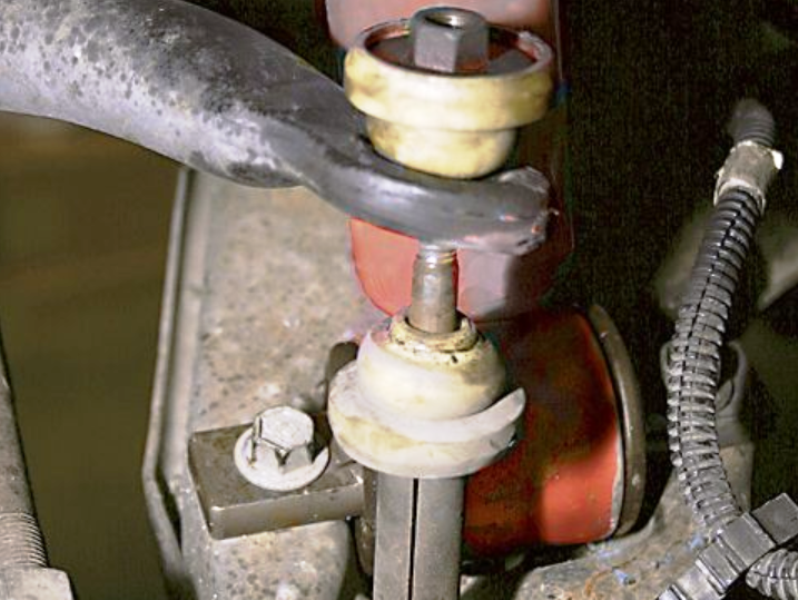
Figure 1. Sway bar disconnected from end link. 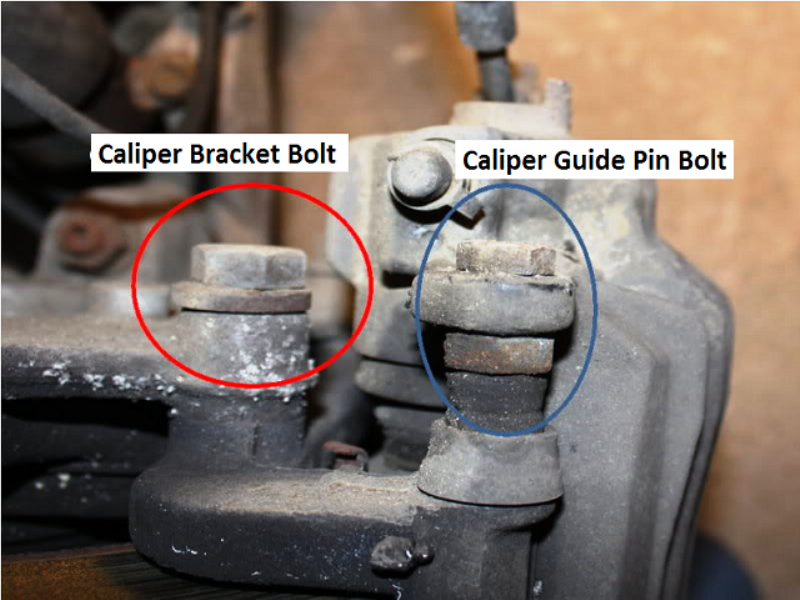
Figure 2. Remove the caliper bracket bolt (red), but not the guide bolt. 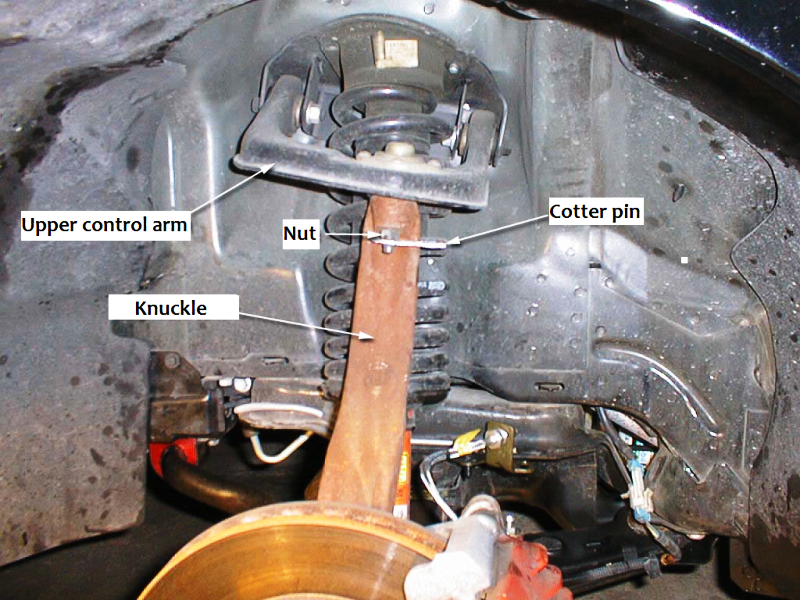
Figure 3. Separate steering knuckle/spindle from upper control arm.
- Remove the brake master cylinder nuts and gently pivot the master cylinder to the side to allow access to the strut top mount fasteners. Remove the strut upper mounting nuts (17) and bolts (18).
- Using a 13mm and 15mm wrench, remove the lower shock bolts.
- With the lower shock bolts removed, the strut assembly and upper control arm can be removed from the vehicle.
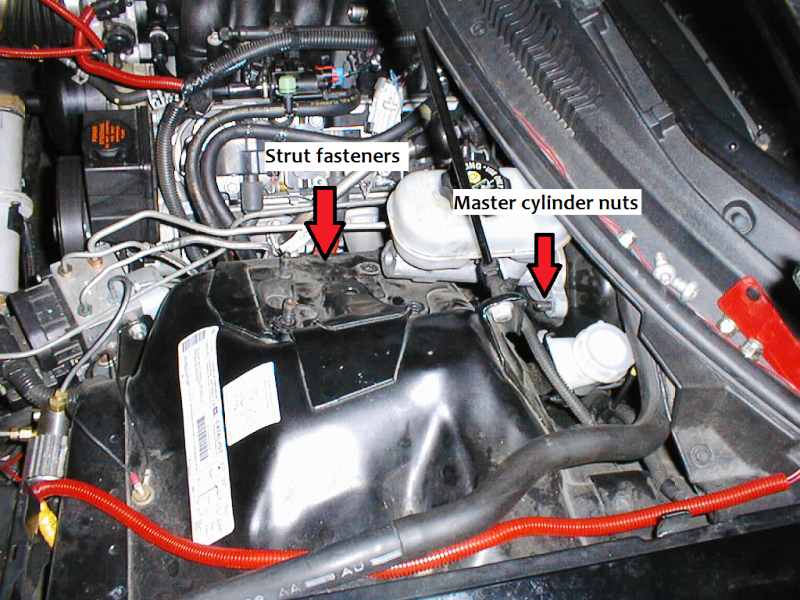
Figure 4. Removing top strut mount fasteners. 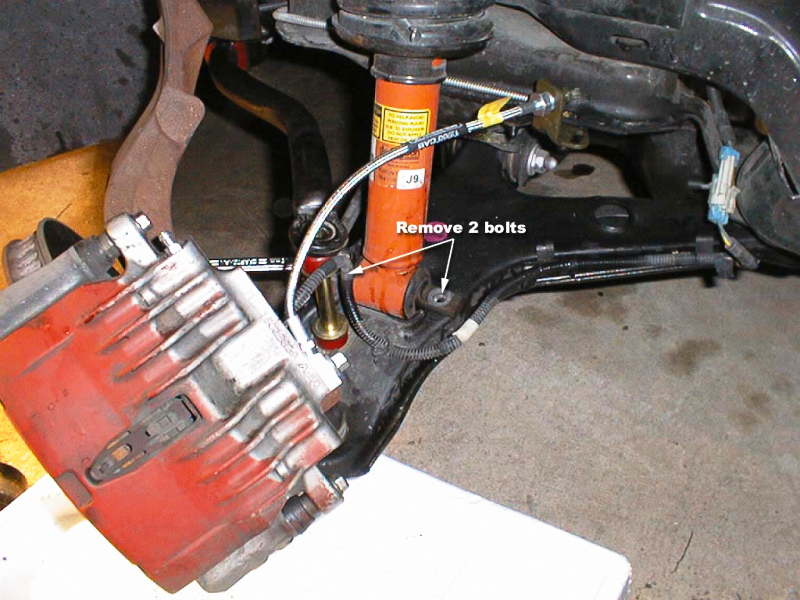
Figure 5. Lower shock bolts removed. 
Figure 6. Coilover shock and upper A-arm come out as a unit.
Step 2 – Front spring replacement
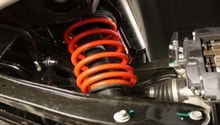
- Using a spring compressor, compress the coil spring to relieve tension on the shock shaft nut and remove the nut. With the nut removed, release the spring compressor and remove the top hat and coil spring.
- Install the new lowering spring onto the shock and compress the spring to install the top hat and shock nut. Torque the nut to 13 ft/lbs.
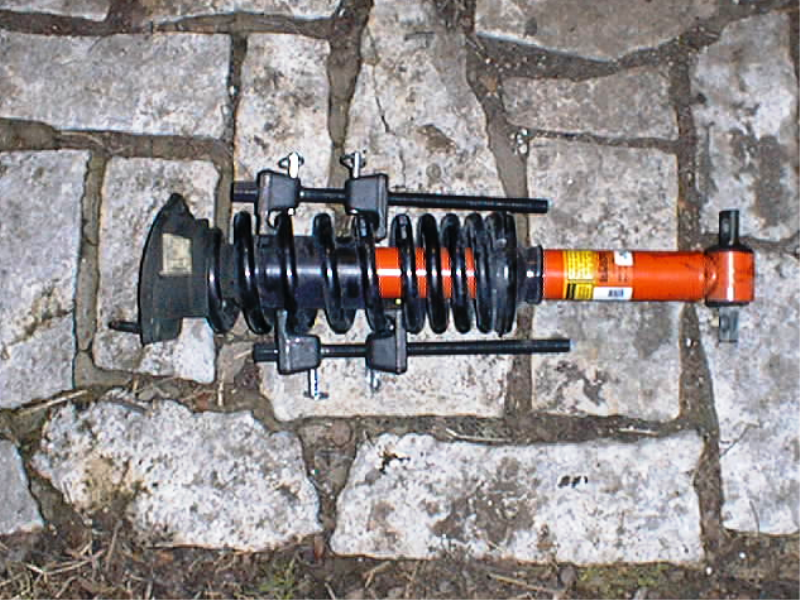
Figure 7. Spring compressor on strut. 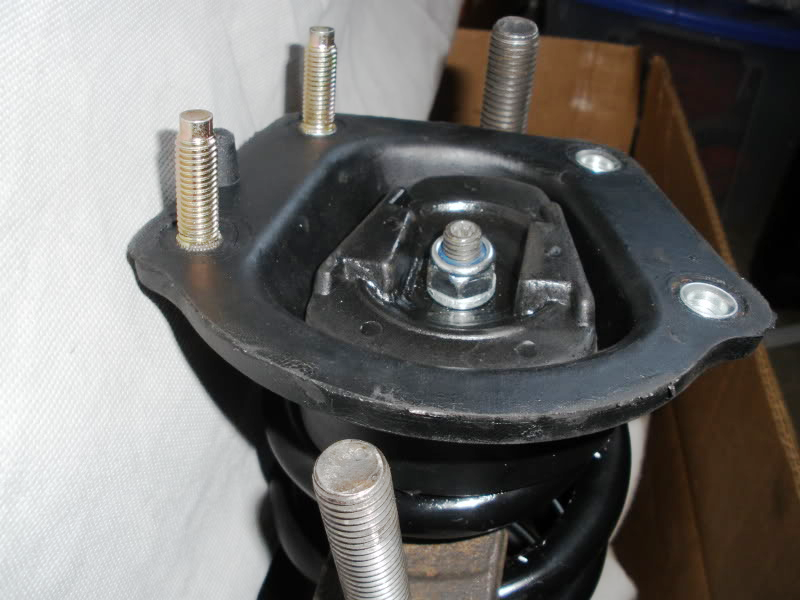
Figure 8. Upper shock mount nut and studs.
- With the new spring installed, the strut assembly and upper control arm can be re-installed on the vehicle.
Step 3 – Front suspension reassembly
- Place the strut and upper control arm onto the vehicle. Be sure to align the top hat studs with their corresponding holes in the strut top mount before installing the lower shock bolts. Torque to 48 ft/lbs.
- Install the strut top bolts and nuts. Torque the bolts to 37 ft/lbs and the nuts to 32 ft/lbs.
- Install the master cylinder nuts and torque to 21 ft/lbs.
- Attach the knuckle to the upper control arm and torque the ball joint nut to 39 ft/lbs.
- Attach the sway bar to the end link and torque to 17 ft/lbs.
- Install the brake caliper/caliper bracket and apply medium strength Threadlocker (blue) to the bolts. Torque to 75 ft/lbs.
- Install the wheels and lower the vehicle off of jack stands.
Step 4 – Rear spring replacement
Rear spring replacement is much less involved compared to the front springs and can be accomplished in just a matter of minutes.
- Lift the rear of the car under the differential with a floor jack and place jack stands under the rear sub-frame rails.
- Remove the rear wheels.
- Remove the lower shock bolt with a 21mm (7/8") and 19mm (3/4") wrench.
- With the shock bolts removed, slowly lower the floor jack to allow the rear end to drop until tension is relieved from the coil springs.
- Remove the springs and rubber spring insulators. Swap the spring insulator to the new springs and install them onto the axle, making sure they are properly seated in their respective spring perches.
- Lift the rear axle and reattach the lower shock. Torque the bolts to 66 ft/lbs.
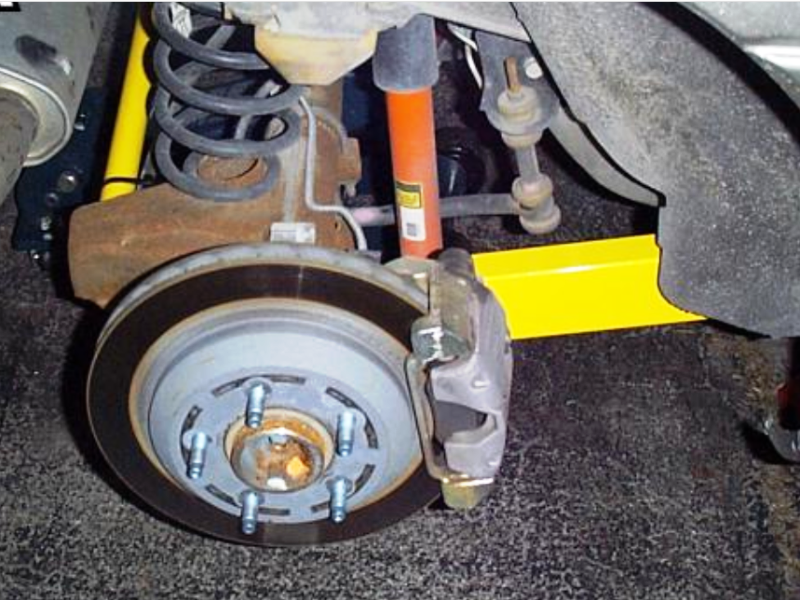
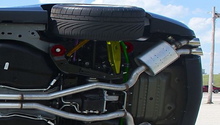
Figure 10. Rear axle with wheel removed. 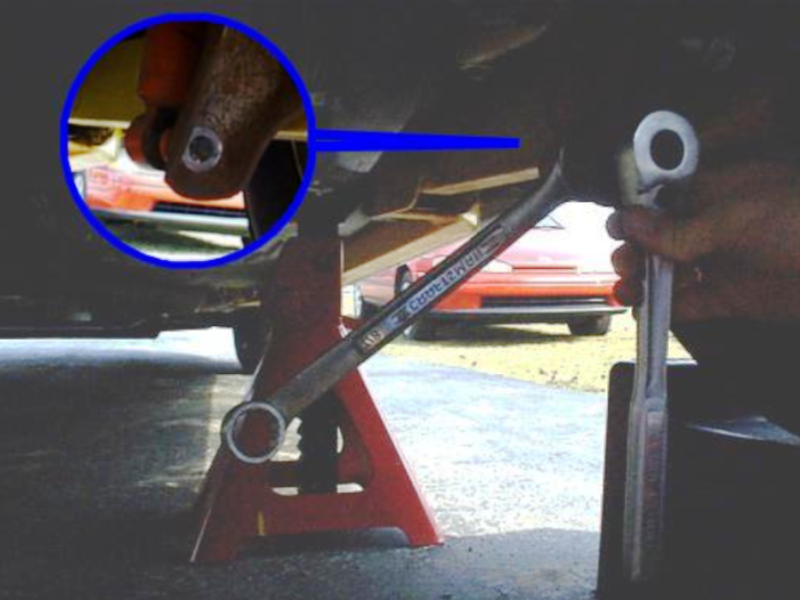
Figure 11. Lower shock bolt removal. 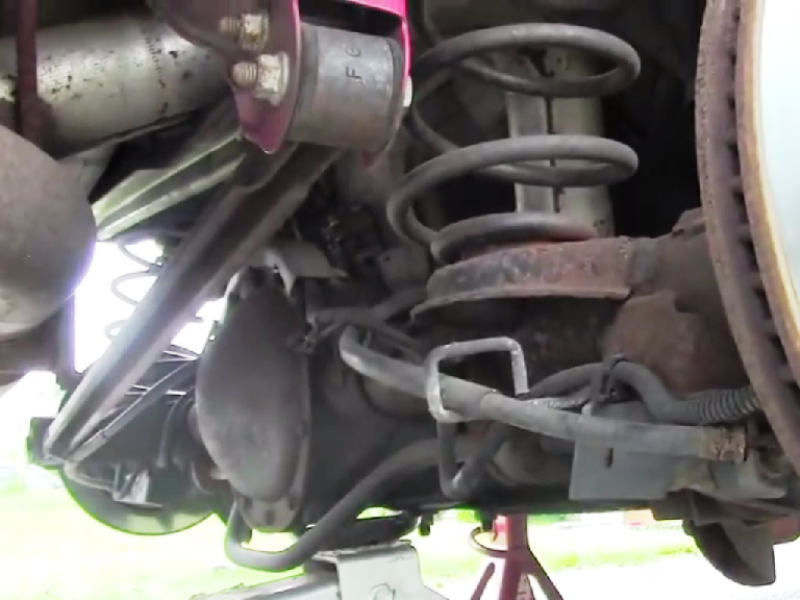
Figure 12. Lower rear axle with jack and let it hang free. 
Figure 13. Rear springs pull right out.
- Install the wheels and lower the car off of jack stands.
- It is normal for springs to settle a bit and the car to be 1/2" or more lower than the initial look after 100 miles of driving on the new springs.
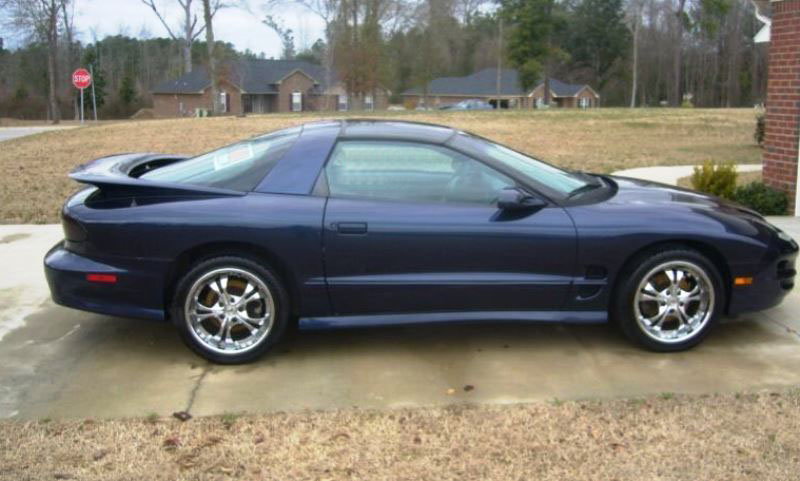
Figure 14. Stock ride height Firebird. 
Figure 15. Same Firebird with lowering springs.
Pro Tip
After installing lowering springs, it is recommended that a wheel alignment be performed.
Related Discussions
- Lowering Spring Install - LS1Tech.com
- lowering Spring Install, $500. Is This Accurate? - LS1Tech.com
- Anyone Run Lowering Springs on Stock Shocks? - LS1Tech.com