Chevrolet Camaro 2010-2015: How to Replace Ball Joints
Replacing the ball joints on your Camaro isn't the easiest job in the world, but it is one you can tackle over a lazy weekend.
This article applies to the Chevrolet Camaro (2010-2015).
If you are ready to replace the ball joints on your Camaro, you have a fairly lofty job on your hands. The job takes a good deal of time and requires a special press, at least for the lowers. The upper ball joints will come out with some muscle, but the lowers will either require some dogged determination and a blow torch, or the use of a press. You may be able to borrow or rent a press from your local auto parts store, or a better option may be to remove the entire A-arm along with the joint and take it to a shop and have them remove as well as replace the ball joint. This DIY job is fairly difficult to do on your own; however, if you choose to tackle it, you will save yourself a great deal of money from not having a professional do it for you. Another option that you may want to consider is replacing the entire control arm and ball joint assembly. Although you'll pay approximately twice the cost of just the joint for the entire kit, it may save yourself a great big headache and the extra money could be well worth it.

Materials Needed
- Ratchet and socket set
- Torque wrench
- Arbor Press or other press for ball joints
- Ball joint grease
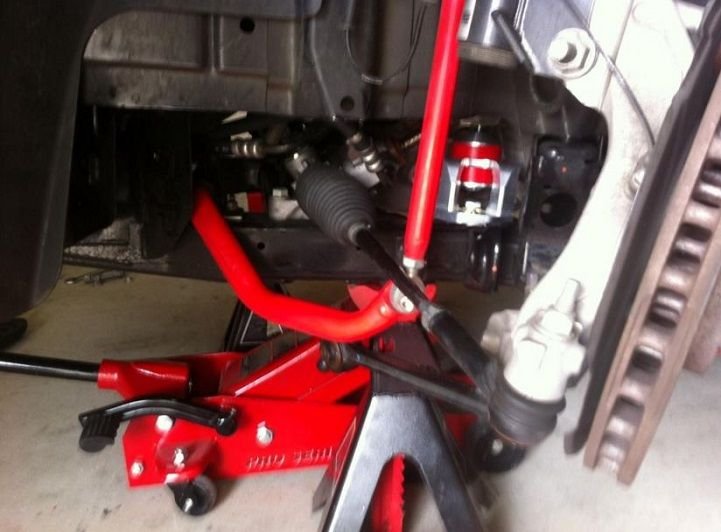
Step 1 – Lift Camaro and place on jack stands
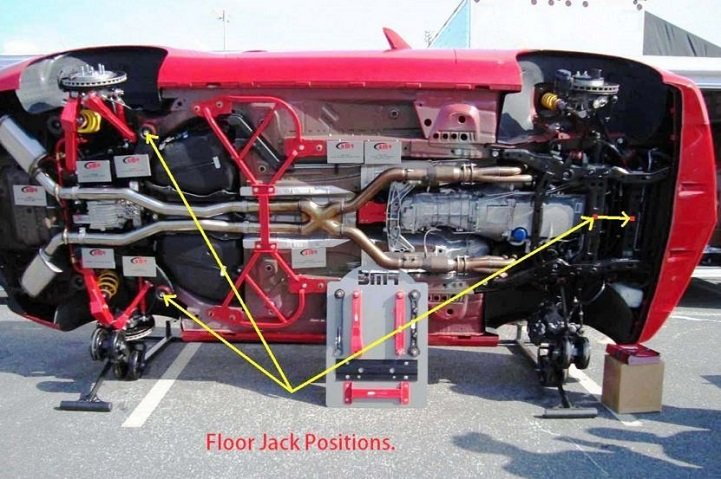
Break the lugs loose on your wheels and then lift the front end with a hydraulic floor jack. Place on jack stands in the approved locations. Lift the rear and place on jack stands as well, if you have four stands. If not, you can do the front and then the rear. Once you are secured onto the jack stands, remove the lugs and the wheels.
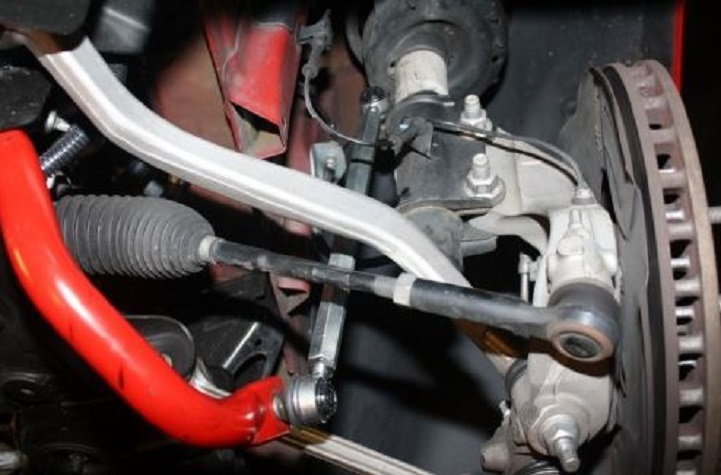
Step 2 – Remove spindle from upper ball joint and drill out rivets
Use a ratchet and socket to remove the spindle from the joint. The OEM ball joint is mounted with rivets (for some reason). Replacement ball joints will come with two bolts and nuts to mount it in place. The first tricky step of this entire job is cutting the two rivets out. You can either try to cut them out or you can drill them out; either way is a pain, but you don't really have much of a choice here.
Step 3 – Install new ball joint and remount control arm to spindle
Replace the new ball joint, then use the included bolts to mount it to the control arm and torque the bolts to specification. Remount the control arm to the spindle and grease liberally.
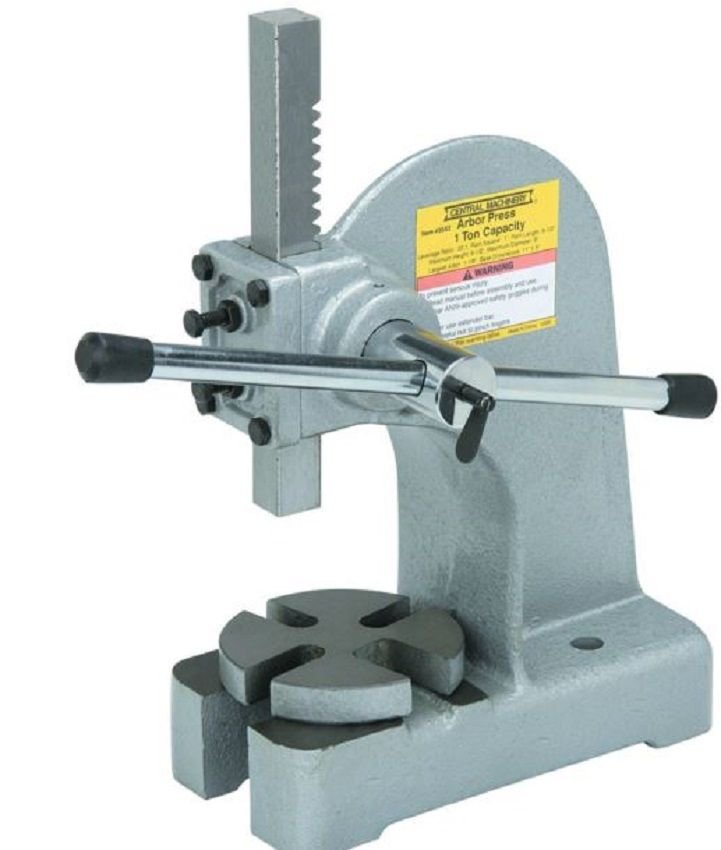
Step 4 – Remove lower A-arm and press out lower ball joints
There are a couple of methods to get the lower ball joint out. If you have a lot of time and a torch, you can attempt to heat the joint until it glows red and tap it out with a hammer. This may or may not work well, or at all. The "approved" method is to remove the entire lower A-arm and use a press to pop the lower ball joint out. Use the press to install the new one as well. In order to get the A-arm out, you will need to turn the steering wheel all the way to one side in order to create enough clearance for one of the bolts. Once the A-arm is removed, place the joint in a press, such as an Arbor Press, which has a lot of positive feedback from Camaro owners having success with this tool.
Step 5 – Replace lower A-arm, wheels and get an alignment
Once you have pressed in the new lower ball joints, reinstall the lower A-arm. Repeat the process for the other side. Replace the wheels and drop the car. Tighten the lugs and take it out for a short test ride or straight to the shop for a full alignment. You must get an alignment after replacing your ball joints to ensure that you won't cause more issues from being misaligned after such suspension work.

Featured Videos: How to Remove Ball Joints
-
How to Replace Ball Joints on GM Cars and Trucks
-
2010+ Camaro Lower Control Arm Bushing Removal
Related Discussions
- Upper and Lower Ball Joints - LS1Tech.com
- Help with Lower Ball Joint Removal? Install? - LS1Tech.com
- Upper Ball Joints - LS1Tech.com
- Ball Joint Replacement How-to? - LS1Tech.com