Chevrolet Camaro 2010-2015: How to Replace Brake Line
A small leak in a brake line could completely affect your brake system. Read on to learn how to replace the brake line in your Chevrolet Camaro.
This article applies to the Chevrolet Camaro (2010-2015).
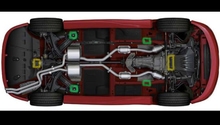
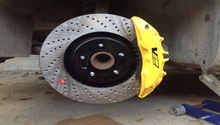
The brake system in the Chevrolet Camaro is a pressurized system, which means any small leak can allow air to go into it, which would alter it. Once air enters the system, your brake pedal feel will completely change, and your brakes won't perform as well. Before we get into the process of how to replace the brake line, make sure you do your inspection to determine the bad brake line. Use your flashlight to detect the worn line. You will need to bleed the brake system after replacing the brake line. Read on to learn how to replace the brake line in your Chevrolet Camaro.

Materials Needed
- Wrench
- Tire iron
- Jack
- Jack stands
- Bottle
- Hose
- Brake fluid
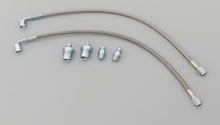
- Brake line
Step 1 – Jack up the car
Use your jack to jack up the car, then secure it with two jack stands. If you feel the need to remove the wheels, loosen the lug nuts before raising the car, then remove the wheels.
Step 2 – Replace brake line
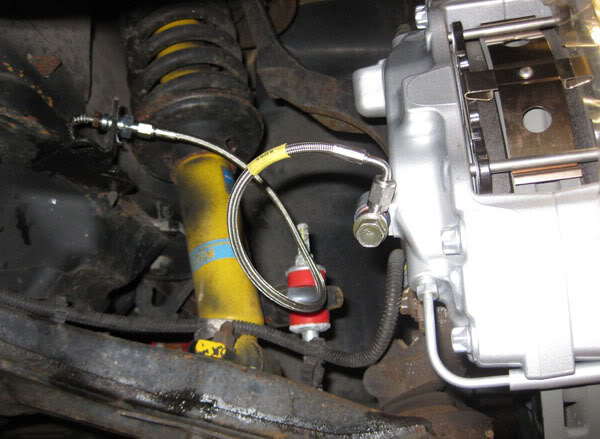
Get ready for some spillage, then remove the brake line. You can remove the nut using your wrench, and have your new line ready, so you don't let it spill too much. Install the new line in place, then tighten the nuts on both sides of the line connections. Make sure to route the new brake line the same way the old one was routed, using the same clamps.
Step 3 – Bleed the brakes
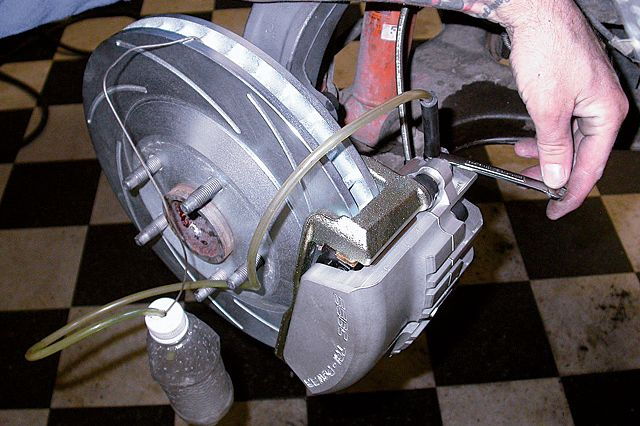
Anytime you remove the brake line, you will need to bleed the system from any air. The bleeding sequence is starting from the passenger's rear caliper, then the passenger's caliper, moving to the driver's rear caliper, and ending with the driver's caliper. Locate the bleeder screw on each caliper, then connect the clear hose to it. Connect the other end of the hose to an empty bottle. Ask a helper to pump the brake pedal a few times, then keep it pressed. Loosen the bleeder screw, and watch the fluid coming out. Once you stop seeing bubbles, tighten the screw first, then ask the helper to let go of the brake pedal. Repeat the process for the rest of the calipers, but be sure to top off the master cylinder between each caliper. If the fluid level gets too low, you will need to start all over.
Related Discussions
- Brake upgrade - Ls1tech.com
- Rusty brake lines - Ls1tech.com
- Brake line concerns - Ls1tech.com